
Owner's Manual


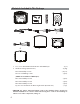


Table Of Contents
- Installation Guide
- Table of Contents
- Supplied Accessories
- Installation
- Tools Required / Preparation
- Installing the Snap-On Shroud
- Installing the Snap-On Screen Cover
- Installing the Trim Ring
- General Vehicle Installation Approach
- Vehicle Preparation
- Connecting the Dome Lights
- Installing the Mounting Bracket
- Wiring Diagram
- Mounting the Unit
- Removing the Screen Back Cover
- Removing the Trim Ring and Shroud
- Installing the Optional Thick Trim Ring
- Installing the Optional SmartStream Module (WM1)
- Troubleshooting
- Owners Manual
- Warranty

9
Installing the snap-on shroud
Installing the Shroud
*NOTE: Work on a soft surface to avoid damaging the plastic.
1. Remove the double sided tape backing from the two strips on the center section of
the shroud.
2. Hook the shroud over the dome light and align the shroud tabs (1)with the eight
openings around the rim of DVD player(2 ).
3. Slide the shroud down until the shroud completely covers the DVD player and that all
eight tabs snap into all eight openings around the DVD player (1)& ,(2).
4. Apply pressure to the center section of the shroud in the area of the double sided tape
to ensure that the tape adheres.
5. Locate the
Slide Knob (3) in the hardware package and press it onto the dome light
switch (4)on the side of the DVD player.
HD IN
UX
3
1
2
4