
Owner's Manual


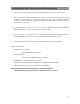


Table Of Contents
- Installation Guide
- Table of Contents
- Supplied Accessories
- Installation
- Tools Required / Preparation
- Installing the Snap-On Shroud
- Installing the Snap-On Screen Cover
- Installing the Trim Ring
- General Vehicle Installation Approach
- Vehicle Preparation
- Connecting the Dome Lights
- Installing the Mounting Bracket
- Wiring Diagram
- Mounting the Unit
- Removing the Screen Back Cover
- Removing the Trim Ring and Shroud
- Installing the Optional Thick Trim Ring
- Installing the Optional SmartStream Module (WM1)
- Troubleshooting
- Owners Manual
- Warranty

19
Installing the Unit Video System-Mounting the Unit
Installing the System
1. Make all electrical connections.
2. Attach the Unit to the mounting bracket using four M5 screws.
CAUTION: The M5 screws are supplied in three dierent lengths (10mm, 20mm and
40mm) to facilitate proper installation. Use extreme caution when using these screws to
avoid damage to vehicle roof or other components, wiring, etc.
CAUTION: Do not trap any bulk wiring or other accessories such as lters between the
supplied bracket and the unit. Any such items can block air ow in addition to placing
pressure on the top of the unit which could lead to performance issues.
Mounting Bracket
4 x M5
Screws
Video Unit
Front
of
Vehicle
Mounting Bracket
Mounting Holes
Headliner
Roof