
Installation Manual

UNIVERSAL INSTALLATION 10”.1 SEATBACK ENTERTAINMENT SYSTEM (Seat Back Mount)
© 2018 Voxx Automotive, Inc. All rights reserved.
Page 8 of 9
730148A2
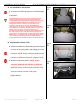
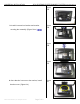
6. Re-install headrest. NOTE: Some slight
modification may be done to the bracket
cover to allow headrest to move up and down
freely. (Figure E6)
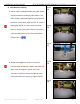
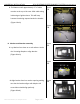
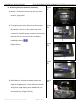
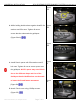
7. Continue routing harnesses following factory
harnesses from the lower seat to a central
location in the vehicle. Attach Upper harness to
the T-Harness. NOTE: The Audio/Video Output
will only output A/V signals from the monitor
that is connected to the M1 Monitor side of
the T-Harness. When connecting to an
external monitor, it is important to review
with the end user which monitor they would
like to have as the source monitor (SB10MD1
or SB10M1). (Figure E7a-b)
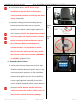
F. Power/Ground Location
1. Locate an Accessory Power source (+12 VDC
should be present when the ignition key is in the
accessory and run positions. 0 VDC should be
present when ignition key is in the off position).
Locate a good ground. Generally, these wires
can be located at ignition switch, power outlet, or
fuse box. NOTE: Ensure that the switched
power is fused at the source. Failure to do so
may result in vehicle and wiring damage.
Figure
E6
Figure
E7a
Figure
E7b