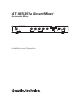
AT-MX351a SmartMixer ® Automatic Mixer AUTOMATIC MIXER AT-MX351a Gain 1 Gain 2 Gain 3 Gain 4 Output Level Aux In -20 -10 -6 -3 0 Master +3 +6 Priority Pre-select Power Selected Channel Installation and Operation 1234 MANUAL Lockout Monitor
Contents Introduction .......................................................................................................................5 What is a SmartMixer ? ...........................................................................................................5 Features .....................................................................................................................................5 Front Panel ...............................................................................
Installation and Operation Warning IC statement To prevent fire or shock hazard, do not expose the unit to rain or moisture. To avoid electrical shock, do not open the cabinet. Refer servicing to qualified personnel only. This Class B digital apparatus complies with Canadian ICES-003. Cet appareil numérique de la classe B est conforme á la norme NMB-003 du Canada.
Introduction Please Note! This manual assumes use of microphone-level inputs and line-level output, the most typical SmartMixer application. However, all inputs and the output may be individually switched internally to achieve any combination of mic- and line-level input/output. See page 10 for details. About internal adjustment Operating personnel must not remove equipment covers. Only qualified, experienced, authorized service personnel may remove equipment covers for any internal adjustments.
AT-MX351a Front Panel 1. Power switch. 2. Power “on” indicator. 3. Input Gain controls. Adjust inputs for microphone sensitivities and/or operating conditions. 4. Selected Channel LED indicators. Indicate which channels are “on” or “active.” 5. Aux In control. Adjusts input for source output level and/or operating conditions. 6. Output Level LED meter. Indicates RMS output level of the mixer.
AT-MX351a Rear Panel 1. External Control connector. For TTL output, plus closure-control input for external control of each channel. 2. Link In/Link Out. Provides for daisy-chaining of multiple mixers when more than four microphones are used. 3. Line/Mic balanced output. Level can be changed via internal switch (see page 10). XLRM-type connector. 4. Unbalanced line-level (–10 dBV) output. RCA jack. 5. Aux In. Unbalanced, line-level (–10 dBV), auxiliary input. 6. Preamp Outputs.
Installation and Setup AT-MX351a SmartMixer setup tips: 1. Turn the Master level control to the minimum position. Proceed with steps 2-9. 2. Set all Priority DIP switches and Manual mode switch to “down” position. 3. Turn all four microphone Gain controls fully counterclockwise. 4. Connect the power cord to the mixer and plug into AC outlet. 5. Turn Power switch “on.” The mixer will perform a self-test and turn each microphone “on” and “off ” consecutively. 6.
Mode 2…Priority Pre-select switches (1-4) Down In this mode, only one mic at a time can be “on.” The lockout bus shuts down all other mics until the first speaker pauses. As soon as the controlling microphone goes silent, the lockout bus goes inactive and any other mic can come on. This switching takes place without any syllable-grabbing delay, or pops or clicks. (This mode is known as “First-come-first-served” or “Filibuster.
The preamplifier gain may be reduced further, allowing the SmartMixer to accept line-level sources. Changing the settings of the internal switches designated by “S101,” “S201,” “S301” and “S401” will cause an input reduction of 50 dB for channels 1, 2, 3 and 4 respectively. Note that the appropriate internal switches can be used in combination for a total sensitivity reduction of up to 60 dB for each channel. Output Level The SmartMixer’s output is factory set at line level.
Rear Panel Don't Touch ! Front Panel Figure 4. Internal view of mixer. MIC MIC LINE LINE S101 P48 OFF S402 40dB 30dB 30dB OFF OFF 40dB S103 P48 S302 S202 40dB S401 P48 OFF S102 LINE LINE S301 S201 P48 MIC MIC 30dB LINE 30dB MIC S403 S303 S203 S602 40dB NOMA S601 ON OFF OFF OFF OFF OFF Gate Gate Gate Gate S104 VOL102 Min. VOL202 –6 dB Min. VOL302 –6 dB Min. VOL203 –10 dB ON OFF S106 -40 -40 VOL103 +10 dB –6 dB -20 S405 S305 S205 –10 dB Min.
Adjusting ”Off” Attenuation In instances when the number of microphones in use is high, it may be necessary to increase the amount of “off ” attenuation per microphone to keep the total ambient noise level low. There are “off ” attenuation adjustments inside the unit. To adjust the “off ” attenuation of channel 1, unplug the unit, remove the top cover and locate the trimpot designated on the circuit board by “VOL102” (Figs. 4 and 5, page 11).
Control Voltage Out When a microphone channel turns “on,” as indicated by a Selected Channel LED on the front panel, the channel’s associated Control Voltage Out goes “high” (+4 VDC). See chart on page 12 for pin connection. This signal can be used to light indicator lamps, switch speaker zones on and off, select video cameras, etc. The control voltage should not be connected directly to an inductive load such as a relay coil, as damage to the mixer may result.
Daisy-chaining Mixers When more than four microphones are needed, it is possible to daisy-chain multiple SmartMixers together through the Link In/Out connectors on their back panels (Fig. 2). Connect Mixer #1 Link Out jack to Mixer #2 Link In jack, etc. Mixer #1 output contains only audio from the first four microphones; Mixer #2 output then contains audio from all the microphones plugged into Mixer #1 and the microphones plugged into Mixer #2.
Specifications Input Impedance Mic . . . . . . . . . . . . . . . . . . . . . . . . . . . . Line . . . . . . . . . . . . . . . . . . . . . . . . . . . Aux . . . . . . . . . . . . . . . . . . . . . . . . . . . Link In . . . . . . . . . . . . . . . . . . . . . . . . 8,000 ohms 50,000 ohms 50,000 ohms 20,000 ohms Output Impedance Balanced Line . . . . . . . . . . . . . . . . . . . . . . . . . Mic . . . . . . . . . . . . . . . . . . . . . . . . . . Unbalanced . . . . . . . . . . . . . . . . . . . Link Out . .
P52323 ©2011