User Guide
Table Of Contents
- Contents
- 1 Introduction
- 2 Songs
- 3 Transport
- 4 Recording
- 5 Playback and Mixing
- 6 Mastering and Mixdown
- 7 Effects
- 7.1 Automated Fader
- 7.2 Band Effect
- 7.3 Chorus
- 7.4 Compressor
- 7.5 Convolutor
- 7.6 Deesser
- 7.7 Doubler
- 7.8 Dynamics
- 7.9 Echo
- 7.10 EQ
- 7.11 Exciter
- 7.12 Flanger
- 7.13 Guitar Amp
- 7.14 Master Limiter
- 7.15 Multi Effect
- 7.16 Noisegate
- 7.17 Parallel Effect
- 7.18 Phase Inverter
- 7.19 Phaser
- 7.20 Pseudo Stereo
- 7.21 Reverb
- 7.22 Rotor
- 7.23 Saturation
- 7.24 Stereo Effect
- 7.25 Tremolo
- 7.26 Tuner
- 7.27 Vibrato
- 7.28 VST Plugins
- 7.29 DX Plugins
- 7.30 External Sidechain Routing
- 8 MIDI Instruments
- 9 Automation
- 10 Editing
- 10.1 Editing Tracks
- 10.2 Editing Audio Tracks
- 10.3 Vocal Pitch Correction
- 10.4 Editing MIDI Tracks
- 10.5 Editing Notes
- 10.6 Pianoroll Editor
- 10.7 Notation Editor
- 10.8 Drum Editor
- 10.9 Controller Editor
- 10.10 MIDI Pattern Editing
- 10.11 Tempo/Time Signature Editing
- 10.12 Song Editor
- 10.13 Multi MIDI Editor
- 10.14 Multitrack Editing
- 10.15 Chords and Lyrics
- 11 Devices
- 12 Control Surfaces
- 13 Audio and MIDI Files
- 14 Keyboard Shortcuts
- 15 Touchscreens
- 16 Preferences
- 17 Tools
- 18 Miscellaneous
- 19 Requirements
- 20 Troubleshooting

Full screen mode
It's highly recommended to use the Studio menu's Full Screen option. The knobs at the top, and the status
bar at the bottom are much easier to operate this way, and you avoid the risk of touching the 'X' button or
Windows task bar inadvertently.
Controlling user interface elements
Some user interface elements work a bit different with touch than with the mouse:
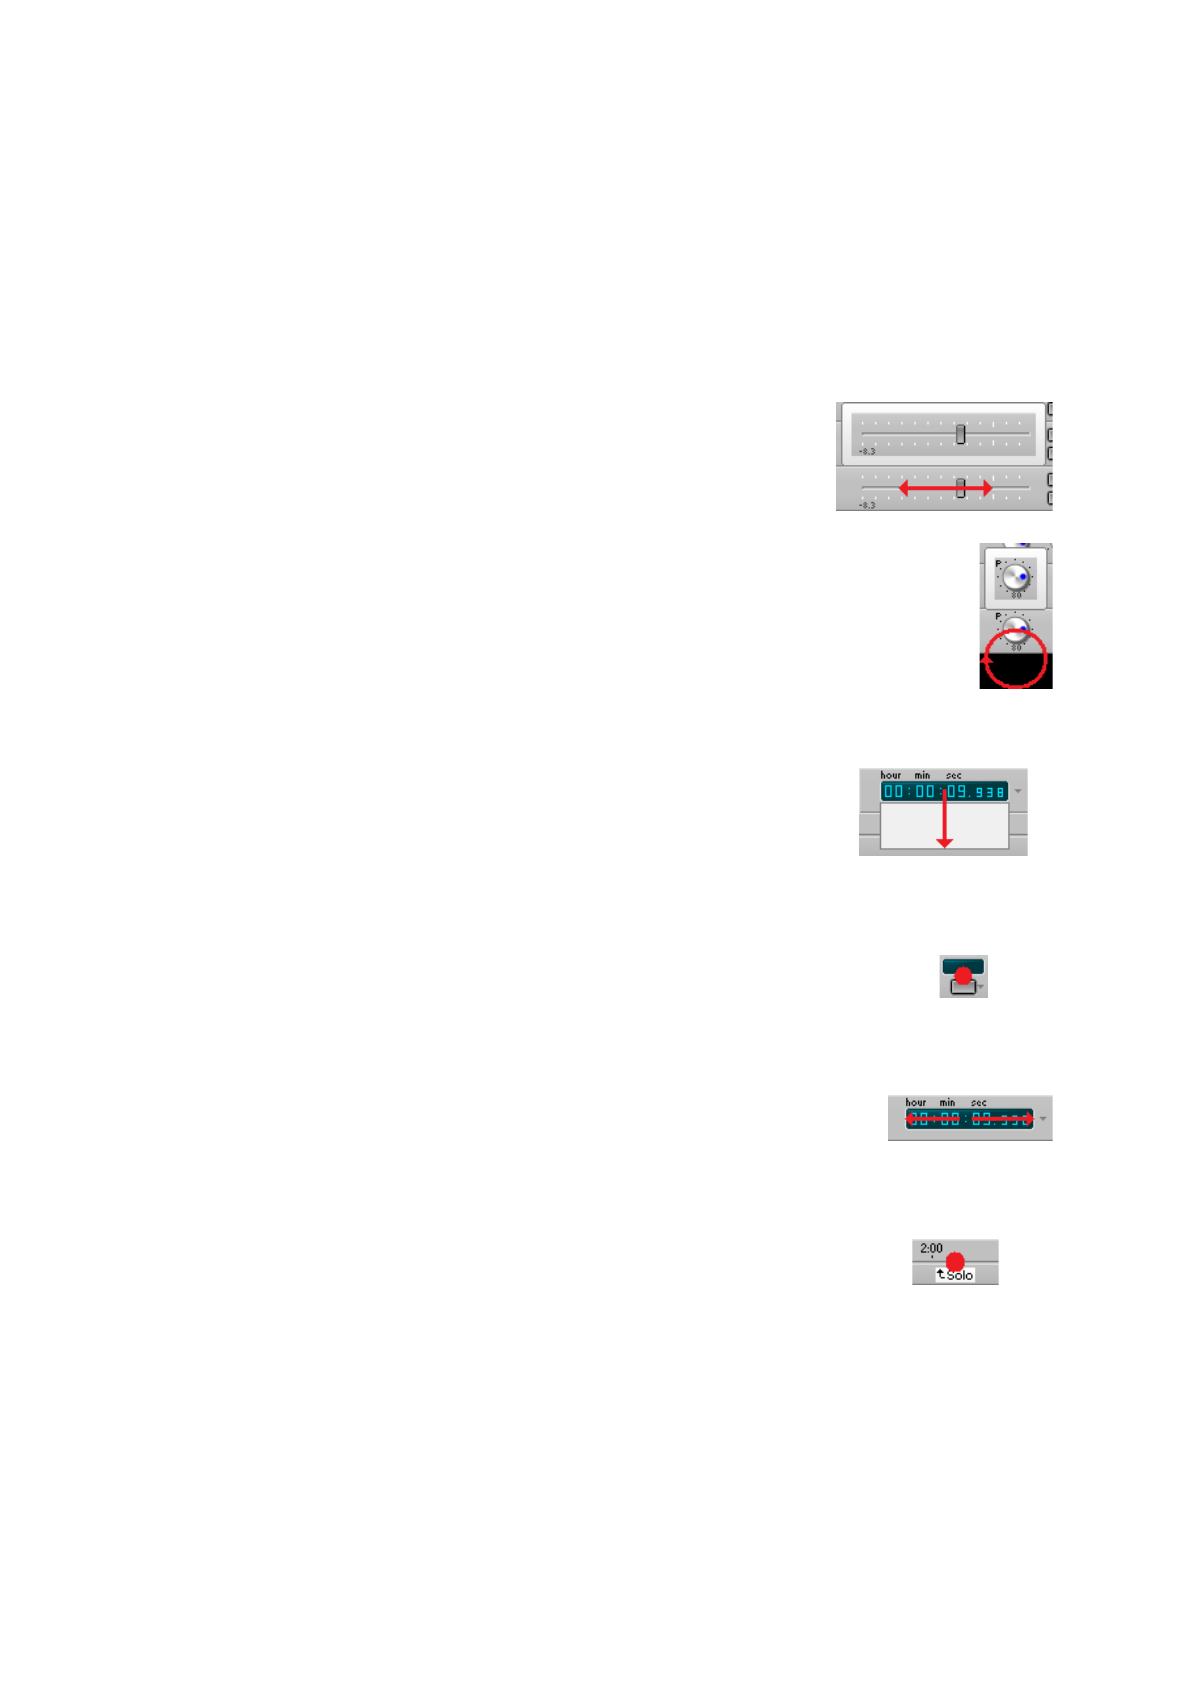
Mixer faders
Put a finger on the fader and move it horizontally. A copy of the fader appears
above the fader so you can see it even if your finger covers the fader itself.
The fader thumb doesn't move as fast as your finger does, so you can control
it accurately. Tapping the left half moves it down one step, tapping the right
half moves it up one step.
Fader with copy
Rotary knobs
Put a finger on the knob and make a rotating movement below the knob. A copy of the knob
appears above the knob so you can see it even if your finger covers the knob itself. A few
turns are required to turn the knob all the way, so you can control it accurately. Tapping the
left half moves it down one step, tapping the right half moves it up one step.
Knob
Buttons/boxes with down arrows (like the transport's Play button and position indicator)
You can't push the down arrow because it's too small. Instead you can put a
finger on the button/box itself and move it down (approx. 2 centimeters). A white
area becomes visible, this represents the menu which will appear when you take
your finger off the screen.
Note: this doesn't apply to the track file name boxes.
Position indicator about
to show dropdown menu
Effect/Instrument slots
See "Buttons with down arrows". The whole slot area can be touched, ie. the little display
also works, not just the button. If you want to move a slot and the white area is visible
(meaning you're not dragging the slot but instead about to pop up the effect selector) you
can move horizontally to get rid of that.
Tapping a slot
Position indicator
You can move your finger horizontally over the transport position indicator to walk
through the history of recent start positions (the Alt + Left/Right arrow key keyboard
shortcut). About 2 centimeters will do. Moving to the right once takes you back to
where the transport last started.
Stepping through
start history
Overview Bar
The markers appear at the bottom, but you can (and should) touch them as if they
span the full height. Dragging markers in particular is difficult if you aim too low. The
Transport Options menu can be used to add markers. You can use it to delete markers
as well (click the marker before opening the menu). The easiest way to rename a
marker is by double-tapping it.
It's not possible to change the transport position while recording, in order to avoid doing that accidentally.
Tapping a marker


