
User manual User guide

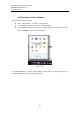

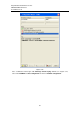
Table Of Contents
- 1 Preface
- 2 Introduction
- 3 Getting Started
- 4 LCM Configuration
- 5 Web Configuration
- 6 CLI Configuration
- 7 Link Modes and Applications
- 7.1 Link Mode Configuration
- 7.2 Link Mode Applications
- 7.2.1 TCP Server Application: Enable Virtual COM
- 7.2.2 TCP Server Application: Enable RFC 2217
- 7.2.3 TCP Client Application: Enable Virtual COM
- 7.2.4 TCP Client Application: Enable RFC 2217
- 7.2.5 TCP Server Application: Configure SE5416A Series as a Pair Connection Master
- 7.2.6 TCP Client Application: Configure SE5416A Series as a Pair Connection Slave
- 7.2.7 TCP Server Application: Enable Reverse Telnet
- 7.2.8 UDP Application: Multi-Point Pair Connection
- 7.2.9 TCP Server Application: Multiple TCP Connections
- 7.2.10 TCP Server Application: Multi-Point TCP Pair Connections
- 8 VCOM Installation & Troubleshooting
- 9 Specifications
- 10 Upgrade System Firmware
- 11 Warranty
Atop Industrial Serial Device Server
SE5408A/SE5416A Series
User Manual V 1.0
94
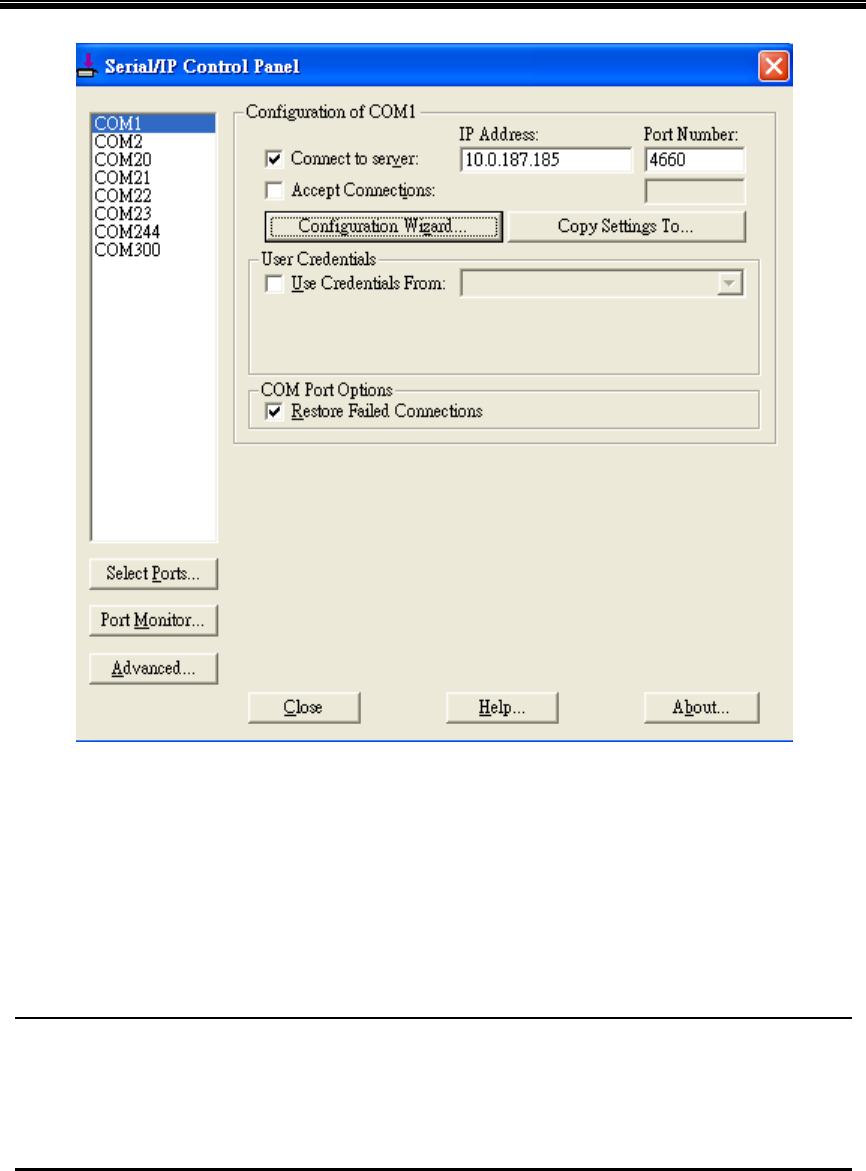
Figure 8.7
The left hand side of the Control Panel shows the list of selected Virtual COM ports. Click on
Select Ports to add or remove Virtual COM ports from the list. The right hand side of the
Control Panel shows the configurations of the selected Virtual COM port marked in blue. Each
Virtual COM port can have its own settings.
Note: The changes to Virtual COM ports apply immediately, so there is no need to save the
settings manually. However, if the Virtual COM port is already in use, it is necessary to close
the Virtual COM port and open it after the TCP connection closes completely in order for the
changes to take effect.