
User Manual

*Subject to change without notice Atomos Shogun – User Manual Edition 1: December 2014 29
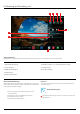
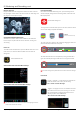
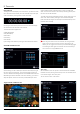
Using Timecode
Touching the timecode display on the home screen, just above the three
main coloured controls, will take you to the Timecode setup screen (this
is also accessible by touching Menu and then Timecode)
Occupying the lower-centre part of the screen is the timecode display
with controls to set the start-time of the timecode.
The timecode modes supported are:
• HDMI (Embedded)
• SDI (Embedded)
• Record Run
• Time of Day
• Auto Restart
Cycle through these modes by touching the timecode Source Selector.
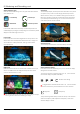
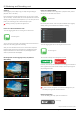
SDI/HDMIembeddedtimecode
With this setting, the SDI or HDMI input will set the timecode (as long as
the source device supports this). The controls to adjust the timecode
value are disabled in this setting because the embedded timecode in the
SDI/HDMI signal sets the timecode value of the recording. If you want to
adjust this please, refer to the manual of your SDI/HDMI input device.
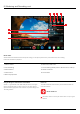
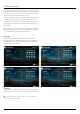
TriggerfromSDIorHDMItimecode
If SDI or HDMI timecode is selected and the camera is in REC RUN
mode, the user has the choice to start and stop recording remotely from
the source camera SDI timecode.
To enable rolling Timecode Start/Stop functions, simply press the TC icon
shown here. When enabled, pressing the camera Record Stop/Start
button will make the Shogun start and stop record simultaneously as the
timecode starts and stops.
When using the camera in Free Run timecode, the rolling timecode
trigger might not work as expected. However, depending on the
camera, you can trigger record function by the embedded ag/trigger
in the SDI signal. Most higher end cameras have this functionality; if
unsure contact us at support@atomos.com
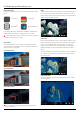
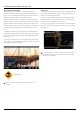
TimeofDay
With this selected, each new clip that is created will contain embedded
timecode accurately showing the time of day that it was recorded, based
on the internal Shogun Time of Day clock.
This can be set in Menu > Date & Time
9. Timecode