
User Manual


*Subject to change without notice Atomos Ninja Inferno – User Manual Edition 1: May 2017 12
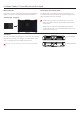
5. Ninja Inferno Connections cont.
21
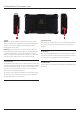
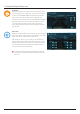
1. HDMI
HDMI IN: The video input is a full size HDMI 2.0a connection used to
receive the video and when supported by your device embedded audio
and Timecode. This is both displayed and recorded to the Atomos
recorder/monitor storage media.
HDMI OUT: This is for connection to an external monitor or other device
with an HDMI input. It carries a loop-through of the incoming HDMI signal
in record and standby mode, and the playback signal when the Ninja
Infernoisinplaybackmode.Thisouputis2.0aandcancarryeithera4K
orHDsignal(withtheoptiontodownconvertthe4KinputtoHD).
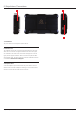
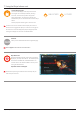
2. Analogue Audio
On the side of the Ninja Inferno unit is a multi-pin connector in to which the
XLR break out cable can be connected. A 2 in 2 out XLR cable is available
asanoptionaladditionalaccessory.TheinputscanbeconguredatLine,
Mic and Pro level in the Audio menu. The inputs can also provide 48V
Phantom power to compatible microphones.
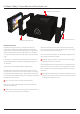
The XLR out puts are available via the optional 2 x 2 XLR cable accessory
for monitoring and the audio channel routed to them can be selected via
the headphones selection in the Audio menu.
Video Scale Convert
Video out also has the option for a down scale to be applied allowing your
4Kinputtobeconvertedtoa1080HDoutputforusewithexistingHD
equipment.
3D LUT Output
When not using AtomHDR mode 3D LUTs can be applied to the outputs
of the Inferno and LUTs can also be selected to be applied to the outputs
and routed out to other equipment via the HDMI connections.
Embedded Audio
The Ninja Inferno can record 8 channels of digital audio embedded in the
HDMI signal.