
User Guide


52
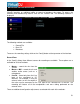
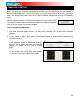
ecording to a file (“Record File”)
the system’s hard drive. When the
recording is completed, it can then be
listened to in VirtualDJ, edited with an
audio editing application, or written to a
CD using a CD burning software.
To setup the “Record File”, click on
“Config” to access the configuration
settings for recording a file.
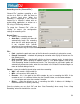
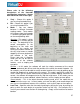
Record From –
• chooses the recording source
• Auto-Start – checking this box will
automatically begin the recording
ying.
If not checked then manual
ac rding will need
to be activated using the “Start Re
File –
• Prompt if overwrite – checked will prompt to overwrite when trying to record to a file
dy exists.
• Split in multiple files – checked will split the session as separate tracks, instead of one
to demarcate tracks. The “Auto-split on crossfade” option will
automatically demarcate tracks when the crossfader in the VirtualDJ interface begins to
Fo a sed when recording.
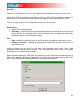
•
• rd an .MP3 audio file
P3 encoder for use in recording the MP3. If the
an the VirtualDJ folder, use the browse button
er’s location
• in recording the MP3. A bitrate of 192Kbps is
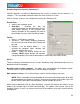
Once set, click “OK” and then “Start Recording” when ready. Press “Stop
Recording” when finished with the session.
R
“Record File” provides recording a mix
session to a .WAV or .MP3 file direct to
when the first track begins pla
tivation of the reco
cording” button
• Path – provide the path and name of the file where the recording is going to be saved.
that alrea
large audio file. When splitting to separate tracks, a “Cut” button appears next to the
“Start Recording” button
move to the deck being mixed in.
rm t – select the audio file format to be u
WAV – will record a .WAV audio file
MP3 – will reco
• Encoder – this is the path to the M
encoder to use is in a different folder th
( ,,, ) to navigate and select the encod
Bitrate – select the bitrate to use
recommended for CD-quality recording.
the choices are