
User`s guide


www.uTasker.com
µ
Tasker – AT91SAM7X Tutorial
V1.4
uTaskerV1.4_SAM7X.doc/0.03 8/36 31.07.2009
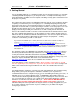
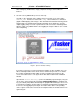
This is displaying that the page has not been found on the server, which is simply due
to the fact that we haven’t loaded any web pages to it yet, so we will do this as next
step.
Note however that the web browser is displaying the AT91 favicon. This is because
this favicon is embedded in the code and not in the µFileSystem – this is explained in
detail in the user file document
http://www.utasker.com/docs/uTasker/uTaskerUserFiles.PDF
9. Take a look in the project directory
\Applications\uTaskerV1.4\WebPages\WebPagesSAM7X
and you will find the web pages prepared for the demo project. These are HTM, JPG
and GIF files. It is possible to load these pages using FTP clients but these tend to
work quite differently from another and require various setups before they work
smoothly. See the following document for more information on this subject:
http://www.utasker.com/docs/uTasker/uTaskerFTP.PDF
This is the reason that working with simple DOS FTP tends to be the fastest and
simplest method and the bat file Copy_all.bat even does all the work for you.
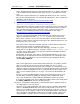
Check that its content is set to use the correct IP address and then double-click the
bat-file to start the transfer of all of the web pages to the simulated target device. The
transfer takes just a few seconds.
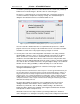
Then go back to the web browser window and make a refresh. Now you will see the
start side and can navigate to a number of other pages.
Before we get into any more details about the web pages and their uses, please
modify and save the Device ID (on the start page – default “uTasker Number 1”) to
any name of your choice and close the µTasker environment simulation window by
using the ‘normal’ exit method.
By doing this, the contents of the device’s simulated FLASH (Flash is used to save
the web pages in the µFileSystem and also any parameters, for example the device
ID which you have modified) are saved to a file in the project simulation directory
called FLASH_SAM7X.ini.
Now execute again (F5) and check that the loaded web pages are all there and that
after a refresh of the start side also the device ID which you chose is correct.
Now you should understand the operation of the simulator; on a normal exit it saves
all present values and settings and on the next start the device has the saved FLASH
contents as at the last program exit. This is exactly how the real device works since,
after a reset, its FLASH contents are as saved – I mean, that is what FLASH is all
about.
If however you have modified FLASH contents and do not want them to be saved,
you can always avoid this by quitting the debugger (short cut SHIFT F5) which
causes the simulator to be stopped without performing the normal save process.
If you wish to start with a fresh device (with blank FLASH contents) then simply delete
the FLASH_SAM7X.ini file from the simulator directory…
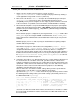
10. There is one important setting which we should perform before continuing; that is to
set a MAC address to our new device.
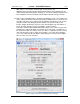
So browse to the “LAN configuration side”, where you will see that the default MAC
address is 00-00-00-00-00-00. This works, but we really should set a new one – as
long as we are not directly connected to the Internet any non-used value can be set.
You make one up. For example set 00-11-22-33-44-55 (watch that the entry format is
correct and always start with 00!) and then click on “modify / validate settings”. The
entry field will be set inactive since it is no longer zero and cannot be changed a