
User`s guide


www.uTasker.com
µ
Tasker – AT91SAM7X Tutorial
V1.4
uTaskerV1.4_SAM7X.doc/0.03 5/36 31.07.2009
...fasten your seat belts since we are about to roll
1. Simply copy the complete µTasker folder to your PC and go to
\Applications\uTaskerV1.4. This is a ready to run project directory showing a
useful application using network resources (and more).
2. Move to the sub director Simulator and open the VisualStudio project workspace
uTaskerV1-4.dsw. This project is in the VisualStudio 6.0 format to ensure
compatibility and, if you have a higher version, simply say that it should be converted
to the new format – no problems are involved and it should build with no warnings.
3. Ensure that the compiler is set up for the SAM7X target in the project’s pre-compiler
settings: look for the pre-processor define _HW_SAM7X. If instead you find that the
project is set up for another target, eg. _HW_NE64 or _M5223X simply overwrite this
with _HW_SAM7X.
Ensure that the project is configured for your target board in config.h: enable either
SAM7X_EVAL if you are using the ATMEL evaluation board, or else OLIMEX_EX256
for the demo board. Further boards can be added later if necessary to suit your own
hardware.
Build the project (use F7 as short cut) and you should find that everything compiles
and links without any warnings.
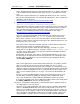
Note that the VS project as delivered has two configurations (uTasker - Win32
debug and uTasker - Win32 uTasker SAM7X plus GNU build). When the
configuration with GNU build is selected a post build step will cross compile the
project code using the GCC compiler. This is only possible when the GNU compiler is
installed on the local PC and it may also be necessary to modify the paths in the bat
file \Applications\uTaskerV1.4\GNU_SAM7X Build_SAM7X.bat to suit. This
is discussed in more detail in chapter 4.1.
4. I would love to be able to say “Execute” but there are a couple of things which have to
be checked before we can do this. First of all, you will need to be connected to a
network, meaning that your PC must have a LAN cable inserted and the LAN must be
operational – either connected to another PC using a crossover cable or to a router or
hub (wireless links tend not to work well but this may improve as the WinPCap
capabilities get better with newer version).
Then we have to be sure that the network settings allow your PC to speak with the
simulated device. The IP address must be within the local subnet:
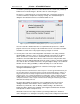
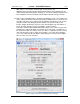
Open the C-file application.c in the uTaskerV1.4 project directory and check that
the following default settings match your network settings (check what your PC uses
in a DOS window with “ipconfig”)
static const NETWORK_PARAMETERS network_default = {
(AUTO_NEGOTIATE | FULL_DUPLEX | RX_FLOW_CONTROL), // usNetworkOptions - see
driver.h for other possibilities
{0x00, 0x00, 0x00, 0x00, 0x00, 0x00},// ucOurMAC – our default MAC
{ 192, 168, 0, 3 }, // ucOurIP - our default IP address
{ 255, 255, 254, 0 }, // ucNetMask – our default network mask
{ 192, 168, 0, 1 } // ucDefGW – our default gateway
};
Just make sure that the network mask matches, that the device’s IP address is within
the local network and that the IP address defined doesn’t collide with another one on
the local network.