
User`s manual


414 AWAY Action Mode Assignment
16#‘s
For each of the 16 above categories (in order, described above)
enter a number
(0-5),
describing what the response should be
to an alarm for that category, with the system in the AWAY
mode. Enter
“0”
for unused Categories. Default: 1222 2252
2222 2122 (spaces added to make reading numbers easier).
See Table 3-2.
================5OO
Series: Sensors (Points of Protection)
Proper use of the [SELECT], [AWAY], and [NIGHT] keys will allow you to move smoothly through the different
Fn#‘s
in the Sensors group. See the beginning of this chapter.
Note-Setting Sensor Loop Functions: With the 400 and 500 series of functions, you can designate any
sensor or loop to fill any function. Example: Hardwire Zone 13 is defaulted to provide indication of trouble
with any mechanical device, such as a cooler, exhaust fan, animal feeding device for the farm-you can
make it a second Fire zone. Use
Fn#511
to select “Sensor 13.” Go to
Fn#513
and enter a “10” (the Category
for Fire). This Zone (13) will now respond according to the 400 series’ “fire” digit (the tenth
digit-Fn#41
1-
would be 0002
2452 2222
2002).
511 Sensor (Protection Point) Number 3#‘s
512 Descriptor
1
6chrs
513 Category (type)
514 Priority
2#‘s
#
Enter a number 1-1 12. 1-16 are hardwired Points only, 17-80
not used, 81-l 12 are wireless only. Selecting a number allows
editing/setting of the variables (Fn#512-521) for that Protection
Point.
Describe type, location of Protection Point. (Examples: NE
BDRM WINDOWS, 84 KITCHEN SMOKE, or08 FMLY RM
INTRU) Default “SENSOR
##”.
where ## is the sensor number.
NOTE: Be as clear as possible! Both you and the customer
use this description to identify sensor or zone points (e.g., for
low battery, alarm, bypassing purposes). Include the sensor
number in the description. To enter characters see Figure 3-l.
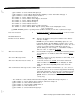
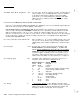
Tell which of the 16 Categories to place the sensor in (see
Categories under “400 Series”) Defaults follow:
Hdwir#
Wireless #
1 l-l
3
92-94
14-l
6
95-98
7.8
101-105
9
100
10
99
6 109
1,2
110-112
5
106-108
91
87-90
3
81,82
4
83-86
Default Category
Entry/Exit
Perimeter
Interior
24-Hour/Perim Tamper (default: Priority)
Interior Tamper (always Priority)
Aud.Panic
Emergency (default: Priority)
Fire (always Priority)
Environmental
Trouble Category
Auxl
Aux2
=
Don’t make “Priority”; 1= Do. Making a Protection Point
“Priority” means that it can never be bypassed. (Fire and Interior
Tamper are forced to be Priority; 24-Hour/Perim Tamper and
Emergency default to Priority, but can be changed.)
3-18
AT&T Security System 8300 Installer’s Manual