
User guide


1. Go to http://www.vm.att.com
and enter your Email Address and Password.
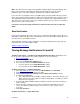
2. Click Settings on the left-hand side of the page.
3. Click Pager Notification Settings (under the Notification Settings section).
4. Select the Yes or No button.
• This feature must be Yes in order to proceed to settings. If message notification is
No, you can’t make any changes on this page.
5. Choose the type of pager notification, via your pager’s email address. Then follow the
instructions below.
• Email Address – Most alphanumeric pagers and some numeric pagers have an
email address associated with the phone number of the pager (pager
number@mypagercompany.com
)
1) Choose the type of pager you have – Numeric or Alphanumeric. For
wireless
7
phones, choose Alphanumeric.
2) Enter your email address for your pager or phone where indicated (Ex:
pager number@mypagercompany.com).
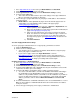
3) Choose the type and urgency of messages you want to be paged
about. You can choose one option for email messages, one for voice
messages, and one for fax messages. If you want to be notified of
messages from people in your Key Contacts List
, check the box for
this option.
4) Click Save and Close.
Test Your Paging Notification Settings
To ensure your pager notification has been set up properly, you’ll want to test them.
1) Click the All Emails button.
2) Click Test These Settings button.
• You should receive a test email in your mailbox, which will then send you a page.
Check your pager to confirm it was sent.
• If you receive a page, return to the Pager Notification section on
http://www.vm.att.com
to set your pager options, such as type and urgency of
messages. If you don’t receive a page, return to the Pager Notification section on
http://www.vm.att.com
to change your settings and test them again.
Computer Instructions — Email Notification
1) Go to http://www.vm.att.com
and enter your Email Address and Password.
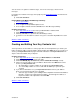
2) Click Settings on the left-hand side of the page.
3) Click Email Notification Settings (under the Notification Settings section).
4) Select the Yes or No button. This setting will affect all your email addresses listed. This
feature must be Yes to proceed to settings.
5) Select the tab with the email address whose settings you want to change.
• To select a new email address, click the next available email address tab and type
the email address in the Email Address field. You can have up to three email
addresses. Any email listed in this section will receive the notification. If you’d like to
remove an email so that it doesn’t receive notifications, select the tab of the Email
Address you want to remove and click Delete Email Address. Click Save and
Close.
6) Select the Yes button to send Email notifications to the selected Email Address or select
No if you do not want to send Email notifications but do not want to delete the address
from your selection.
7) Choose the type and urgency of messages you want to be emailed about.
7
Refers only to wireless services from AT&T.
Version 9.1
22