AT&T VoiceMail User Guide © 2008 AT&T Intellectual Property. All rights reserved. AT&T and the AT&T logo are trademarks of AT&T Intellectual Property.
AT&T Voice Mail User Guide Enjoy all the benefits of your new service by learning about its many features and capabilities. Welcome to AT&T Voice Mail Service Prepare to have your messaging life changed. That may sound like a bold statement, but you’ll understand the difference your new Voice Mail service can make once you experience its many features and benefits. Even better, your Voice Mail service is easy to learn and use.
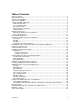
Table of Contents Table of Contents ............................................................................................................................ 2 System Requirements ..................................................................................................................... 3 Setting Up Your Mailbox.................................................................................................................. 3 Accessing Your Mailbox ..............................................
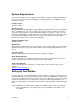
System Requirements The AT&T Voice Mail service is designed to work with most computers equipped with Pentium processors. There are some browser limitations for Apple Macintosh users. Minimum system requirements include: Computer Speed 133 MHz or higher Operating System Microsoft Windows® 98 (2nd Edition) or higher, Millennium, XP, 2000 (service pack 2), Windows VistaTM or Windows NT® 4.0 (service pack 6.0).
• • • • • • • Compatibility Test — Do you have software required for creating greetings and listening to messages? If you don’t have the required software, the Wizard will download and install it for you.
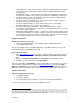
If you’re setting up your voice mailbox using the telephone connected to your Voice Mail service, follow these steps: 1) Select one of the two options below to enter your mailbox: • Dial your Access Number, 1-888-288-8893. Once you hear the pre-recorded greeting, simply follow the prompts. • Dial your Mailbox Number and simply follow the prompts. (Note: Because the telephone will ring like any other telephone call, someone may accidentally pick up the telephone.
Once you’ve recorded your personal greeting or selected a pre-recorded greeting, Basic Mailbox Setup is complete and your Voice Mail mailbox is now ready to use by pressing the # key. For additional setup instructions, follow the prompts. To check your voice or email messages online, you’ll still need to go through the Setup Wizard over the web browser. If you’re setting up your mailbox using a telephone NOT connected to your Voice Mail service, follow these steps: 1.
Accessing Your Mailbox Now that you’ve set up your Voice Mail mailbox, you can access it anytime using a computer or phone. The various features of your mailbox and how to use them are explained in the following sections of this User Guide. Telephone Instructions There are two numbers that you can use to access your mailbox from a phone: • Your Access Number – 1-888-288-8893 • Your Telephone Number – This number is also known as your Mailbox Number (typically your home number).
Setting Your Mailbox Greetings With Voice Mail service, you have a choice of several types of mailbox greetings: Name Announcement Your recorded Name Announcement is what other Voice Mail users hear when they send you a message or when you send them a voice message. It is also heard when using the Pre-recorded Greeting that includes your name. A sample Recorded Name: “Jack Smith.” Pre-recorded Greeting The pre-recorded greeting is a default greeting provided by your Voice Mail service.
Absence Greeting is engaged voice mails cannot be left unless additional commands are entered into the system A sample Extended Absence Greeting: “This is Marilyn with an out of the office announcement. I am currently out on vacation for the next 2 weeks. This mailbox will not accept any messages in my absence. Please call back after the 15th. Thank you.
• • • Press 2 to mark the message “Urgent.” Press 3 to mark the message “Private.” Press # to send your message as is. Telephone Instructions 1. Access your mailbox. 2. From the Main Menu, press 3 for Greetings. 3. Choose the greeting you want to change: • Personal Greeting – press 1 • Extended Absence Greeting – press 2 • Name – press 3 • Family Greeting (if applicable) – press 4 (Learn about Family Greetings) 4. After recording the new greeting, you can: • If you’re happy with the recording, press 1.
Getting Your Messages When accessing your mailbox via a computer or phone, you’ll be presented with several options. Checking for messages is the option you’ll choose most often.
2. Underneath the message window, emails with attachments will show the attachment file names that can be opened. Click on the underlined attachment file name to open the file. Save to My Computer Saving messages to your computer and deleting them from your inbox helps to keep your inbox from reaching capacity. Once your messages are deleted and you empty your trash folder, they can no longer be accessed through your Voice Mail mailbox. To save messages to your computer, follow these steps: 1.
Retrieving Your Messages Faster and Easier Your Voice Mail service includes the following shortcuts for retrieving and reviewing messages using a phone. The information below is also outlined in your Telephone User Interface (TUI) Wizard: Fast Log in When turned on, this feature lets you bypass entering your Telephone Number when you call Voice Mail from your primary telephone number. Your new service comes with Fast Log in turned on. See below for how to turn Fast Log in on and off.
playing. If you do not press 2 to save it or 3 to erase it, it will automatically be saved and the next message will play. If you have sub-mailboxes, all mailboxes have access to this feature. Telephone Instructions — Autoplay (this can only be done from your primary telephone number) 1. Access your mailbox 2. From the Main Menu, press 4 for Mailbox Settings. 3. Press 2 for Voice Mail, Email and/or Fax Settings. 4.
3. Click Telephone Settings (under the Telephone Access Settings section). 4. Click the box(es) to designate which type of urgent messages you want to be prompted for. 5. For voice mail listening options, check what header information you want to hear over the phone. 6. Click Save and Close. [Return to Table of Contents] Deleting Messages, Trash Folder and Storage Capacity (Full Mailbox) Voice Mail comes with storage capacity of 76.8MB for Voice Mail customers and 144MB for Voice Mail Plus customers.
5. Next, you’ll hear the recipient’s name or telephone number read back to you. You’ll then be asked if you want to add additional numbers. • If you have additional numbers to enter, follow the prompts. • Once you’ve finished entering telephone or Distribution List numbers, press # to confirm you’re done. 6. You’ll then be prompted to record your message. 7. After the tone, record your message and press # when you’re done. To hear delivery options, press 1.
When creating a Distribution List using the telephone, you can only enter telephone numbers of Voice Mail users. When creating a Distribution List using the computer, you can enter email addresses of Voice Mail users plus email addresses of people who aren’t Voice Mail users. (Note: You cannot add individual entries to the Address Book over the phone, only via the computer.) Computer Instructions — Add Individual Entry 1. Go to http://www.vm.att.com and enter your Email Address and Password. 2.
1. Click the “To:” button. (“CC:” and “BCC:” will also work.) Your address book will appear. 2. Click the email address(es) for all recipients. The address(es) will appear in the address box in the middle of the page next to the “To:” dropdown menu. 3. If you want to CC (carbon copy) or BCC (blind carbon copy) someone on your message, select the dropdown menu next to the address(es) box and choose “CC:” or “BCC:”.
Telephone Instructions 1) 2) 3) 4) Access your mailbox. Press 4 for Mailbox Settings from the Main Menu. Press 3 for Security Options. Press 4 to modify your Authentication Code. a. Press 1 to Create or Change i. For Mother’s Date of Birth, press 1 1. Enter 8 digit date of birth (MMDDYYYY) 6 2. Re-enter 8 digit date to confirm 3. Puts you back in the Security Options sub-menu ii. For Father’s Date of Birth, press 2 1. Enter 8 digit date of birth (MMDDYYYY) 2. Re-enter 8 digit date to confirm 3.
You can turn your message notification on and off whenever you want using a touch-tone telephone or computer. You can also select the type of messages you want to be notified about (e.g., email, voice, and fax) and whether you want to be notified of all messages, just the ones marked urgent or none at all. (Note: Notifications can only be setup and changed using a computer.
(Note: The actual text of an email or any attachments will not appear in the pager display. Also, pager service providers may format their notifications differently. Therefore, the pager notifications you receive may not appear exactly like the examples shown above.) If you select the second option to have your mailbox page your pager number directly, you’ll be able to choose which telephone number is displayed in your pager when a message is left in your Voice Mail mailbox.
1. 2. 3. 4. Go to http://www.vm.att.com and enter your Email Address and Password. Click Settings on the left-hand side of the page. Click Pager Notification Settings (under the Notification Settings section). Select the Yes or No button. • This feature must be Yes in order to proceed to settings. If message notification is No, you can’t make any changes on this page. 5. Choose the type of pager notification, via your pager’s email address. Then follow the instructions below.
You can choose one option for email messages, one for voice messages, and one for fax messages. If you want to be notified of messages from people in your Key Contacts List, check the box for this option. 8) Click Save and Close Primary Mailbox/Sub-Mailbox New Message Summary 1. Access your mailbox 2. Press 4 from the Main Menu 3. Press 4 again for Group Mailbox Options menu 4. Press 4 again to include/exclude Sub-Mailboxes in New Message Summary Computer Instructions 1. Go to http://www.vm.att.
Additional Features of Your Voice Mail Service Calendar This feature allows you to track all of your appointments and important events in a single location. Plus, you can check your calendar at the same time you are checking your other messages. It’s another convenient feature that helps you stay organized. Computer Instructions Note: This feature is only available on the computer. 1) Go to http://www.vm.att.com and enter your Email Address and Password. 2) Click Calendar on the left-hand side of the page.
name. You’ll need this information, as well as your email address/user ID and password for the email address. If you’re an AT&T Yahoo! subscriber and need help finding your POP3 server information, click this link for the POP3 help page and follow the steps. http://helpme.att.net/article.php?item=287 If you’re not an AT&T Yahoo! subscriber and need assistance finding your POP3 server information, please contact your Internet Service Provider. To set up your External Email Accounts: 1) Go to http://www.vm.
Spanish Language Preference You can choose to hear either English or Spanish Language prompts when calling in over the telephone to access your Voice Mail service. Note: There is currently not an option to view your service in Spanish from the computer. Telephone Instructions 1) Access your mailbox 2) Press 4 for Mailbox Settings from the Main Menu. 3) Press 6 to choose Additional Settings. 4) Press 4 to work with your Languages a. Press 1 for English b.
Bulk Mail Folder The Bulk Mail folder is created by the system. The message is placed in the Bulk Mail folder as a result of the system flagging or scoring the message as SPAM. The Bulk Mail folder is a system folder that cannot be re-named or deleted. The messages in the Bulk Mail folder do not count against your allocation and the messages expire when they have been in your Bulk Mail folder for more than 15 days. These messages will actually be deleted, not just moved to your trash folder.
5) In the space provided next to Out-of-Office Reply, type the message you want to be sent automatically when you’re out of the office. 6) Click Save and Close. The Extended Absence Greeting is the telephone equivalent to the Out-of-Office Reply feature, except that the default setting for the Out-of-Office Reply feature is that incoming emails are accepted.
• 5) 6) 7) 8) From the dropdown menu, select a number the caller should press to leave a message. You can select any number you want. When you record a Family Greeting, this is the number a caller must press to leave a message in this mailbox. • The default email address will be provided to you. • Enter a Web password and telephone PIN for the individual and provide the information to the person so he or she can log in to their account. Click Save and Close.
3) Press 4 for the Family Greeting. 4) Press 1 to turn on/off the Family Greeting feature. (If turned off, callers cannot reach your sub-mailboxes.) 5) Press 2 to re-record the Family Greeting. Record Family Greeting Computer Instructions 1) Click Settings on the left-hand side of the page. 2) Click My Sub-Mailboxes at the bottom of the page (under the Account Settings section). 3) Click Listen to and Record Family Greeting link under In Any Mailbox to listen to or record a Family Greeting.
Navigation Map 123451234560*1234 Version 9.
AT&T Prompts Frequently Asked Questions about the Voice Mail Service • • • • • • • • • • • • • • • • • • • • • What is the maximum file attachment size for emails? Can I access my mailbox from any phone or do I have to use my own phone? One of my callers couldn’t leave me a message because my mailbox was full.
Q: One of my callers couldn’t leave me a message because my mailbox was full. How can I prevent that? A: After retrieving any email, fax or voice mail message, you should always either delete/erase it or save it to your computer. When your mailbox is full, callers won’t be able to leave messages until you free up space in your mailbox. (Note: You can determine how much storage your mailbox is using by clicking the Folder button.
Q: Can I change the number of times my telephone rings before my mailbox picks up my line and answers the call? A: Yes. You can change the number of times your telephone rings before your mailbox picks up and answers your calls. For ring-cycle changes, please call: AT&T Customer Care at 1-800-2882747 [Return to FAQ] Q: How can someone send me a fax? A: Anyone can send you a fax by calling your telephone number associated with your mailbox. The mailbox will detect the fax tones and accept the fax.
[Return to FAQ] [Return to Table of Contents] Definition of Terms Access Number The telephone number you were given to access your messages using a telephone. “Beeping / Stutter” Dial Tone A special-sounding dial tone when you pick up the telephone that plays intermittently and alerts you to new messages in your Voice Mail mailbox. Distribution List A list of subscriber telephone numbers, subscriber email addresses and non-subscriber email addresses that you can use to send messages.
main mailbox also controls the Family Greeting and the routing of calls to each sub-mailbox by designating which key to press to reach the sub-mailbox. Subscriber This term refers to a Voice Mail customer. [Return to Table of Contents] Terms and Conditions The following terms and conditions (this “Agreement”) will govern AT&T’s provision and your use of AT&T Voice Mail (the “Service”).
subscribers or the public. You acknowledge and agree that AT&T neither endorses the contents of your communications nor assumes responsibility for any material contained therein. 6. LIMITED WARRANTY. You expressly agree that use of the Service is at your sole risk. AT&T warrants that the Service shall perform substantially as described in Your Guide.
terminate the Service by notifying AT&T at 1 800 288-2747. When the Service is terminated by you, AT&T will continue to provide the Service for a maximum of three days from the date of your notification to AT&T to allow time for an orderly transition of messaging functions. AT&T will have no obligation thereafter to forward any unread or unsent messages to you or to any third party. 11. AVAILABILITY OF SERVICE.
deletion of messages, the failure to store or accurately/timely deliver messages, or the modification or malformation of messages. 14. PAGER NOTIFICATION: Pager Notification allows your pager to notify you when a message is received in your mailbox. Your pager must have an email address associated with it and must be setup through the Web User Interface. Paging service and equipment must be purchased separately. Other restrictions may apply. Use of Pager Notification to any device other than a pager (e.g.