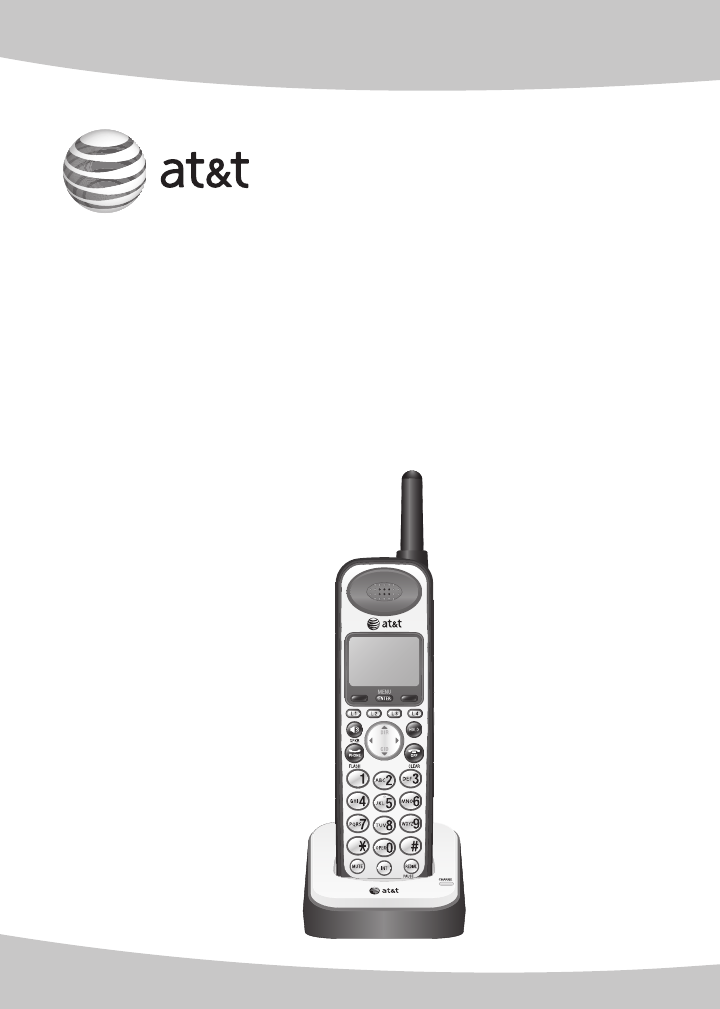
User’s manual AT&T SB67108 DECT 6.
Getting started Congratulations on your purchase of this AT&T product. Before using this AT&T product, please read the Important safety information on pages 70-72 of this manual. Please thoroughly read this user’s manual for all the feature operations and troubleshooting information necessary to install and operate your new AT&T product. You can also visit our website at www.telephones.att.com or call 1 (888) 915-2007. In Canada, dial 1 (866) 288-4268. Model #: SB67108 Type: DECT 6.
Parts checklist Check to make sure the telephone package includes the following items: User’s manual Quick start guide AT&T SB67108 DECT 6.0 expansion handset AT&T SB67108 DECT 6.
User’s manual AT&T SB67108 DECT 6.
Volume control �����������������������������29 Call waiting ������������������������������������29 Call privacy ������������������������������������29 Recording a call ���������������������������30 Mute ���������������������������������������������������31 Hold ���������������������������������������������������32 Switching between lines ���������32 Join a call in progress ��������������33 Chain dialing ���������������������������������33 Three-way conference calls ���34 COVM �������������������������������
Setting your system to automatically answer calls ��������� 59 Record announcement �����������59 Answering system capacity ���59 Voice prompts �������������������������������60 New message indication �������60 Turn alert on or off ��������������������60 Message playback ��������������������������� 61 Options during playback ���������62 Delete all old messages ����������62 Recording and delivering memos ��������������������������� 64 Remote access ��������������������������������� 65 Appendix Handset disp
Getting started Quick reference guide Softkeys MENU/ENTER Press to select an item displayed above the key. Press to enter the menu. While in the menu, press to select an item or save an entry or setting. L 1-L 4 keys HOLD Press to make or answer a call on the desired line (pages 25-26). Press to place an outside call on hold (page 32). SPKR OFF/CLEAR Press to turn on the handset speakerphone (page 25). Press again to turn off. During a call, press to hang up (page 25).
Getting started Quick reference guide PTT (push-to-talk) VOLUME Press and release, then press DIR or CID to select an extension. Press and hold to broadcast a message to that extension or the base (page 40). During a call, press to adjust the listening volume (page 29). During message playback, press to adjust the playback volume (page 62). Press and hold to broadcast to all extensions (page 41). Main menu The > symbol highlights a menu item.
Getting started Installation If you subscribe to high-speed Internet service (digital subscriber line DSL) through your telephone line, you must install a DSL filter between the telephone line cord and the telephone wall jack. The filter prevents noise and caller ID problems caused by DSL interference. Please contact your DSL service provider for more information about DSL filters. Your product may be shipped with a protective sticker covering the handset display - remove it before use.
Getting started Charger installation Plug the power adapter into an electrical outlet not controlled by a wall switch. IMPORTANT INFORMATION 1. Use only the power������������������������������������������������ adapter���������������������������������������� supplied with this product. To order a replacement power adapter, visit our website at www.telephones.att.com, or call 1 (888) 915-2007. In Canada, dial 1 (866) 288-4268. 2.
Getting started Handset battery installation and charging Install the battery as shown on the next page. Once you have installed the battery, the screen indicates the battery status (see table below). If necessary, place the handset in the charger to charge the battery. For best performance, keep the handset in the charger when not in use. The battery is fully charged after 16 hours of continuous charging. See the table on page 79 for battery operating times.
Getting started Handset battery installation and charging Step 1 Plug the battery connector securely into the socket inside the handset battery compartment, matching the color-coded label. Insert the supplied battery with the label THIS SIDE UP facing up as indicated. Step 2 Align the cover flat against the battery compartment, then slide it upwards. Step 3 To lock the battery compartment, turn the latch clockwise until it points to the lock icon as shown above.
Getting started Handset battery installation and charging Step 4 To charge the handset, place it in the charger as shown. The CHARGE light is on when the handset is charging. CHARGE light Low battery indicator Return the handset to the charger to recharge when the handset screen displays Low battery. 1:Handset 1 Low battery To open the battery compartment for battery replacement, turn the latch counter-clockwise until it reaches the horizontal position as shown to the right.
Getting started Add and register handsets The handset provided with your SB67118 is pre-registered as Handset 1. Additional handsets are assigned numbers in the order they are registered (Handset 2 to Handset 10). You can register a maximum of ten handsets. You can add new handsets (SB67108, sold separately) to the SB67118 at any time, but each new handset must be registered with the telephone base before use. Each handset must be registered separately.
Getting started Add and register handsets NOTES: 1. If the registration is not successful, the screen shows Press MENU on BS, sel Registration & sel Register HS. Then put HS in cradle. To reset the handset, remove the handset from the charger. Try the registration process again. 2. Please make sure to remove all unregistered handsets from the chargers before registering a new handset.
Getting started Deregister all handsets You may need to deregister your handsets if you already have ten registered handsets and need to replace a handset, or if you wish to change the assigned numbers of your registered handsets. You must first deregister ALL the handsets, and then re-register each handset that you wish to use. Please read carefully through all the instructions in this section before beginning the deregistration process.
Getting started Deregister all handsets NOTES: 1. If the deregistration process is not successful, you might need to reset the system and try again. To reset: pick up the handset and press PHONE/FLASH, then press��� OFF/CLEAR and place the handset back into the charger. You can also reset the telephone base by unplugging the power from the telephone base and plugging it back in. 2. To re-register a cordless handset, see page 8.
Getting started Belt clip and optional headset Install belt clip as shown below if desired. Snap the belt clip into notches on both sides of the handset. To release the belt clip, pull and unlock one flap from the notch first before detaching the whole belt clip from the handset. To use an AT&T 2.5 mm headset, plug it into the jack on the side of the handset as shown below. Plug the 2.5 mm headset into the jack on the side of the handset (beneath the small rubber flap).
Getting started Handset setup Menu settings You can use the menus to change the handset settings. 1. Press MENU/ENTER when in idle mode (when the phone is not in use) to enter the main menu. 2. Press DIR ��� or CID ���������������������������������������������� to scroll to the feature to be changed. The > symbol indicates the selected menu item. 3. Press MENU/ENTER to select the menu item. 4. Press OFF/CLEAR to exit setup without making changes. NOTE: Press idle mode.
Getting started Handset setup Ringer tone You can choose one of seven ringer tones for incoming calls. You ���� can choose different ringer tones for different lines so you can easily identify which line is ringing. 1. When the handset is idle, press MENU/ENTER. Ringer volume 2. Press DIR or CID to scroll to Ringer setting. >Ringer tone Press MENU/ENTER. 3. Press DIR or CID to scroll to Ringer tone. Press MENU/ENTER. Ringer tone L1 L2 L3 L4 4. Press or to select the desired line (L1, L2, 1 1 1 1 1 L3, L4).
Getting started Handset setup Key tone You can turn the key tone on and off. The handset is factory programmed to beep with each key press. If you turn off the key tone, there are no beeps when you press keys. LCD contrast 1. When the handset is idle, press MENU/ENTER. >Key tone Language 2. Press DIR or CID to scroll to Handset setup. Line selection Press MENU/ENTER. 3. Press DIR or CID to scroll to Key tone. Press Key tone :Off MENU/ENTER. 4. Press DIR or CID to select On or Off. 5.
Getting started Handset setup Line selection You can select the default telephone line to be used when you make outgoing calls. This handset comes factory set for Auto selectable line, which chooses the first available line for making a call. To select a particular line, choose Line 1, Line 2, Line 3 or Line 4. 1. When the handset is idle, press MENU/ENTER. LCD contrast Key tone 2. Press DIR or CID to scroll to Handset setup. Language >Line selection Press MENU/ENTER. 3.
Getting started Handset setup 5. ������ Press MENU/ENTER to save the setting and return to the previous menu. There is a confirmation tone. To exit without making changes, press OFF/CLEAR. Hold reminder You can have silence or play a beep tone every 30 seconds when there is a call on h�������������������������������� old for more than three minutes. 1. When the handset is idle, press MENU/ENTER. Language Line selection 2. Press DIR or CID to scroll to Handset setup.
Handset operation Handset setup Speed dial The handset has ten speed dial locations where you can store the phone numbers you wish to dial using two key presses. You can store up to 32 digits in each location. Enter, edit or delete a speed dial number Mailbox setup 1. When the handset is idle, press MENU/ENTER. Handset setup COVM 2. Press DIR or CID to scroll to >Speed dial setup Speed dial setup. Press MENU/ENTER. 3.
Getting started Handset setup Screen icons, indicator tones and lights Screen icons L1 L2 L3 L4 On when line 1, line 2, line 3, or line 4 is in use. Flashes when line 1, line 2, line 3, or line 4 is put on hold. L1 Line1 COVM L1 -PRIV -MUTE Handset battery status (animated displayed). Ringer off - the handset ringer is off. Message - new message in the handset mailbox. -MUTE Microphone is muted. -PRIV Call privacy is on. COVM LX There are new voicemail from the telephone service provider.
Getting started Mailbox setup Handset mailbox overview Each handset has its own �������������������������������������������� mailbox������������������������������������� which is different from the general mailbox������������������������������������������������������������ on the base.
Getting started Mailbox setup 1. When the handset is idle, press MENU/ENTER. Set Set access access code code Notify alert 2. Press DIR or CID to scroll to Mailbox setup. 3. Press MENU/ENTER twice to select Set access code. Enter mailbox 4. Use the dial pad to enter a four-digit number. access code :0001 Press OFF/CLEAR to backspace and delete a digit. 5. Press the Next softkey or MENU/ENTER to save Mailbox security the password and to select Mailbox security. :Off 6. Press DIR or CID to select On or Off.
Getting started Mailbox setup 1. When the handset is idle, press MENU/ENTER. 2. Press DIR or CID to scroll to Mailbox setup. Press MENU/ENTER. 3. Press DIR or CID to scroll to Notify alert. Press MENU/ENTER. Set access code Notify Notify alert alert Back Set alert number: Alert Alert call number # 1. Press MENU/ENTER to select Alert call #. Alert on/off Calling alert 2. Use the dial pad to enter the telephone number (up to 32 digits) you want to receive the notify alert.
Getting started Mailbox setup 3. Press PHONE/FLASH or SPKR. The ringing of the designated phone confirms that the setup of the Alert number is correct. 4. After confirming that the call went to the telephone number you specified, press OFF/CLEAR to end the test. The idle screen appears. NOTE: ������������������ If you try to set Alert on/off before you enter the Alert call #, Please set alert # appears on the screen.
Getting started Mailbox setup 4. Press the Stop softkey when finished. The recorded announcement plays. 5. Press the OK softkey to use the new recorded announcement. -ORPress the Change softkey to re-record the announcement.
Handset operation Handset basic operation Making a call To make a call: Elapsed time L1 1. Press PHONE/FLASH or SPKR. Line1 00:01:15 -ORTo override automatic line selection, press the L 1-L 4 key for the desired line. 2. Enter the telephone number. The screen displays the elapsed time as you talk (in hours, minutes and seconds). To end a call: Press OFF/CLEAR. NOTE: Pressing PHONE/FLASH to access services from your telephone service provider does not affect the elapsed time.
Handset operation Handset basic operation 2. Press PHONE/FLASH or SPKR. -ORTo override automatic line selection, press the L 1-L 4 key for the desired line. NOTE: If you press and hold a dial pad key that does not have a speed number assigned, the screen displays No Number. Answering a call To answer a call: • Press PHONE/FLASH or SPKR. -OR• To override automatic line selection, press����� the L 1-L 4 key for the desired line.
Handset operation Handset basic operation Temporary ringer silencing Press OFF/CLEAR or MUTE while the handset is ringing to silence the ringer temporarily on that handset only. This turns off the ringer without disconnecting the call. The next incoming call rings normally at the preset volume. NOTE: Each handset rings when there is an incoming call unless the ringer volume is turned off on that handset. Auto off A call ends automatically when you put the handset in the charger.
Handset operation Handset basic operation Last number redialing The last 10 phone numbers dialed (up to 32 digits) are stored in handset memory. To view the ten most recently dialed numbers: 1. Press REDIAL/PAUSE to enter the redial list and 888 883 2445 display the most recently called number. 2. Press DIR, or CID , or press REDIAL/PAUSE repeatedly to view other recently called numbers. 3. Press OFF/CLEAR to exit the ������������ redial������ list.
Handset operation Options while on calls Volume control While on a call, press VOLUME listening volume. to increase or decrease the VOLUME NOTES: 1. Handset and speakerphone volume settings are independent. 2. When the volume reaches the minimum or maximum setting, you hear an error tone. Call waiting If you subscribe to call waiting service with your telephone service provider, you hear a beep if someone calls while you are already on a call.
Handset operation Options while on calls To cancel call privacy: During the call, press MENU/ENTER twice to select Privacy OFF. Other extensions can now join the call by pressing the appropriate line key. L1 >Privacy OFF Record call on Back L1 Line1 00:01:15 NOTES: 1. You cannot set call privacy during intercom or conference call. 2. Call privacy applies only to the system telephones. It does not affect non-system phones using the same line(s).
Handset operation Options while on calls While recording a call: The other party hears a short beep when the recording begins and once each minute during the recording. To ensure compliance with state and federal regulations regarding the recording of a telephone call, you should start the recording process by informing the caller that you are recording the call. NOTE: Calls that you record use the same memory as the answering system.
Handset operation Options while on calls Hold Use this feature to hold one line while accessing another, or as part of the conference and call transfer features. HOLD While on a call, press and release HOLD. The L 1-L 4 indicator for the line on hold flashes slowly on the screen. After the call has been on hold for more than three minutes, you will hear a beep every 30 seconds. (To turn off the reminder beep, see page 17.
Handset operation Options while on calls Join a call in progress You can join in an ongoing call on any line that does not have call privacy set (see page 29 for information on call privacy). The line icon appears on the screen when the line is in use. • Press and hold the appropriate L 1-L 4 key on the handset to join in the call, which becomes a three-way conference (see page 34). NOTES: 1.
Handset operation Options while on calls Three-way conference calls You can set up a three-party call by using two lines at the same time. You can also join an intercom call with a call on an outside line. The outside line call must be established first because an intercom call cannot be placed on hold. 1. Make or answer an outside call. 2. Press HOLD. Then call someone using another line, answer a call, or intercom someone (see page 37).
Handset operation Options while on calls To drop an intercom call: Press the L 1-L 4 key to activate the external call and the intercom call drops automatically. To end a conference call: Press OFF/CLEAR or hang up. The call does not terminate until all extensions hang up. NOTES: 1. If an internal party hangs up, the ongoing call becomes a two-way conversation. 2. You cannot make any conference calls if all four telephone lines are in use. 3.
Handset operation COVM COVM (central office voicemail) If you subscribe to voicemail service with your telephone service provider, and you want the handset to indicate when you have new voicemail����������� , turn the COVM indicator on. When a phone line receives any new voicemail messages, COVM LX (X is the telephone line number) displays on the screen. If you do not subscribe to voicemail service, turn off the COVM feature. 1. 2. 3. 4. 5. When the handset is idle, press MENU/ENTER.
Handset operation Intercom At any given time, you can use the intercom feature for conversations between handsets or a handset and the telephone base. When the system is making one or more external calls, the cordless handsets can make intercom calls with each other. You can register up to 10 extensions to the telephone base. The extensions are cordless handsets. The extensions are assigned sequential numbers (1-0) as they are added.
Handset operation Intercom 4. When you choose All in the menu, all the handsets and base ring. The intercom call is established with the first one who answered the call. 5. If a line is in use, pressing INT places the line on hold and activates the intercom. Answer an incoming call during an intercom call If you receive an incoming outside call during an intercom call, you will hear two beeps. To answer the call, press the L 1-L 4 key. The intercom call ends automatically.
Handset operation Call transfer using intercom Press the desired extension number, * (star) for the base, or # (pound) for all. The outside call is put on hold and your handset screen shows Calling X:Handset X, Calling *:Base, or Calling All. 3. The other handset or base rings and its screen shows Call X:Handset X. 4. Answer an intercom call just as you would answer a Intercom 00:01:15 normal call, or press INT. The outside call is still on hold and both handsets now show Intercom.
Handset operation Push to talk (PTT) intercom You can directly broadcast messages to the speakerphone of any extension. The extension you called can respond by pressing the INT key to begin a two-way communication. Up to five pairs of PTT calls establish at a time. PTT call to a handset or base 1. When the handset is idle, press PTT. PTT 2. Press DIR or CID to������������������������������� choose the desired handset or base. 3.
Handset operation Push to talk (PTT) intercom PTT call to all handsets and base 1. When the handset is idle, Press and hold PTT on the side of your handset ������ until PTT to: All your handset screen shows PTT to: All. Release PTT key -ORto stop Press PTT. ������ Press DIR or CID to choose #: All. Press and hold PTT until your handset screen shows PTT to: All PTT to: All. -MUTE When the connection is made, both the caller and the destination parties hear two beeps.
Handset operation Push to talk (PTT) intercom Respond with a new PTT call. Wait for the end of the three-second PTT wait state (the screen changes to idle mode) then, to respond with a handset, see PTT call to a handset or base or PTT call to all handsets and base on the previous pages. To respond with the telephone base, see Answer a PTT call in the SB67118 telephone base manual.
Directory About the directory Use the directory to store names and phone numbers. Directory entries are not shared with the telephone base or other extensions. Each handset has its own directory. Capacity The directory in each handset is independent from all other handsets. In other words, changes made to the directory on any handset apply only to that particular handset.
Directory Create directory entries Create and store a directory entry Use the following steps to store a name and number in the directory. 1. When the handset is idle: • Press MENU/ENTER twice to select Directory. -OR• Press Directory 2 entries Add Del All DIR to enter the directory. 2. Press the Add softkey to add an entry. 3. Enter or change the telephone number (up to 32 digits) using the dial pad when prompted. Enter phone #: • Press or to move the cursor to the left or 8888832445 right.
Directory Create directory entries – Press or to move the cursor to the left or right. – Press OFF/CLEAR to backspace and delete characters. – Press and hold OFF/CLEAR on the handset to delete all characters. – Press the Back softkey to return to the previous screen. Characters by number of key presses Number key 1 2 3 4 5 6 7 8 9 1 & ' ( ) , - .
Directory Create directory entries Store a flash in a directory number Use this feature to store the flash needed to access Enter phone #: certain custom-calling services in a directory number. 8888832445F • When you wish to enter a flash in the dialing sequence, press the Flash softkey. An F appears in the telephone number. Each flash counts as one digit. If you want to save the number in the directory, press MENU/ENTER.
Directory Review directory Review directory entries 1. �������������������������� When the handset is idle, Press MENU/ENTER twice to select Directory. -OR ������ Press DIR to enter the directory. If there are no directory entries, the screen displays Directory empty. 2. ������ Press DIR or CID to browse through the directory. Entries appear alphabetically by the first letter in the name.
Directory Search directory Search by name Follow the steps below to search for directory entries on the handset. 1. When the handset is idle, press MENU/ENTER twice to select Directory. -ORPress DIR to enter the directory. 2. Press DIR or CID to browse through the directory. 3. When a name entry appears, press the dial pad keys (2-9) to start a name search.
Directory Dial, delete or edit entries You can dial, delete or edit a directory entry (name and number) when it is shown on the handset screen. See Review directory entries on page 47 for instruction on how to display an entry. Display dial When a number is displayed on the screen, you can dial the number by pressing: PHONE/FLASH, SPKR, or����� the L 1-L 4 key for the desired line. Delete an entry When a directory entry is displayed, press the Del softkey to delete the displayed entry from the directory.
Caller ID About caller ID (call log) This telephone supports caller ID services offered by most telephone service providers. Depending on your service subscription, you might see the caller’s number, or the caller’s name and number from the telephone service provider after the first or second ring. Caller ID allows you to see the name, number, date and time of calls.
Caller ID Caller ID history How caller ID history (call log) works The handset stores caller ID information for the last 50 incoming calls. Entries are stored in reverse chronological order. The phone deletes the oldest entry when the log is full to make room for new calls. Each extension has an independent caller ID history. Deleting the caller ID history on any one extension does not affect the caller ID history on other extensions.
Caller ID Caller ID history NOTES: 1. Caller ID information might not be available for every incoming call. The callers might intentionally block their names and/or telephone numbers. 2. Each entry can store up to 32 digits for the telephone number and 16 characters for the name. If the telephone number has more than 16 but less than or equal to 24 digits, only the last 16 digits appear. If the telephone number has more than 24 digits, only the 9th to 24th digits (16 digits) appear.
Caller ID Caller ID operation Memory match If the incoming telephone number is an exact match with a telephone number in your directory, the name that appears on the screen matches the corresponding name in your directory. For example, if Christine Smith calls, her name appears as Chris if this is how you entered it into your directory. NOTE: The number you see on your caller ID is in the format from the telephone service provider.
Caller ID Caller ID operation Review caller ID history 1. When the handset is idle, press CID or the CID softkey. -ORWhen the handset is idle, press MENU/ENTER. Press DIR or CID to scroll to Call log, then press MENU/ENTER. 2. Press DIR or CID ������������������������������������������������ to scroll through the list ��������������������� to review the caller ID history in chronological or reverse chronological order starting with the most recent call first. 3.
Caller ID Caller ID operation Dial a call log entry 1. When in the call log, press DIR or CID to��������������������� browse to the entry you wish to dial. 2. Press PHONE/FLASH, SPKR, or L 1-L 4 key������������������� to dial the entry. Delete entries Delete a caller ID entry: CHRISTINE SMITH 1. When in the call log, press DIR or CID to ���������� browse to the number you wish to delete. 2. Press the Del softkey to delete the shown entry from the caller ID history.
Caller ID Caller ID operation Save a call log entry to the directory 1. When in the call log, press DIR or CID to browse the entry you wish to save. 2. Press the Edit softkey to select the displayed entry. Enter phone #: displays. 3. Use the dialing keys to edit the number. • Press OFF/CLEAR on the handset to backspace and delete characters. • Press and hold characters. OFF/CLEAR on the handset to delete all • Press or to move the cursor to the left or right.
Caller ID Reasons for missing caller ID information There are also occasions when other information or no information shows for various reasons: On-screen message Reason PRIVATE CALLER The caller prefers not to show the telephone number and name. UNKNOWN CALLER Your telephone service provider cannot determine the caller’s name and telephone number. Calls from other countries may also generate this message.
Answering system Handset voicemail box (answering system) Each handset has a private voicemail box that is different from the general mailbox on the base. The voicemail messages for each handset can be accessed from that handset or telephone base. Answering system and voicemail Your telephone has separate indicators for two different types of voice messages: those left on its built-in answering system and those left at your service provider’s voicemail.
Answering system answering calls in seconds instead of rings. In this case, allow six seconds per ring when determining the appropriate setting. Setting your system to automatically answer calls On the base you can set each of the four lines to automatically answer incoming calls in two different ways. See the SB67118 manual for more information. General mailbox: The called line rings on every extension for each incoming call.
Answering system Setting your system to automatically answer calls NOTE: You cannot record an announcement when the telephone system is out of space. You will hear a two-beep alert tone and voice prompt “Memory is full.” Please refer to Remaining space section in the SB67118 telephone base manual. Voice prompts The system provides voice prompts to guide you through the setup procedures. New message indication When you have new messages in the handset mailbox, the screen displays New messages.
Answering system Message playback From a handset, you can play the messages for that handset mailbox and the general mailbox. If you have new messages, the system plays the new messages (oldest first) automatically when you access the mailbox. When playback begins, the total number of messages is announced. Before each message, you hear the date and time of the recording. After the last message, you hear “End of messages.
Answering system Message playback Options during playback When a message is playing, you can adjust the playback volume, skip, repeat, or delete the message. When messages are playing on the handset: • Press VOLUME to adjust the message playback volume. • Press to skip to the next message. • Press to repeat the message. ��������������� After you hear "Repeat" and within five seconds, press again to hear the previous message. • Press the Del softkey to delete the message.
Answering system Message playback 3. Press DIR or CID to scroll to Delete all old. Press MENU/ENTER. 4. The screen displays Delete all old messages? Press the Yes softkey to confirm or press the No softkey to return to the previous screen. NOTE: If there are any new and unreviewed�������������������������������������� ������������������������������������������������ messages in the handset mailbox, the messages indicator still flashes after you delete all old messages.
Answering system Recording and delivering memos Memos are messages you record at a handset. You can save, play back, and delete them like incoming messages. You can record a memo as a reminder to yourself, or send a memo to other extensions using the answering system. Record and deliver a memo in a handset mailbox: 1. When the handset is idle, press the M.box softkey. Go to step 3 below. Record and deliver a memo in the general mailbox: 1. When the handset is idle, press the M.box softkey. 2.
Answering system Remote access You can access your handset answering system remotely by dialing your telephone number from any touch-tone telephone. To remotely access the answering system: 1. Dial your telephone number from any touch-tone telephone. 2. When the system answers, enter the four digit remote access code of your handset (0001 is default code for handset 1, 0002 is default code for handset 2 and so on. See page 20 to change it).
Answering system Remote access 7 • Press to transfer the current message (during playback): Press the handset number (1-9) or star (*) for the base, then press pound (#) to transfer a message to the destination mailbox (This option is only available when transferring of message). 8 Press to change the personal announcement (This option is only available to handset mailboxes). 9 Press to change to the general delivery mailbox (This option is only available to handset mailboxes).
Appendix Handset display screen messages Busy Failed intercom or conference call (there are already two handsets being used). Call Another system handset is calling. X:Handset X Call log empty There are no entries in the caller ID history. Calling The handset is calling the other handset (for intercom calls). X:Handset X Charging A handset is being charged. COVM L1 L2 L3 L4 There are new voicemail messages. Directory empty There are no directory entries. Ended You have just ended a call.
Appendix Handset display screen messages -PRIV The call is in privacy mode. Privacy A handset tried to join in a call in which call privacy is activated. Please enter another The access code you attempted to change has already been used. Please set alert # You are trying to confirm the alert number or set the notify alert on or off before you set the alert number. -REC The call is being recorded. Redial list empty The redial list is empty. This mailbox is in use.
Appendix Maintenance Taking care of your telephone • Your cordless telephone contains sophisticated electronic parts, so you must treat it with care. • • • Avoid rough treatment. Place the handset down gently. Save the original packing materials to protect your telephone if you ever need to ship it. Avoid water • You can damage your telephone if it gets wet. Do not use the handset in the rain, or handle it with wet hands. Do not install the telephone base near a sink, bathtub or shower.
Appendix Important safety information This symbol is to alert you to important operating or servicing instructions that may appear in this user’s manual. Always follow basic safety precautions when using this product to reduce the risk of injury, fire, or electric shock. Safety information • Read and understand all instructions in the user’s manual. Observe all markings on the product. • Avoid using a telephone during a thunderstorm. There may be a slight chance of electric shock from lightning.
Appendix Important safety information Especially about cordless telephones • Privacy: The same features that make a cordless telephone convenient create some limitations. Telephone calls are transmitted between the telephone base and the handset by radio waves, so there is a possibility that your cordless telephone conversations could be intercepted by radio receiving equipment within range of the cordless handset.
Appendix Important safety information Pacemaker patients Should keep wireless telephones at least six inches from the pacemaker. Should NOT place wireless telephones directly over the pacemaker, such as in a breast pocket, when it is turned ON. Should use the wireless telephone at the ear opposite the pacemaker. WTR’s evaluation did not identify any risk to bystanders with pacemakers from other persons using wireless telephones.
Appendix FCC part 68 and ACTA This equipment complies with Part 68 of the FCC rules and with technical requirements adopted by the Administrative Council for Terminal Attachments (ACTA). The label on the back or bottom of this equipment contains, among other things, a product identifier in the format US:AAAEQ##TXXXX. This identifier must be provided to your telephone service provider upon request.
Appendix FCC part 68 and ACTA Industry Canada Operation is subject to the following two conditions: (1) this device may not cause harmful interference, and (2) this device must accept any interference, including interference that may cause undesired operation. The term ‘’IC:‘’ before the certification/registration number only signifies that the Industry Canada technical specifications were met. The Ringer Equivalence Number (REN) for this terminal equipment is 0.1.
Appendix FCC part 15 This equipment has been tested and found to comply with the requirements for a Class B digital device under Part 15 of the Federal Communications Commission (FCC) rules. These requirements are intended to provide reasonable protection against harmful interference in a residential installation. This equipment generates, uses and can radiate radio frequency energy and, if not installed and used in accordance with the instructions, may cause harmful interference to radio communications.
Appendix Limited warranty The AT&T brand is used under license - any repair, replacement or warranty service, and all questions about this product should be directed to: In the United States of America, visit www.telephones.att.com or call 1 (888) 915-2007. In Canada, call 1 (866) 288-4268. 1.
Appendix Limited warranty • PRODUCT to the extent that the problem experienced is caused by signal conditions, network reliability or cable or antenna systems; or • PRODUCT to the extent that the problem is caused by use with non-AT&T accessories; or • PRODUCT whose warranty/quality stickers, PRODUCT serial number plates or electronic serial numbers have been removed, altered or rendered illegible; or • PRODUCT purchased, used, serviced, or shipped for repair from outside the United States of Americ
Appendix Limited warranty 7. Other limitations This warranty is the complete and exclusive agreement between you and the manufacturer of this AT&T branded PRODUCT. It supersedes all other written or oral communications related to this PRODUCT. The manufacturer provides no other warranties for this PRODUCT. The warranty exclusively describes all of the manufacturer’s responsibilities regarding the PRODUCT. There are no other express warranties.
Appendix Technical specifications RF frequency band 1921.536 MHz — 1928.448 MHz Channels 5 Operating temperature 32°F — 122°F 0°C — 50°C Handset voltage 3.2 — 4.2 VDC Charger voltage 96 — 127 Vrms (AC voltage, 60Hz) Charger voltage 9VDC @200mA (AC adapter output) Replacement battery 3.
Appendix Troubleshooting If you have difficulty with your phone, please try the suggestions below. For Customer Service, visit our website at www.telephones.att.com, or call 1 (888) 915-2007. In Canada dial 1 (866) 288-4268. My phone doesn’t work at all. • Make sure the power cord is securely plugged in. • Make sure you plug the battery connector securely into the cordless handset. • Make sure you plug the telephone line cord securely and firmly into the telephone base and the telephone wall jack.
Appendix Troubleshooting I cannot get a dial tone. • First try all the suggestions above. • Move the cordless handset closer to the telephone base. You might have moved out of range. • If the previous suggestions do not work, disconnect the telephone base from the telephone jack and connect to a different phone. If there is no dial tone on that phone either, the problem is in your wiring or local service. Contact your telephone service provider. • Your line cord might be malfunctioning.
Appendix Troubleshooting My cordless handset isn’t performing normally. • Make sure you plug the power cord securely into the telephone base. Plug the power adapter into a different, working electrical outlet without a wall switch. • Move the cordless handset closer to the telephone base. You might have moved out of range. • Reset the telephone base. Unplug the electrical power. Wait for 15 seconds then plug it back in. Allow up to one minute for the cordless handset and telephone base to reset.
Appendix Troubleshooting The batteries do not hold a charge. • If the cordless handset is in the charger and the charge light is not on, refer to The charge light is off in this Troubleshooting guide. • Charge the battery in the cordless handset for at least 16 hours. For optimum daily performance, return the cordless handset to the charger when not in use. • If the battery is depleted, it might take approximately four minutes to charge the handset before it can resume display on the screen.
Appendix Troubleshooting • Other electronic products can cause interference to your cordless phone. Try installing your phone as far away from the following electronic devices as possible: television sets, VCRs, or other cordless telephones. • Do not install this phone near a microwave oven or on the same electrical outlet. You might experience decreased performance while the microwave oven is operating.
Appendix Troubleshooting I experience poor sound quality when using the speakerphone. • For increased sound quality while using the handset speakerphone, place the handset on a flat surface with the dial pad facing up. • Excessive background noise will cause a speakerphone to fade in and out. Try controlling the background noise by turning off any audio devices near the speakerphone. Also, try to avoid interrupting the person at the other end of the conversation while they are speaking.
Appendix Troubleshooting • The cordless handset may be too far from the telephone base. • Charge the battery in the cordless handset for at least 16 hours. For optimum daily performance, return the cordless handset to the charger when not in use. • You may have too many extension phones on your telephone line to allow all of them to ring simultaneously. Try unplugging some of the other phones. • The layout of your building might be limiting the operating range.
Appendix Troubleshooting My calls cut in and out while I’m using my cordless handset. • Other electronic products can cause interference with your cordless phone. Try installing your phone as far away from the following electronic devices as possible: television sets, VCRs, or other cordless telephones. • Do not install this phone near a microwave oven or on the same electrical outlet. You might experience decreased performance while the microwave oven is operating.
Appendix Troubleshooting • When using a speakerphone, controlling background noise in your environment is essential. While you are listening to your party, press MUTE to temporarily turn your microphone off. When it is your turn to speak, remember to press MUTE again to turn the microphone on. The charge light is off. • Make sure you plug the power and line cords in correctly and securely. • Unplug the electrical power. Wait for 15 seconds, then plug it back in.
Appendix Troubleshooting System does not receive caller ID when on a call. • Make sure you subscribe to caller ID with call waiting features from your telephone service provider. Caller ID features works only if both you and the caller are in areas offering caller ID service, and if both telephone service providers use compatible equipment. The answering system is recording incomplete messages.
Appendix Troubleshooting • The answering system may not detect the remote access code while your announcement is playing. Try waiting until the announcement is over before entering the code. • There may be interference on the phone line you are using. Press dial pad keys firmly. System does not record messages. • Make sure the auto attendant is on. Please refer to the Turn the auto attendant on section in the SB67118 telephone base manual. • Make sure the memory of the answering system is not full.
Appendix Troubleshooting Outgoing announcement is not clear. • When you record your announcement, make sure you speak in a normal tone of voice, about nine inches from the telephone base. • Make sure there is no background noise (TV, music, etc.) while recording. I cannot retrieve voicemail messages. • Your telephone has both a built-in answering system and voicemail indication. They are independent features and each alerts you to new messages differently (page 57).
Index Index A AC adapter, 4 Access code, 20, 65 Adding new handsets, 8 Alert tones, 19 Announcement, 23 Answering calls, 26 Answering system, 58-66 Auto off, 27 directory dialing, 49 from a record in the caller ID history, 55 Directory, capacity, 43 create entries, 44 dial number, 49 edit entries, 49 name search, 48 Display dial, 49 DSL, 3 B Battery charging, 5-7 Battery installation, 5-7 Belt clip, 12 E Elapsed time, 25 Ending calls, 25 C Call privacy, 29 Call transfer, 38 Call waiting, 29 Caller ID (
Index Index I Incoming caller ID history, 54 Incoming calls, answering, 26 Indicator lights, 19 Indicator tone, 19 Installation, 3 Intercom, 37 Navigation key, 1 New message indication, 60 Notify alert, 21 O On-hook dialing, 25 P Pause, 45 Phonebook (directory), 43 Play back a message memo, 61 Power adapter, 4 Predialing, 25 PTT, 40 J Join a call in progress, 33 K Key tone, 15 Q Quick reference guide, 1-2 L Language, 15 Last number redial, 28 LCD contrast, 14 Limited warranty, 76 Line selection, 16 R
Index Index Screen display messages, 67 Screen icons, 19 Search by name, 48 Speakerphone, 25 Speed dial, 18 T Technical specifications, 79 Telephone operating range, 79 Temporary ringer silencing, 27 Three-way conference calls, 34 Transfer a call, 38 Troubleshooting, 80 U Un-mute, 31 V Voicemail, 36 Voice prompts, 60 Volume control, 29 W Warranty, 76 94
Remote access wallet card Use the wallet card below to help you remember commands to control your answering system from any touch tone telephone. Cut along dotted line. Call your telephone number, then enter your four-digit access code (preset to 0001 for Handset 1 and so on). Action Remote command 1 2 Fold here. Play all messages or record announcement........ Accept the recorded announcement....................... Delete the message or recorded announcement...........................................
www.telephones.att.com © 2009 Advanced American Telephones. All Rights Reserved. AT&T and the AT&T logo are trademarks of AT&T Intellectual Property licensed to Advanced American Telephones, San Antonio, TX 78219. Printed in China. Issue 3 AT&T 09/09.