
Specifications


To make button labels for the voice terminal you plan to use as your
administrator/attendant console, do the following:
1
Remove the blank button labels from the voice terminal according to the
instructions that came with the voice terminal.
2
Fill in the button labels with pencil or ballpoint pen since either can be
erased if you make changes later.
)
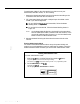
For any BIS-34 and
34-button
voice terminals, follow the button
labeling shown in Figure 3-2.
)
For any BIS-22 voice terminal, follow the button labeling shown in
Figure 3-3.
NOTE:
On the button labels divided by a horizontal line, the term above
the line identifies the button’s function when the console is in the
normal call-handling mode. The term
below
the line identifies the
button’s function in administration mode.
3
Reinsert the labels following the instructions that came with the voice
terminal.
Entering Administration Mode
You have to enter administration mode to set up the system initially and
anytime you use the attendant console to administer the system. Follow the
boxed instructions below whenever you have to enter administration mode.
Entering Administration Mode
To enter administration mode:
1
Slide the
TIP
switch on the left side of the console to
P
(down).
The green lights next to the line buttons begin flashing.
The console rings
every
5 seconds to remind you that it’s in programming mode.
2
Touch
Administer,
or dial
#49.
The green lights
go
ofi
The red lights
go
on next
to Administer
and
Restrict.