
Specifications


Administration Procedure
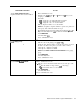
I
Desigmte
J
jail\
fur
the
ASA
features (jack
I
18 is the initial assignment).
/
I
I
!
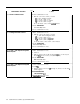
Select the lines, except tie lines, that you
want to add to or remove from CFIDXD,
RLA,
or
SA line groups.
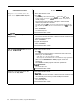
Enable or disable the voice message for all
lines in your CF and/or DXD incoming
line groups.
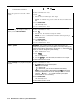
Modify the voice message for one or more
lines in your CF,
RLA,
SA and/or DXD
incoming line groups.
Do This
1 Enter administration mode.
2 Dial
*59.
3
Touch the Auto Intercom button or dial
the
intercom number
ior
the
jack you want to assign to
ASA.
4 Touch Administer.
The console
beeps
twice.
5 Leave administration mode.
1 Enter administration mode.
2
Dial
the
appropriate code:
*51
for the CF incoming line group
*52
for the CF outgoing line group
*58
for the DXD incoming line group
*54
for the RLA incoming line group
*75
for
SA
incoming line group
3
Touch line buttons until the green light next to it indicates its
assignment to the list.
Greet1
l@zt
on = line is assigned to the list
Green
light off = line is not assigned to the list
4 Touch Administer.
The
console beeps twice.
5 Leave administration mode.
1 Enter administration mode.
2 Dial
*30.
3
Dial the appropriate code:
1 to turn on the Call Forwarding voice message
0 to turn off the voice message
4 Touch Administer.
The console beeps twice.
5 Leave administration mode.
1 Enter administration mode.
2 Dial
*50.
3
Touch the line button(s) for the line(s) on which you want to
mc
the message.
4
Dial the telephone number you want to include in the message.
5 Touch Administer.
The console beeps twice.
6 Leave administration mode.
Quick Reference Guide to System Administration
6-9