
Instruction manual


Installing the Carriers
2-32
Installation, SPM, Maintenance, and Troubleshooting Supplement
Installing the Power Supply 2
WARNING:
Do not install the power supply unless the carrier is connected to an
approved ground.
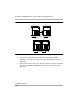
Before touching leads, connectors, pins, and other components, use a
properly grounded wrist strap, to prevent damage from electrostatic
discharge (ESD). The wrist strap can be clipped to the ground screw or
plugged into the hole next to the ground screw.
Do not attach any cables or power cords to the power supply until it is
installed in the carrier.
Do not power up the control unit until all of the modules and power
equipment are installed. Once they are installed, refer to “Powering Up the
System,” later in this chapter. Failure to comply with this procedure can
result in shock hazard and/or damage to the equipment.
Installing the Power Supply Module
in the Carrier
2
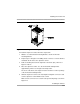
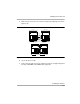
Follow these steps to install the power supply module in the carrier:
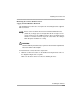
1. Align the circuit board guides inside the carrier, and slide the power supply
module into the slot.
2. Make sure the connector on the back of the module mates properly with
the connector on the carrier.
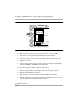
3. Secure the module with two screws, one on top and one on the bottom.
The power supply may make a ticking sound when plugged in but
not turned on. This is normal operation.