91-000302-050-000_EP5962Englishmanual_Sep.02,2005.qxd 2/13/1950 7:21 PM User Manual (Part 2) 5.
91-000302-050-000_EP5962Englishmanual_Sep.02,2005.qxd You must install and charge the battery before using the telephone STOP! 2/13/1950 7:21 PM See page 8 for easy instructions For customer service or product information, visit our web site at Please also read www.telephones.att.com or call 1-800-222-3111 Enclosed in product package Important Product Information Add new handsets to make your phone more versatile (see page 41) Your telephone can accommodate up to eight cordless handsets.
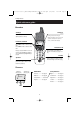
91-000302-050-000_EP5962Englishmanual_Sep.02,2005.qxd 2/13/1950 7:21 PM Page 1 User Manual (Part 2) 5.8 GHz 2-Line Corded/Cordless Answering System EP5962 SPEA KE R ME LU VO Table of contents Getting Started Answering System Operation Quick reference ...................................2 Parts checklist .......................................4 Before you begin ..................................5 Telephone base installation................6 Battery & charger installation............
91-000302-050-000_EP5962Englishmanual_Sep.02,2005.qxd 2/13/1950 7:21 PM Page 2 Getting Started Quick reference guide Handset Off/Clear Softkeys Press a softkey to select an item displayed just above the key. During a call, press to hang up. While using menus, press to cancel an operation, back up to the previous menu, or exit the menu display. L1/Flash, L2/Flash Press LINE 1 to make or answer a call on line 1. Press LINE 2 to make or answer a call on line 2.
91-000302-050-000_EP5962Englishmanual_Sep.02,2005.qxd 2/13/1950 7:21 PM Page 3 Getting Started Quick reference guide Base/Speakerphone Telephone function keys Answering system function keys Telephone function keys (see pages 12-19) RDL MENU CID SOFTKEYS ............Press to select item displayed just above the key. CLEAR ....................Press to exit current menu or clear an entry. INTERCOM/ TRANSFER ............Press to begin intercom call or transfer external call. MUTE ..................
91-000302-050-000_EP5962Englishmanual_Sep.02,2005.qxd 2/13/1950 7:21 PM Page 4 Getting Started Parts checklist Remember to save your sales receipt and original packaging in case you ever need to ship your telephone for warranty service.
91-000302-050-000_EP5962Englishmanual_Sep.02,2005.qxd 2/13/1950 7:21 PM Page 5 Getting Started Before you begin About Caller Identification Telephone operating range Caller ID with Call Waiting features in this telephone let you see who’s calling before you answer the phone, even when you’re on another call. These features require services provided by your local telephone company. This cordless telephone operates with the maximum power allowed by the Federal Communications Commission (FCC).
91-000302-050-000_EP5962Englishmanual_Sep.02,2005.qxd 2/13/1950 7:21 PM Page 6 Getting Started Telephone base installation (2-line jack) If you have a 2-line wall jack, install the base as shown below. Choose a location away from electronic equipment, such as personal computers, computer routers, television sets or microwave ovens. Avoid excessive heat, cold, dust or moisture. Line 1 + Line 2 Connect the black line cord to jack labeled LINE 1/L1+L2.
1-000302-050-000_EP5962Englishmanual_Sep.02,2005.qxd 2/13/1950 7:21 PM Page 7 Getting Started Telephone base installation (separate line jacks) If you have separate wall jacks for each line, install the base as shown below. Choose a location away from electronic equipment, such as personal computers, computer routers, television sets or microwave ovens. Avoid excessive heat, cold, dust or moisture. Line 1 Line 2 Connect black line cord to jack labeled LINE 2.
91-000302-050-000_EP5962Englishmanual_Sep.02,2005.qxd 2/13/1950 7:21 PM Page 8 Getting Started Battery & charger installation Installation of Battery Pack in Handset Follow the steps below: 1. Remove the battery compartment cover by pressing on the indentation and sliding downward. Place the new battery pack in the handset with the positive and negative poles aligned in the battery compartment. 2. Replace the battery cover by sliding it upwards. 3.
91-000302-050-000_EP5962Englishmanual_Sep.02,2005.qxd 2/13/1950 7:21 PM Page 9 Getting Started Belt clip & accessories Install belt clip as shown below if desired. For hands-free telephone conversations, you can use any industry standard 2.5 mm headset (purchased separately). For best results use an AT&T 2.5 mm headset. Snap belt clip into notches on side of handset. Rotate and pull to remove. Plug 2.5 mm headset into jack on side of handset (beneath small rubber cap) or base.
91-000302-050-000_EP5962Englishmanual_Sep.02,2005.qxd 2/13/1950 7:21 PM Page 10 Telephone Operation Basic handset operation Making and answering calls To answer an incoming call, press LINE 1 or LINE 2. Press LINE 1 or LINE 2 to make a call on Line 1 or Line 2, then dial a number. Press OFF/CLEAR to hang up. To preview before dialing, enter digit(s) first, then press LINE 1 or LINE 2 to dial. Press OFF/CLEAR to make corrections as you enter the telephone number.
91-000302-050-000_EP5962Englishmanual_Sep.02,2005.qxd 2/13/1950 7:21 PM Page 11 Telephone Operation Basic handset operation Hold H VOL HOLD MUTE During a conversation, select HOLD to place a call on hold. CALL ON HOLD will be displayed for 4 seconds and an H will appear in the upper left corner of the display. Press the corresponding key (LINE 1 or LINE 2) to resume the call. NOTE: If the call is not resumed in five minutes the set will ring. The display will show CALL ON HOLD RING BACK!.
91-000302-050-000_EP5962Englishmanual_Sep.02,2005.qxd 2/13/1950 7:21 PM Page 12 Telephone Operation Basic base operation Making and answering calls Mute Headset Speakerphone To answer a call, lift the corded handset, press SPEAKor press HEADSET (if a headset is connected). ERPHONE, To make a call, lift the corded handset, press SPEAKERPHONE or press HEADSET, then dial a number. You may choose a line by pressing LINE 1 or LINE 2 before or after you choose your calling method.
91-000302-050-000_EP5962Englishmanual_Sep.02,2005.qxd 2/13/1950 7:21 PM Page 13 Telephone Operation Basic base operation Hold H VOL HOLD MUTE During a conversation, select HOLD to place a call on hold. CALL ON HOLD will be displayed for 4 seconds and an H will appear in the upper left corner of the display. Press the corresponding key (LINE 1 or LINE 2) to resume the call. NOTE: If the call is not resumed in five minutes the set will ring. The display will show CALL ON HOLD RING BACK!.
91-000302-050-000_EP5962Englishmanual_Sep.02,2005.qxd 2/13/1950 7:21 PM Page 14 Telephone Operation Options while on calls-Handset and Base Line 1 Flash RDL MENU CID Line 2 Flash Volume SPEA KE R VO E LUM Flash Volume To adjust volume Press VOLUME button(s) on the handset or the base to adjust listening volume. On the base, each button press raises or lowers the volume by one level. The handset volume button increases the volume.
91-000302-050-000_EP5962Englishmanual_Sep.02,2005.qxd 2/13/1950 7:21 PM Page 15 Telephone Operation Options while on calls-Handset and Base Switching between lines Line 1 Flash RDL MENU CID Line 2 Flash During a handset call, if you make or answer a call on another line, the line previously in use will be automatically placed on hold. You can press LINE 1 or LINE 2 at any time to switch to the call on the other line, whether you have selected HOLD or not, without dropping either call.
91-000302-050-000_EP5962Englishmanual_Sep.02,2005.qxd 2/13/1950 7:21 PM Page 16 Telephone Operation Intercom calls SPEA KE R VO Intercom calls Press the INTERCOM button at a handset or at the base. Scroll down to highlight the desired handset or base, or highlight GLOBAL PAGE to page all. Select OK to page. E LUM DID YOU KNOW? Pressing INTERCOM then 0 (for the base), 1-8 (for individual handsets), or the * button (for GLOBAL PAGE) will also make the intercom call.
91-000302-050-000_EP5962Englishmanual_Sep.02,2005.qxd 2/13/1950 7:21 PM Page 17 Telephone Operation Conference calls 3-way conference calls You can use both outside lines at the same time to set up a three-way conference call. CONF HOLD MUTE 1 Make or answer a call. 2 Select HOLD. 3 Make a call on the other line. 4 When the call is answered, select CONF. DROP HOLD MUTE 5 To end the 3-way conference call, select DROP then scroll down to the option you want.
91-000302-050-000_EP5962Englishmanual_Sep.02,2005.qxd 2/13/1950 7:21 PM Page 18 Telephone Operation Handset settings Ringers At this menu you can change ring volumes, or turn the ringers off. You can also select one of six ring melodies. You will hear an example of each ring volume level and ring type as you scroll through the choices. Settings are selectable for each line. Follow the menu instructions to select the volume and melody you prefer, then select OK or SAVE to confirm.
91-000302-050-000_EP5962Englishmanual_Sep.02,2005.qxd 2/13/1950 7:21 PM Page 19 Telephone Operation Base settings Ringers At this menu you can change ring volumes, or turn the ringers off. You can also select one of six ring melodies. You will hear an example of each ring volume level and ring type as you scroll through the choices. Follow the menu instructions to select the volume and melody you prefer, then select OK or SAVE to confirm.
91-000302-050-000_EP5962Englishmanual_Sep.02,2005.qxd 2/13/1950 7:21 PM Page 20 Directories Directories PAT JOHNSON 908-555-0100 ^ EDIT V Handset and Base directories There are separate directories in the handset and the base. Each directory can store up to 50 entries. Each entry can contain a number up to 32 digits and a name up to 16 letters long. A convenient search feature can help you find and dial numbers quickly (see page 22).
91-000302-050-000_EP5962Englishmanual_Sep.02,2005.qxd 2/13/1950 7:21 PM Page 21 Directories New directory entries Enter number, then select SAVE 5551234 PAUSE MENU To enter a number When the phone is idle, use the dial pad to enter up to 32 digits. When the number is complete, select SAVE. • Press CLEAR to erase digits if you make a mistake. • Select PAUSE to enter a dialing pause.
91-000302-050-000_EP5962Englishmanual_Sep.02,2005.qxd 2/13/1950 7:21 PM Page 22 Directories Directory search-Handset and Base Select MENU, then scroll to DIRECTORY. Select OK. You must use ^ or V to browse through the directory, or search to find a specific entry. You can press CLEAR at any time to exit the directory. To browse through the directory ^ FIND V To browse, use ^ or V to scroll through all entries one by one.
91-000302-050-000_EP5962Englishmanual_Sep.02,2005.qxd 2/13/1950 7:21 PM Page 23 Directories PAT WILLIAMS 555-1234 ^ EDIT To dial, delete or change entries V To dial a number When any directory entry is displayed: Select DEL to delete entry PAT WILLIAMS 555-1234 DEL • Press LINE 1 or LINE 2, or press SPEAKERPHONE, or lift the corded handset from the base, or press HEADSET if a headset is connected to the base. EDIT Select EDIT to change entry EDIT NOTE: Deleted entries cannot be recovered.
91-000302-050-000_EP5962Englishmanual_Sep.02,2005.qxd 2/13/1950 7:21 PM Page 24 Caller ID Logs Caller ID Logs CHRIS THOMPSON 908-555-0100 11:29 A Oct4 #01 How Caller ID works If you subscribe to Caller ID service provided by your local phone company, information about each caller will be displayed after the first or second ring.
91-000302-050-000_EP5962Englishmanual_Sep.02,2005.qxd 2/13/1950 7:21 PM Page 25 Caller ID Logs To review your call log- Handset and Base To review your call log RDL MENU CID To view your Caller ID log select CID, the most recent call is displayed first. Use ^ or V to scroll through the list as shown at left.
91-000302-050-000_EP5962Englishmanual_Sep.02,2005.qxd 2/13/1950 7:21 PM Page 26 Caller ID Logs CHRIS THOMPSON 908-555-0100 11:29 A Oct4 #01 ^ MENU V DIAL OPTIONS * DELETE CID 4 SAVE TO MEM 7 ^ OK# V To dial a call log entry-Handset and Base When any Caller ID screen is displayed on the handset, press SPEAKER or LINE 1 or LINE 2 to dial the number exactly as it appears on the screen.
91-000302-050-000_EP5962Englishmanual_Sep.02,2005.qxd 2/13/1950 7:21 PM Page 27 Caller ID Logs CHRIS THOMPSON LEFT A MESSAGE 908-555-0100 11:29 A Oct4 #01 ^ MENU V Messages with Caller ID-Handset and Base If a caller leaves a message, the Caller ID screen will display LEFT A MESSAGE beneath the caller’s name. To hear the message, press 1 (or select MENU, highlight PLAY MESSAGE, then select OK).
91-000302-050-000_EP5962Englishmanual_Sep.02,2005.qxd 2/13/1950 7:21 PM Page 28 Answering System Operation Mailbox buttons flash to announce new messages Answering System Operation Message capacity The answering system can record up to 99 messages for each line, depending on how long each message is. Individual messages can be up to 4 minutes long, but total maximum recording time for all messages is 25 minutes. Messages will remain available for replay until you delete them.
91-000302-050-000_EP5962Englishmanual_Sep.02,2005.qxd 2/13/1950 7:21 PM Page 29 Answering System Operation Day and time announcements RDL MENU CID To set day and time Before playing each message, the answering system announces the day and time the message was received. Highlight MAILBOXES DIRECTORY MAILBOXES SETUP HANDSET REGISTER ^ OK V Highlight SET DAY & TIME OK Select MENU, scroll to MAILBOXES, then select OK. Scroll to SET DAY/TIME, then select OK.
91-000302-050-000_EP5962Englishmanual_Sep.02,2005.qxd 2/13/1950 7:21 PM Page 30 Answering System Operation Select MENU, then highlight MAILBOXES DIRECTORY MAILBOXES SETUP BASE DISPLAY BASE-ID ^ OK Outgoing announcements V Highlight mailbox to modify PLAY MAILBOX 1 PLAY MAILBOX 2 SET DAY/TIME SETUP MAILBOX 1 ^ OK V Highlight REVIEW/CHNG OGA ANSWER + RECORD REVIEW/CHNG OGA SEC.
91-000302-050-000_EP5962Englishmanual_Sep.02,2005.qxd 2/13/1950 7:21 PM Page 31 Answering System Operation Base: Press mailbox button Message playback At the base, press a mailbox button to hear messages. At the handset, select MAILBOXES, then choose a mailbox. Messages are played back in order from newest to oldest. Handset: Select MENU, highlight MAILBOXES DIRECTORY MAILBOXES SETUP BASE DISPLAY BASE-ID ^ V OK • Before each message, you will hear the day and time it was received.
91-000302-050-000_EP5962Englishmanual_Sep.02,2005.qxd 2/13/1950 7:21 PM Page 32 Answering System Operation Select MENU, then highlight MAILBOXES Answering mode DIRECTORY MAILBOXES SETUP BASE DISPLAY BASE-ID ^ OK V Highlight mailbox to modify PLAY MAILBOX 1 PLAY MAILBOX 2 SET DAY/TIME SETUP MAILBOX 1 ^ OK In Answer + Record mode, callers are asked to leave a message. In Answer Only mode, callers hear an announcement but cannot leave messages.
91-000302-050-000_EP5962Englishmanual_Sep.02,2005.qxd 2/13/1950 7:21 PM Page 33 Answering System Operation Select MENU, then highlight MAILBOXES Number of rings before answer DIRECTORY MAILBOXES SETUP BASE DISPLAY BASE-ID ^ OK V At this menu you can select how the answering system answers incoming calls. Select - or + to highlight one of four options: • Answer calls after 2 rings.
91-000302-050-000_EP5962Englishmanual_Sep.02,2005.qxd 2/13/1950 7:21 PM Page 34 Answering System Operation Select MENU, then highlight MAILBOXES Audible message alert DIRECTORY MAILBOXES SETUP BASE DISPLAY BASE-ID ^ OK V Highlight mailbox to modify OK When the audible message alert is on, the telephone will beep every 10 seconds to alert you when there are new messages waiting. Select OFF or ON, then select OK.
91-000302-050-000_EP5962Englishmanual_Sep.02,2005.qxd 2/13/1950 7:21 PM Page 35 Answering System Operation Recording and playing memos and phone conversations Memos are messages you record yourself. They are saved, played back and deleted exactly like incoming messages. You can record a memo as a reminder to yourself, or leave a message for someone else if others in your household use the answering system. Note: You can also record a phone conversation. This is also known as 2way recording.
91-000302-050-000_EP5962Englishmanual_Sep.02,2005.qxd 2/13/1950 7:21 PM Page 36 Answering System Operation Select MENU, then highlight MAILBOXES Change security code DIRECTORY MAILBOXES SETUP BASE DISPLAY BASE-ID ^ OK V You must enter a security code for remote access to the answering system from another telephone. The security code is factory programmed to 5000, but you should change it to a number known only to you.
91-000302-050-000_EP5962Englishmanual_Sep.02,2005.qxd 2/13/1950 7:21 PM Page 37 Answering System Operation 1 Dial your telephone number from any touch-tone phone. Remote access 2 When system answers, enter 4-digit Remote Access Code (“5000” unless you have changed it). A 4-digit security code is required to access your answering system from any touch-tone phone. This code is “5000” by default; see page 36 to change it. 3 Enter remote commands (see list at right).
91-000302-050-000_EP5962Englishmanual_Sep.02,2005.qxd 2/13/1950 7:21 PM Page 38 Appendix Display screen status icons Status icons Line in use (line number shown in phone icon) or Base using answering system (handset or base number 1T Handset followed by “T”) HANDSET 1 RDL MENU Phone in use (intercom call); flashes when handset or base is being paged CID Battery power level (see below); Battery charging (animated display). (This icon is only on handset screen.
91-000302-050-000_EP5962Englishmanual_Sep.02,2005.qxd 2/13/1950 7:21 PM Page 39 Appendix Display screen messages-Handset and Base Screen display messages SPEA KE R VO E LUM PHONE ON The handset or base is in use. PHONE OFF The handset or base is on hook. DIRECTORY IS EMPTY You are accessing an empty directory. DIRECTORY IS FULL You are saving to a full directory. MICROPHONE MUTED The call is on mute. HANDSFREE ON You are using handset speaker.
91-000302-050-000_EP5962Englishmanual_Sep.02,2005.qxd 2/13/1950 7:21 PM Page 40 Appendix Alert tones and indicator lights Handset light flashes to announce new messages SPEA KE R VO Alert tones “Beep-Beep-Beep-Beep-Beep” (5 quick beeps) Handset battery is low. Place handset in base to charge the battery. “Beep” (Single beep) Handset registration or programming command successfully completed. “Beeeeeeeeep” (1 long beep) Error tone (current operation has been unsuccessful; try again).
91-000302-050-000_EP5962Englishmanual_Sep.02,2005.qxd 2/13/1950 7:21 PM Page 41 Appendix Adding new handsets Your telephone can accommodate up to eight cordless handsets. You can add new handsets (AT&T model EP590-2 sold separately) at any time, but each must be registered with the base before use. The handset provided with your EP5962 is automatically registered as Handset 1. Additional handsets will be assigned in the order they are registered (HANDSET 2, HANDSET 3, etc).
91-000302-050-000_EP5962Englishmanual_Sep.02,2005.qxd 2/13/1950 7:21 PM Page 42 Appendix Replacing a handset If you are replacing a handset on a system that has the maximum number of registered handsets (8) or wish to change the assigned handset number of your registered handset, you must first deregister all handsets and then re-register all handsets. NOTE: Use this option with EXTREME CAUTION. It will make all handsets unusable until each one has been reregistered.
91-000302-050-000_EP5962Englishmanual_Sep.02,2005.qxd 2/13/1950 7:21 PM Page 43 Appendix Re-Registering a handset You can re-register handsets after deregistration from the base. Or you can re-register handsets to a new base unit if you have replaced your base unit for any reason. During re-registration, you must enter the 15-digit ID number of the telephone base. To find this number, go to the base, select MENU, scroll down to DISPLAY BASE ID, then select OK.
91-000302-050-000_EP5962Englishmanual_Sep.02,2005.qxd 2/13/1950 7:21 PM Page 44 Appendix Charging a spare battery An optional spare battery (AT&T model 103, sold separately) can be kept charged in the base for quick replacement when a handset battery becomes depleted and for power failure operation. A spare battery requires at least 24 hours to reach full charge. Caution: Only the rechargeable handset battery (AT&T model 102) or optional replacement battery (AT&T model 103) can be charged in the base.
91-000302-050-000_EP5962Englishmanual_Sep.02,2005.qxd 2/13/1950 7:21 PM Page 45 Appendix In case of difficulty If you have difficulty with your phone, please try the suggestions below. For Customer Service, visit our web site at www.telephones.att.com, or call 1-800-222–3111. Telephone does not work at all • Make sure the battery is installed and charged correctly (see page 8). • Make sure the AC adapter is plugged into an outlet not controlled by a wall switch.
91-000302-050-000_EP5962Englishmanual_Sep.02,2005.qxd 2/13/1950 7:21 PM Page 46 Appendix In case of difficulty Incomplete messages • If a caller leaves a very long message, part of it may be lost when the system disconnects the call after 4 minutes. • If the caller pauses for more than 7 seconds, the system stops recording and disconnects the call. • If the caller's voice is very soft, the system may stop recording and disconnect the call.
91-000302-050-000_EP5962Englishmanual_Sep.02,2005.
91-000302-050-000_EP5962Englishmanual_Sep.02,2005.
91-000302-050-000_EP5962Englishmanual_Sep.02,2005.
91-000302-050-000_EP5962Englishmanual_Sep.02,2005.qxd 2/13/1950 7:21 PM Page 50 Appendix Remote access wallet card Use the wallet card below to help you remember commands to control your answering system from any touch tone telephone. Cut along dotted line Call your phone number, then enter your 4-digit access code (preset to 5000). NOTE: Messages are played back in order from newest to oldest. Action Remote Command Voice help menu ................5 Play messages ........................
91-000302-050-000_EP5962Englishmanual_Sep.02,2005.qxd 2/13/1950 www.telephones.att.com Copyright © 2005 Advanced American Telephones. All Rights Reserved. AT&T and the Globe Design are trademarks of AT&T Corp., licensed to Advanced American Telephones. Printed in China. Issue 4 AT&T 09/05.