
User Guide
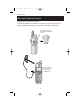
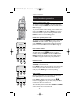
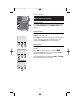
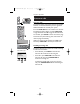

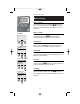

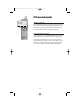
Table Of Contents
- E2525 manual
- Table of contents
- Quick reference guide
- Parts checklist
- Before you begin
- Telephone base installation
- Battery installation & charging
- Wall mounting
- Connect cords as shown, then press and slide down firmly so base is held securely on outlet mounting pegs
- Clip wall-mount bracket securely into notches on underside of base
- Plug short telephone line cord into telephone jack
- Plug power cord transformer into electrical outlet
- Place handset in base to charge for 8 hours before first use.
- Belt clip & optional headset
- Telephone Operation
- Phonebook
- Caller ID Logs
- Answering System Operation
- Appendix
- Display screen status icons
- Alert tones and indicator lights
- Adding new handsets
- Charging spare batteries
- In case of difficulty
- Telephone does not work at all
- Phone does not ring
- If you hear noise or interference during a call
- If you lose a call while using the handset
- Incomplete messages
- Difficulty hearing messages
- System does not answer after correct number of rings
- “CL” appears in message window
- System does not respond to remote commands
- Announcement message is not clear
- Index
- Technical specifications
- Remote access wallet card
- IMAGES
- E250 manual
16
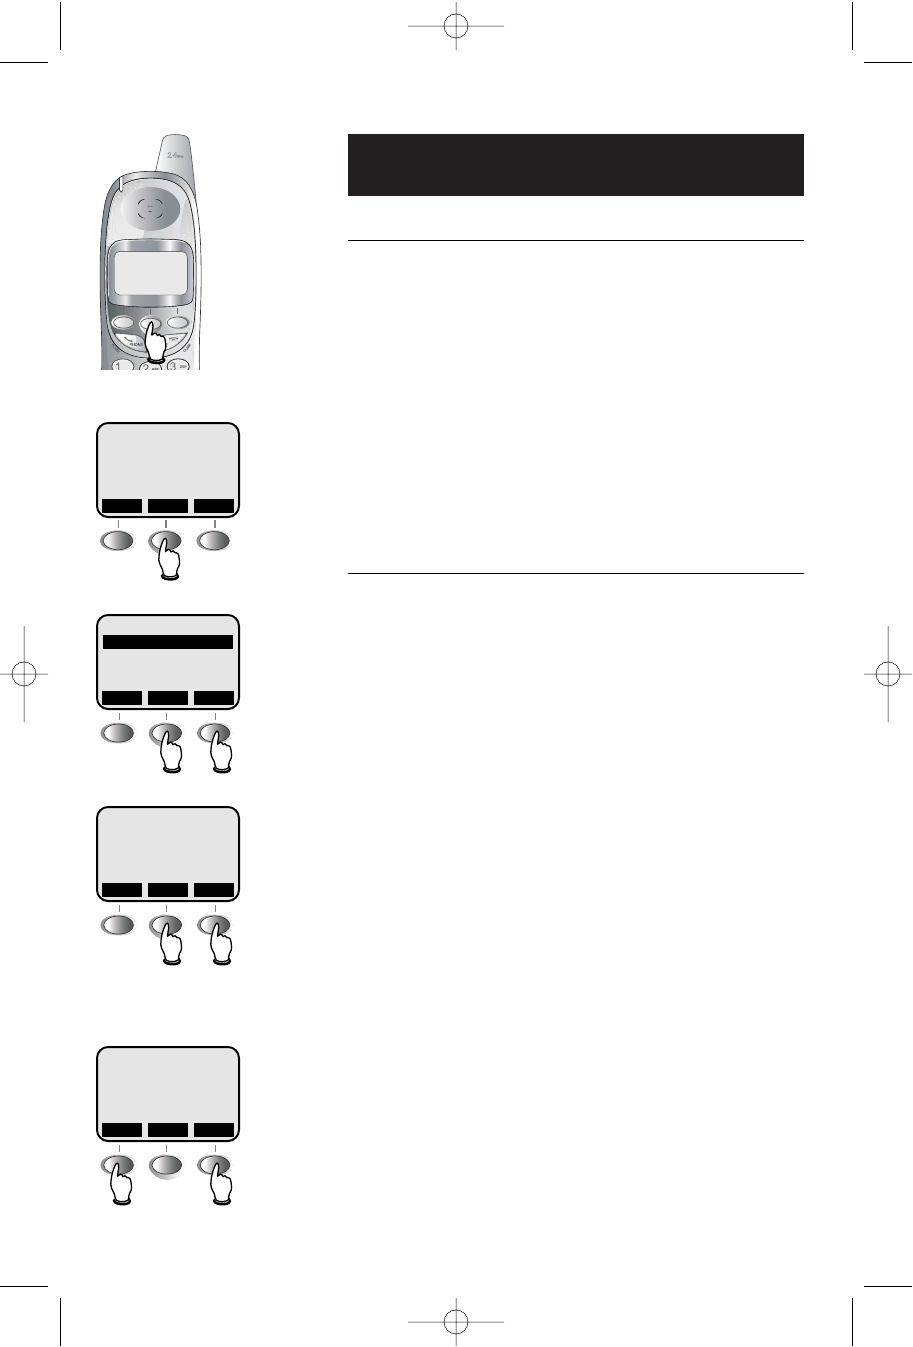
Telephone Operation
Handset clock settings
To set time
Follow steps at left to set the handset clock time. Use
the keypad to enter four digits (i.e., 09:15), then press
AM/PM to toggle the display between AM and PM.
When the correct time is displayed, press SAVE.
NOTE: You can choose to set the time manually, or
you can allow it to be set automatically with incoming
Caller ID information. The time will be set automatically
only if you subscribe to Caller ID service provided by
your local telephone company (see page 5).
To set the answering system clock, see page 25.
To turn clock on or off
The handset time display is optional. To turn it on or
off, select MENU, press V until CLOCK MODE is
highlighted, then press OK.
Press ON or OFF buttons to enable or disable the clock
display, then press OK.
HANDSET 1
SET TIME
HANDSET SETTINGS
CLOCK MODE
REGISTER
SET TIME
12:00 AM
Select MENU
Select SET TIME
Enter time, press AM/PM, then SAVE
To turn clock on or off
CLOCK ENABLE
ON
REDIAL MEMMENU
OFF ONOK
^ V
OK
<
AM/PMSAVE
ATT-2525CIB-d2.qxd 12/30/2003 6:28 PM Page 16