
User`s guide

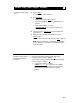
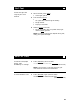
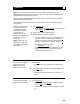
Table Of Contents
- Table of Contents
- Your 7406 Plus Voice Terminal
- What the Features Do
- How to Use the Features
- Voice Features
- Handset and Speaker
- Abbreviated Dialing (AD)
- Automatic Callback
- Bridging
- Call Coverage
- Call Forwarding All Calls
- Call Park
- Call Pickup
- Conference
- Drop
- Hold
- Intercom (Automatic/Dial)
- Last Number Dialed
- Leave Word Calling (LWC)
- Message
- Mute
- Priority Calling
- Reset Speakerphone
- Select Button
- Select Ring (and Ringer Volume)
- Self-Test
- Send All Calls
- Speaker
- Speakerphone
- Transfer
- Voice Message Retrieval
- Display Features
- Tones and Their Meanings
- Troubleshooting
- Key Words to Know
- Quick Reference Lists
1
2
1
2
●
●
●
●
Select Button
To adjust the
speakerphone to the
surrounding room
acoustics
Press [
Select ]
Green light next to [
Select ] goes on steadily
Press [
Speaker Reset Spkr
]
Green light next to [ Select ] goes off
Green light next to [
Speaker Reset Spkr
] flutters
intermittently
You hear a series of tones as the speakerphone
performs an acoustic test of the environment.
When the tones stop, your built-in speakerphone
is ready for use.
✔
You can use any of the following features by, first, pressing the Select Button
( [
Select ] ).
Then press one of these buttons:
1
2
3
4
Press [
Drop Test
] to initiate a self-test of your voice terminal lights, ringer, and
display. For procedures, see “Self-Test” in this section.
Press [
Conference Ring
] to select one of 8 personalized ringing patterns for your voice
terminal. For procedures, refer to “Select Ring” in this section.
Press [
Speaker Reset Spkr
] perform an acoustic test of the surrounding environment and
adjust the speakerphone for optimal performance. For procedures, refer to
“Reset Speakerphone” in this section.
Press a 2-level feature button to access the top-labeled feature. Use the
procedure below.
To use the Select Button
to access the top-labeled
feature on 2-level buttons
Press [
Select ] to access any of the top-labeled
features on buttons with split labels
Green light goes on
Press the split-labeled button whose top feature you
wish to use
Note: When you press the chosen feature button,
the green light for [
Select ] automatically goes off;
begin again at Step 1 to use another top-labeled
feature.
●
22