
Technical information


INSTALLATION AND ADMINISTRATION GUIDE
24
4. Mount the CD-ROM drive.
Refer to Sample Unix and Linux Mount Commands
(page 235) for additional information.
5. Change directory to the CD-ROM mount point by entering:
cd /mnt/cdrom
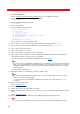
6. Run the installation program by entering:
./install.sh
7. Confirm your platform.
8. The list of available packages appears:
Available packages are:
s) Fax Server
v) Virtual Fax Server
a) Fax Client APIs
b) Dialogic Brooktrout TR1034-SR140 drivers
*) All packages
Q) quit
Enter package to install [s]:
Choose Fax Server (s) as the package to install.
9. Choose where you want to extract the temporary install files (The default location is /tmp).
10. Choose where you want to install the VSI-FAX system. (The default location is /usr/vsifax).
11. Let the setup create a group "vsifax".
12. Let the setup create a user "vsifax".
13. Agree to the conditions in the Software License Agreement.
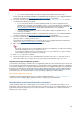
14. When asked for License information, enter the Serial Number and Activation Key you received when you
registered your software or when you asked for an upgrade.
To know how to get your Serial Number and Activation Key, refer to Prepare
.
Note
If you do not enter a Serial Number and Activation Key, an evaluation license will be installed. This license
allows you to test VSI-FAX and see if the product matches your needs. With such a license, you can use
VSI-FAX for 30 days. After that, you can renew it with another time-limited evaluation license or with a
production license.
The setup installs VSI-FAX Server.
15. Enter the information for the modem(s) you want to configure, if any.
Notes
If you are testing VSI-FAX with the loopback device or you are only planning to route faxes to email
addresses, you can skip this dialog box.
You can skip this part of the installation and add your fax modem devices later using the vfxadmin
command.
16. Enter your TSI and CSI strings.
Refer to Dialing properties .
17. Enter your SMTP server name.
18. Indicate if you reside in the United States or Canada.
19. Enter your country code, long distance access number, area code, local number length, dial prefix, and dial
suffix.
Refer to Dialing properties.
20. Enter your POP3 server name, POP3 user name, POP3 password, and confirm password.
Note
You need to create the POP3 user account only if the Email-to-Fax gateway integration will be used.