
User guide

9-20 Advanced Programming
77. In the Teach Window, select U-pass in the Available Patterns text box.
78. Use the Position Controls to center the camera crosshairs on the ULHC of the first
flip chip model in Pattern 3 on the Tutorial Board workpiece.
79. Click on Teach.
80. Choose Done.
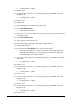
> Your program will look like this:
1 MEASURE FLOW RATE
2 LOOP PASS: FROM 1 TO 3
3 DO MULTIPASS: U-pass AT (x
1
, y
1
)
4 NEXT LOOP:
5 END:
81. Place the cursor on NEXT LOOP.
82. Click on Pattern on the Program Commands toolbar, and select Place Pattern.
83. In the Teach Window, select U-pass in the Available Patterns text box.
84. Use the Position Controls to center the camera crosshairs on the ULHC of the
second flip chip model in Pattern 3 on the Tutorial Board workpiece.
85. Click on Teach.
86. Use the Position Controls to center the camera crosshairs on the ULHC of the
remaining two flip chip models in Pattern 3 on the workpiece.
87. Click on Done when you have finished teaching the last two flip chips.
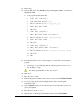
> You program will look like this:
1 MEASURE FLOW RATE
2 LOOP PASS: FROM 1 TO 3
3 DO MULTIPASS: U-pass AT (x
1
, y
1
)
4 DO MULTIPASS: U-pass AT (x
2
, y
2
)
5 DO MULTIPASS: U-pass AT (x
3
, y
3
)
6 DO MULTIPASS: U-pass AT (x
4
, y
4
)
7 NEXT LOOP:
8 END:
88. From the File menu, select Save.