® WiFi-g™ 54Mbps PCI AP/WLAN Adapter (WL-130g) User Guide
E1549 Checklist First Edition V1 April 2004 Copyright © 2004 ASUSTeK COMPUTER INC. All Rights Reserved. No part of this manual, including the products and software described in it, may be reproduced, transmitted, transcribed, stored in a retrieval system, or translated into any language in any form or by any means, except documentation kept by the purchaser for backup purposes, without the express written permission of ASUSTeK COMPUTER INC. (“ASUS”).
Contents Features Notices ............................................................................................ v Safety statements ........................................................................... vi About this guide ............................................................................ viii ASUS contact information .............................................................. ix WiFi-g™ specifications summary ....................................................
Contents Safeguards Chapter 4: Software support 4.1 4.2 4.3 4.4 4.5 4.6 Support CD information ...................................................... 4-2 Control Center .................................................................... 4-3 4.2.1 Control Center icons .............................................. 4-3 4.2.2 Right-click menu .................................................... 4-4 4.2.3 Left-click menu ....................................................... 4-4 Wireless Settings .........
Notices Federal Communications Commission Statement This device complies with FCC Rules Part 15. Operation is subject to the following two conditions: • This device may not cause harmful interference, and • This device must accept any interference received, including interference that may cause undesired operation. This equipment has been tested and found to comply with the limits for a class B digital device, pursuant to Part 15 of the Federal Communications Commission (FCC) rules.
Safety statements Regulatory Information/Disclaimers Installation and use of this Wireless LAN device must be in strict accordance with the instructions included in the user documentation provided with the product. Any changes or modifications (including the antennas) made to this device that are not expressly approved by the manufacturer may void the user’s authority to operate the equipment.
Safety statements Caution Statement of the FCC Radio Frequency Exposure This Wireless LAN radio device has been evaluated under FCC Bulletin OET 65C and found compliant to the requirements as set forth in CFR 47 Sections 2.1091 and 15.247(b)(5) addressing RF Exposure from radio frequency devices. The radiation output power of this Wireless LAN device is far below the FCC radio frequency exposure limits.
About this guide This user guide contains the information you need to install and configure your ASUS WiFi-g™ card. How this guide is organized This guide contains the following parts: • Chapter 1: Product introduction This chapter describes the physical features of the ASUS WiFi-g™ card. The chapter also presents the package contents, LED indicators, and recommended network settings. • Chapter 2: Installation This chapter provides step by step instructions on installing the card to your system.
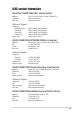
ASUS contact information ASUSTeK COMPUTER INC. (Asia-Pacific) Address Telephone Web site 150 Li-Te Road, Peitou, Taipei, Taiwan 112 +886-2-2894-3447 www.asus.com.tw Technical Support Telephone MB/Component Notebook Server/PC Networking Support fax +886-2-2890-7121 (English) +886-2-2890-7122 (English) +886-2-2890-7123 (English) +886-2-2890-7902 (English) +886-2-2890-7698 ASUS COMPUTER INTERNATIONAL (America) Address Fax E-mail Web site 44370 Nobel Drive, Fremont, CA 94538, USA +1-510-608-4555 tmd1@asus.
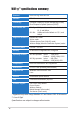
WiFi-g™ specifications summary Standard IEEE 802.11g; IEEE 802.11b Interface PCI 2.2 Technology Octogonal Frequency Division Multiplexing (OFDM) Direct Sequence Spread Spectrum (DSSS) Data transfer rate 802.11g: 802.11b: 54Mbps with auto-fallback to 48, 36, 24, 18, 12, 9, and 6Mbps 11Mbps with auto-fallback to 5.5, 2, and 1Mbps Supported networks Infrastructure mode Ad-hoc mode Software Access Point (Soft AP) mode* Wireless Bridge (Wireless Distribution System) mode* Frequency band 2.4 GHz ~ 2.
Chapter 1 This chapter describes the physical features of the ASUS WiFi-g™ card. The chapter also presents the package contents, LED indicators, and recommended network settings.
1.1 Welcome! Thank you for choosing the ASUS WiFi-g™ card! The WiFi-g™ card is an easy-to-install and use wireless local area network (WLAN) card designed for home or office use. Conforming to IEEE 802.11g standard for WLAN, the ASUS WiFi-g™ card is capable of up to 54Mbps data transmission rate using the Direct Sequence Spread Spectrum (DSSS) and the Octogonal Frequency Division Multiplexing technologies. This card is backward compatible with the earlier IEEE 802.
1.3 Features 54Mbps speed advantage With data transmission rate up to five times faster than IEEE 802.11b standards, the WiFi-g™ card breaks the wireless data speed barrier to give you faster Internet connection and file sharing capabilities. One Touch setup wizard Designed for novice home users and experts alike, the One Touch setup wizard guides you through the entire setup process without the hassles of configuring confusing network settings.
1.4 Card layout Metal bracket WiFi-g™ AIR LED Antenna connector PCI connectors LED indicators The card comes with a green data transmission LED indicator labeled AIR. Refer to the table below for LED indications. LED AIR 1-4 Status Indication On The WiFi-g™ card is on but has no data activity. Off The WiFi-g™ card is off. Flashing The WiFi-g™ card is transmitting and/or receiving data.
1.5 Recommended network setup You can use the ASUS WiFi-g™ card in different wireless network configurations. We recommend that you select the most appropriate WLAN configuration before installing the card. The following descriptions are for reference only and may not exactly match your actual network configuration. 1.5.1 Ad-hoc mode When in Ad-hoc mode, the WiFi-g™ card connects to another wireless device. No access point (AP) is present in this wireless environment.
1.5.3 Soft Access Point (Soft AP) You can configure the ASUS WiFi-g™ card as software access point (Soft AP). In Soft AP mode, the card is capable of supporting an unlimited number of wireless clients as it becomes the access point connected to a wired (using an onboard LAN adapter) or wireless network. Wireless clients connect to the WiFi-g™ card for data transfer, Internet connection, printer access, etc.
1.5.4 Wireless bridge (Wireless Distribution System) In a wireless bridge setup, the WiFi-g™ card connects two or more APs while maintaining connection to its wireless clients. The wireless bridge feature of the WiFi-g™ is a cost-effective solution for integrating several wireless networks.
1-8 Chapter 1: Product introduction
Chapter 2 This chapter provides step by step instructions on installing the card to your system. This part also provides information on installing the card drivers and software applications using the support CD.
2.1 Card installation 2.1.1 System requirements Before installing the WiFi-g™ card, make sure that your system meets the following requirements.
A WiFi-g™ card installed to an ASUS motherboard 2.1.3 Placing the antenna The WiFi-g™ card comes with an omni-directional and moveable dipolar antenna to maximize the card coverage. Place the antenna at an elevated location to receive or transmit better signal. Do not place the antenna under your table or in a closed compartment. The speed of wireless transmission decreases as you move farther from the access point.
By default, the device automatically adjusts the data rate to maintain an operational wireless transmission. Therefore, a wireless device that is close to the access point may operate at higher speeds while a wireless device far from the access point may operate at lower speeds. Site survey A site survey (utility provided with the ASUS WiFi-g™ card) analyzes the installation environment and recommends the best location for wireless LAN devices and access points. 2.
Chapter 3 This chapter provides information on how to set up the card in your home or office network using the setup wizard.
3.1 Setting the card in your home After you have installed the card drivers and utilities to your system, you are now ready to setup the WiFi-g™ card in your home network. Windows® XP wireless options When you are using Windows® XP, a Wireless Option window appears during startup. Select “Only use ASUS utilities and disable XP wireless function”, then click OK. Make sure you select the ASUS utilities option to avail of the WiFi-g™ soft AP features. 3.2 One Touch wizard 3.2.
3.2.2 Creating your own wireless LAN You can create your own wireless local area network (WLAN) in your home using the WiFi-g™ card Software Access Point (Soft AP) feature. Create your own WLAN if: 1. you do not have an existing access point in your home network 2. your computer is connected to the Internet and you intend to share the connection to other computers in your home (other computers must have an installed IEEE 802.11b/g wireless LAN adapter such as Centrino notebooks or wireless-enabled PDAs) 3.
4. The wizard configures the WiFi-g™ card wireless LAN settings. Click Finish to close the wizard, or Next to setup your Internet and home network settings. 5. Click the balloon in the Windows® taskbar after you changed the WLAN settings. 6. A Wireless Network Connection Status window appears. Configure the wireless LAN settings from this window, then click Close. 7. Click Next to setup your Internet and home network.
8. The wizard checks your Internet connection. Select the Check or create a new Internet connection right now option to check/create an Internet connection. Otherwise, select the My computer is connecting to the Internet now option to continue. Click OK when finished. Selecting Check or create a new Internet connection right now opens a Network Connections window. Change or set your Internet connections from this window. 9. The wizard selects the current Internet connection from the Connections field.
11. A window displays the WiFi-g™ card settings. All computers in your home (with wireless capability) must have the same settings with the WiFi-g™ card to establish connection to the Internet. Click to close the window. 3.2.3 Connecting to an access point If you have an existing access point in your home, follow these instructions to connect the WiFi-g™ card to the access point. 1. Select the Connect to other Wireless LAN (Station) option from the setup wizard window, then click Next. 2.
3. The wizard displays the WiFi-g™ connection status with the selected AP. If no connection is established, click the Back button to scan other access point(s), then repeat the process. Click Next to setup the TCP/IP settings. 4. Configure the WiFi-g™ card TCP/IP settings, then click Finish to close the wizard. If the AP has an enabled DHCP server, select Obtain an IP address automatically. Otherwise, assign the IP address manually by entering the values in the IP address field.
3.2.4 Connecting to another wireless device If no access point or Internet connection is present in your home network, you can use the WiFi-g™ card to connect to other WLAN-enabled computers for file sharing. This is wireless LAN network is called an Ad-hoc network. To connect to another WLAN-enabled computer: 1. Select the Connect to other Wireless LAN (Station) option from the setup wizard window, then click Next. 2.
3. The wizard displays the WiFi-g™ connection status with the selected wireless device. If no connection was established, click the Back button to scan other wireless device(s), then repeat the process. Click Next to setup the TCP/IP settings. 4. Configure the WiFi-g™ card TCP/IP settings, then click Finish to close the wizard. In an Ad-hoc network, you must specify the WiFi-g™ card IP address manually.
3.3 Setting the card in your office If you are familiar with wireless network settings, you can configure the WiFi-g™ card using the Office User (Advanced Setup) option in the setup wizard. To setup the card using the Customized option: 1. Launch the setup wizard following the instructions in section 3.2.1. 2. When the setup wizard welcome window appears, select Create a new wireless LAN (AP) from the Operation Mode field, then select Customized (Office and advanced users). 3. Click Next. 4.
6. Adjust the WEP encryption settings using this window when WEP is enabled, then click Next. 7. The wizard shows the WiFi-g™ card wireless LAN settings. Click Finish to close the wizard or Next to setup your Internet and home network settings. Launch the wizard again if you wish to change the WiFi-g™ card SSID, channel, and WEP encryption settings. 8. The wizard checks your Internet connection. Select the Check or create a new Internet connection right now option to check/create an Internet connection.
9. A window displays the WiFi-g™ card settings. All computers in your home (with wireless capability) must have the same settings with the WiFi-g™ card to establish connection to the Internet. Click to close the window. The Windows® Network Setup Wizard appears. Use this utility to set up your Internet connection, files, and printer sharing.
Chapter 4 This chapter provides information on several software applications included in the WiFi-g™ support CD.
4.1 Support CD information The support CD that comes with the WiFi-g™ card package contains useful software applications for configuring and setting-up the card. The following applications are automatically installed when the WiFi-g™ card driver is installed to your system. Control Center Use this utility to launch the Wireless Settings, Mobile Manager, and Site Monitor applications. This utility also provides Internet connection and link quality icon indications in the Windows® taskbar.
4.2 Control Center The Control Center utility is an application launcher and Internet connection/link quality indicator in one. During system startup, the Control Center launches automatically and displays an icon in the Windows® taskbar. 4.2.1 Control Center icons The Control Center icon changes automatically to indicate the WiFi-g™ card mode, Internet connection status, and link quality to an access point or wireless device. Refer to the table below for Control Center icon indications.
4.2.2 Right-click menu Right-clicking the Control Center icon displays the WiFi-g™ card software applications. Refer to the succeeding sections for details on these applications. 4.2.3 Left-click menu Left-clicking the Control Center icon displays the left-click menu. Search & Connect – View available wireless networks within range. Wireless Option – This option allows you to select the utilities use.
4.4 Mobile Manager The Mobile Manager is a convenient tool to setup and manage network location settings. This utility allows users to configure multiple alternative configurations for different locations. You need to set up this utility once so you can easily switch configurations when you change your location. To launch the Mobile Manager utility: 1. Click the Windows® Start button.
4.5 Site Monitor The Site Monitor utility measures the signal-to-noise (SNR) values of all available wireless networks. Use this utility to determine the best placement of access points in a wireless network. To launch the Site Monitor: 1. Click the Windows® Start button, then select Programs > ASUS Utility > WLAN Card > Site Monitor, or Right-click the Control Center icon on the Windows taskbar, then select Site Monitor. 2. Click OK when the Site Survey Message window appears.
4.6 Other menu options 4.6.1 Activate Configuration This option allows you to select the wireless profile to use. 4.6.2 Help Menu The Control Center utility has a Help menu to guide you in using the Control Center and Wireless Settings applications. Right-click the Control Center icon, select Help, then select an application to display the help window. 4.6.3 Preferences The Preferences window allows you to customize the Control Center settings. 4.6.
4-8 Chapter 4: Software support
Appendix The Appendix lists the wireless LAN channels available for use in your country or location.
Wireless LAN channels The IEEE 802.11b/g standard for wireless LAN allocated the 2.4 GHz frequency band into 13 overlapping operating channels. Each channel corresponds to a different set of frequencies. The table below shows the center frequencies of each channel. Channel Center Frequency Channel Center Frequency 1 2.412 GHz 8 2.447 GHz 2 2.417 GHz 9 2.452 GHz 3 2.422 GHz 10 2.457 GHz 4 2.427 GHz 11 2.462 GHz 5 2.432 GHz 12 2.467 GHz 6 2.437 GHz 13 2.472 GHz 7 2.
Country/Region (Regulating Body) Available Channels Hungary (RTT&E/EMC/LVD) Channels 1 to 13 Iceland (RTT&E/EMC/LVD) Channels 1 to 13 Ireland (RTT&E/EMC/LVD) Channels 1 to 13 Italy (RTT&E/EMC/LVD) Channels 1 to 13 Japan (TELEC) Channels 1 to 13 Luxembourg (RTT&E/EMC/LVD) Channels 1 to 13 Malaysia (SIRIM/CMC) Channels 1 to 13 Mexico Channels 9 to 11 Netherlands Antilles (RTT&E/EMC/LVD) Channels 1 to 13 Netherlands/Holland (RTT&E/EMC/LVD) Channels 1 to 13 New Zealand (PTC) Channels 1 to
A-4 Appendix