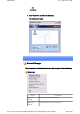
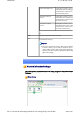
Introduction 第 193 頁,共 224 頁 3. Enter "Pocket PC", and then hit the [Enter] key The new name will appear. Bluetooth Manager This section provides detailed information on the settings categories in Bluetooth Manager. Main menu Category Description Bluetooth Settings Opens [Bluetooth Settings] window. Wireless File Transfer Open the [Wireless File Transfer] window. file://C:\Documents and Settings\anitachou\Local Settings\Temp\~hh114B.
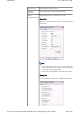
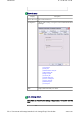
Introduction 第 194 頁,共 224 頁 Remote Camera Open the [Remote Camera] window. Add New Connection Opens the [Add New Connection Wizard] window. Device Displays Bluetooth device information on your PC. Properties&Security [General] tab Allows you to confirm the name, address and other settings displ other devices. Note z z [Device Name] is the only category able to be changed. If y wish to change the name of a device, enter the new name, a click on the [OK] or [Apply] button.
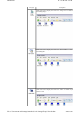
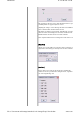
Introduction 第 195 頁,共 224 頁 Note z Click on the [Default] button to restore the initial settings. Category Nondiscoverable Discoverability mode mode Discoverable mode Connectability mode Description Other devices will not be able to detect yours. Other devices will be able to detect yours. Nonconnectable mode Other devices will not be able to connect to yours.1) Connectable mode Other devices will be able to connect to yours.
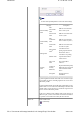
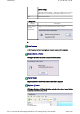
Introduction 第 196 頁,共 224 頁 Important z Communication using Bluetooth will be impossible once it been turned off. When you next wish to use Bluetooth, plea right-click on the Bluetooth icon in the task tray, and then c [Power ON]. → (Turned on) Service Properties Ensures security against various kinds of access from remote dev Here you can enable or disable the following four typical service are accessed remotely.
Introduction 第 197 頁,共 224 頁 PAN Networking Service Ticking the box enables a (server function that allows networking to performed from a remote device u PAN Networking Service. Bluetooth COM Port Service Ticking the box enables a (server function that allows COM Service performed from a remote location the Serial Port Service. AV Remote Control Service Ticking the box enables a (server function that allows remote contro performed from a remote device u AV Remote Control Service.
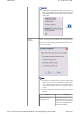
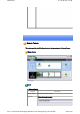
Introduction 第 198 頁,共 224 頁 Bluetooth menu Category Description Device Discovery Detects Bluetooth devices. Configuration Allows detailed setting of categories related to Bluetooth Informati Exchanger. -[General] tab -[Mode] tab -[Inbox/Business Card] tab -[Shared folder] tab -[Image box] tab -[Associate] tab -[Transfer mode] tab -[Service security] tab -[Service class] tab -[Information] tab -[Version] tab Help Displays Bluetooth Utility User Guide.
Introduction 第 199 頁,共 224 頁 Category Description Click on the icon to display a list of devices. "Image box" is a folder on transferring images. Click on the icon to display a list of devices. "Shared folder" is a share transferring files. Click on the icon to display a list of devices. "Inbox" is a folder on you business cards. file://C:\Documents and Settings\anitachou\Local Settings\Temp\~hh114B.
Introduction 第 200 頁,共 224 頁 Remote Camera This section provides detailed information on the settings categories in Remote Camera. Main window Menu ■[Bluetooth] menu Category Description Device Search Searches for remote cameras. Properties [Filter for Search Devices] file://C:\Documents and Settings\anitachou\Local Settings\Temp\~hh114B.
Introduction 第 201 頁,共 224 頁 The program may discover devices other than digital cameras, depe on which profiles are supported by those devices. Adjusting the setting to "Loose filtering" will increase the likelihoo devices other than those intended will be detected. The further you slide the setting towards "Tight filtering", the strict will be the criteria determining device detection, and the lower the likelihood will be that irrelevant devices will be included.
Introduction 第 202 頁,共 224 頁 [Inbox settings] Opens the "Browse folders..." dialog box and allows you to select t folder where you would like your captured images to be saved. Exit Exits Remote Camera. ■[Help] menu Category Image monitor version information Description Displays version information for the image monitor. List of cameras A list of cameras that have been registered as remote cameras will be displayed. [Camera Search...
Introduction 第 203 頁,共 224 頁 Note z A folder for saving your images will be created automatically. Camera operation window Camera images Images as seen through the lens of your remote camera will be displayed. Display magnification The size of the operating window display can be adjusted from 100% (1x) to 300% (3x). Important file://C:\Documents and Settings\anitachou\Local Settings\Temp\~hh114B.
Introduction 第 204 頁,共 224 頁 z Increasing the size of the operating window will impede its ability to display image and will have an adverse effect on other processes being performed by your PC. Pl adjust the magnification as appropriate for your intended use. [Explorer...] button Clicking on this button will display the folders on the hard drive where images that have transferred to the PC have been stored.
Introduction 第 205 頁,共 224 頁 This section provides detailed information on the settings categories in Bluetooth Local COM Main window Port Displays a list of configured ports. Description Displays the function of each port. Ports displayed as "Toshiba BT Port (COMxx)" are TOSHIBA Bluetooth virtual COM p Owner Displays the application used to create those COM ports. The following information will appear for ports created by Bluetooth Local COM.
Introduction 第 206 頁,共 224 頁 Note z OK You can only delete COM ports created by Bluetooth Local COM. Click on this button to confirm settings information, and close the Bluetooth Local COM window. Wireless File Transfer This section provides detailed information on the settings categories in Wireless File Transfe Main window Files/folders Displays a list of files/folders to be sent. Devices to which data can be sent Displays other devices to which you are able to send files.
Introduction 第 207 頁,共 224 頁 Connection method Displays method used to connect to other devices. Note z If a device to which you would like to send data is not listed, you can click on the [Search] button to search for other devices. Function buttons Category Description Add Displays the window below, from where you can add files and/or folders yo would like to send. Delete By selecting a file from the list and clicking on the "Delete" button, you can remove that file (i.e.
Introduction 第 208 頁,共 224 頁 to application.
Introduction 第 209 頁,共 224 頁 Bluetooth Settings Clicking on the [New Connection] button brings up the message "Unable to prepare Bluetooth." z The wireless communication switch is turned off. Please switch it on. Remote device(s) cannot be detected z The other device(s) may have been set to Non -discoverable mode. Please check the mode settings on the device.
Introduction 第 210 頁,共 224 頁 z A maximum of 64 virtual COM ports can be added. You will be unable to add ano port if 64 ports have already been configured. Using a wireless modem station Important z Please refer to " What you need to know about using Bluetooth " for an understandi the basic concepts to be aware of when using Bluetooth.
Introduction 第 211 頁,共 224 頁 Cannot connect to the Internet z The telephone number of the connection (i.e., the telephone number for the access of your Internet service provider) may not be correct. Please check the telephone number. z The user ID and/or password for the provider with whom you have signed up may been entered incorrectly. Please check the user ID and password. The default connection may have been configured with different settings.
Introduction 第 212 頁,共 224 頁 3. Select the [Send] tab, and then confirm that "Enable device to send" has be checked. 4. Select the [Receive] tab, and then confirm that "Enable device to receive" h been checked (when you wish to receive faxes) file://C:\Documents and Settings\anitachou\Local Settings\Temp\~hh114B.
Introduction 第 213 頁,共 224 頁 5. Click on the [OK] button Using an access point Important z Please refer to " What you need to know about using Bluetooth " for an understandi the basic concepts to be aware of when using Bluetooth. Access point cannot be detected z If the access point is connected to and is being used by another device, the access p will be undetectable even if you search for it.
Introduction 第 214 頁,共 224 頁 broken. Please replace the cable with another one. z The access point may not have been configured correctly, and may not be able to maintain the connection to the LAN. Please refer to the product instruction manual for information on how to configure access point.
Introduction 第 215 頁,共 224 頁 Using a Bluetooth Headset Important z Please refer to " What you need to know about using Bluetooth " for an understandi the basic concepts to be aware of when using Bluetooth. Bluetooth Headset cannot be detected z If the Bluetooth Headset is connected to and is being used by another device, the Bluetooth Headset will be undetectable even if you search for it.
Introduction 第 216 頁,共 224 頁 the basic concepts to be aware of when using Bluetooth. Keyboard or mouse cannot be detected z If the keyboard or mouse is connected to and is being used by another device, the keyboard or mouse will be undetectable even if you search for it. Cannot connect to keyboard or mouse z If the keyboard or mouse is connected to and is being used by another device, no o device will be able to connect to the keyboard or mouse.
Introduction 第 217 頁,共 224 頁 Using a PDA Important z Please refer to " What you need to know about using Bluetooth " for an understandi the basic concepts to be aware of when using Bluetooth. Cannot make an ActiveSync connection z Please confirm that you have installed ActiveSync v3.7 or higher on your PC. z ActiveSync is installed to COM7 as a default. Please refer to " Synchronising information using ActiveSync " and re-configure your ActiveSync connection.
Introduction 第 218 頁,共 224 頁 If the mobile telephone is connected to and is being used by another device, the mo telephone will be undetectable even if you search for it. Cannot connect to mobile telephone z If the mobile telephone is connected to and is being used by another device, no oth device will be able to connect to the mobile telephone. Cannot send images to mobile telephone z Please use the appropriate transfer method, according to the profiles supported by y mobile telephone.
Introduction 第 219 頁,共 224 頁 The [Fax properties] window will appear. 2. Select the [Device] tab, right -click on the modem you wish to use, and the on [Properties] 3. Select the [Send] tab, and then confirm that "Enable device to send" has be checked. file://C:\Documents and Settings\anitachou\Local Settings\Temp\~hh114B.
Introduction 第 220 頁,共 224 頁 4. Select the [Receive] tab, and then confirm that "Enable device to receive" h been checked when you wish to receive faxes) 5. Click on the [OK] button Glossary This glossary provides definitions for Bluetooth -related terminology. You will be able to look up the meanings of any uncertain terms here. A2DP Profile Abbreviation of Advanced Audio Distribution. A Bluetooth profile allowing you to adjust the sound quality of wireless headsets and ot audio devices.
Introduction 第 221 頁,共 224 頁 control functions to be sent and received. Remote control commands can be received by Bluetooth Utility. Bluetooth Profile A specification that guarantees the connection to the service function of a remote Blueto device. For a Bluetooth device to send and receive information to and from another device, both devices must support shared profiles designated for each function, such as dial -up networking, faxing, printing and human interface devices.
Introduction 第 222 頁,共 224 頁 GAVDP Profile Abbreviation of Generic Audio -Video Distribution Profile. This is a Bluetooth profile. HCRP Abbreviation of Hardcopy Cable Replacement Profile. A Bluetooth profile that establish connection to a device only when you print, unlike SPP (Serial Port Profile). HID Profile Abbreviation of Human Interface Device Profile. A Bluetooth profile that enables you to connect to a wireless mouse, keyboard or other i device. LAP Abbreviation of LAN Access Profile.
Introduction 第 223 頁,共 224 頁 Passkey Also known as a PIN code This is a password consisting of up to 16 alphanumeric characters that enables a connec to be established to a wireless device. You need to know the passkey in order to connec device that requires authentication. Even when the authentication setting has been disabled in the User Mode Properties of t Bluetooth Utility, the passkey entry dialog box will appear automatically if authenticatio required, enabling you to authenticate a device.
Introduction 第 224 頁,共 224 頁 Names, (e)mail addresses, telephone numbers and other information are exchanged in th form of electronic business cards (in *.vcf format), allowing all parties to easily register other's data in their address books. The standard is extensively compatible with Microsoft Outlook, Lotus Organizer and oth mail/schedule management software. file://C:\Documents and Settings\anitachou\Local Settings\Temp\~hh114B.
FEDERAL COMMUNICATIONS COMMISSION INTERFERENCE STATEMENT This equipment has been tested and found to comply with the limits for a Class B digital device, pursuant to Part 15 of the FCC Rules. These limits are designed to provide reasonable protection against harmful interference in a residential installation. This equipment generates, uses and can radiate radio frequency energy and, if not installed and used in accordance with the instructions, may cause harmful interference to radio communications.
Quick Start Guide - Introduction 第 1 頁,共 160 頁 Introduction The Quick Start Guide is intended to those who wish to get started right away using Bluetooth, and describes basic concepts to be aware of as well as ways to connect to Bluetooth devices. The Quick Start Guide comprises the following items. What you need to know about using Bluetooth Describes the basic concepts you need to be aware of when using Bluetooth devices. It is recommended that you read this section before starting the set-up process.
Quick Start Guide - Introduction z z 第 2 頁,共 160 頁 and telephone number of your provider s access point before you begin the set up process. Please refer to your instruction manual for information on connecting the modem station to a telephone line. A Bluetooth passkey (PIN code) is required for you to connect to the modem station. Please make a note of your Bluetooth passkey before you start the set-up process. Setting up the modem station Procedure 1. Turn on the wireless modem station 2.
Quick Start Guide - Introduction 第 3 頁,共 160 頁 The [Add New Connection Wizard (Searching for Bluetooth devices)] window will appear. 4. Select the device name of the wireless modem station from [Device List], and then click on the [Next] button The [Add New Connection Wizard (Searching for Services)] window will appear. file://C:\Documents and Settings\anitachou\Local Settings\Temp\~hh3F24.
Quick Start Guide - Introduction 第 4 頁,共 160 頁 Once a service has been detected successfully, connection to the device and COM port creation will be performed automatically, after which the [Add New Connection Wizard (Modem Settings)] window will appear. 5.
Quick Start Guide - Introduction 第 5 頁,共 160 頁 Note { Please refer to the modem or mobile phone instruction manual for further details on the initialization commands. 7. Enter the connection name (optional), telephone number (of your provider's access point), user name and password (as issued by your provider), and then click on the [Finish] button. Important { The sample entries shown in the window are provided solely for purpose of explanation.
Quick Start Guide - Introduction 第 6 頁,共 160 頁 Connecting to the Internet You can connect to the Internet by following the procedure below if the connection destination registered when you configured the wireless modem has been set as the default connection destination. 1. Start your browser, e -mail application or other application Important { Please enter the e-mail settings separately if you are going to use e-mail (the setup method will vary with the application). 2.
Quick Start Guide - Introduction 第 7 頁,共 160 頁 Please click on the [Disconnect] button when you want to disconnect from the Internet. Alternatively, please right-click on the icon, and then click on [Disconnect]. Note z You can start an application to make an automatic connection to the Internet, but you can also make a manual connection using the connection destination icon. The procedure is described below. 1.
Quick Start Guide - Introduction 第 8 頁,共 160 頁 If the connection has been established successfully, the connection icon and task tray will appear as shown below. You will be able to browse Web pages using your browser and send and receive email. Important { Please enter the e-mail settings separately if you are going to use e-mail (the setup method will vary with the application). 2. End the connection Right-click on the icon, and then click [Disconnect] to end the connection.
Quick Start Guide - Introduction 第 9 頁,共 160 頁 When the icon appears as shown below, the connection will have ended. Connecting to the Internet using a mobile telephone [DUN] This section describes how to connect to the Internet via a telephone line, using a mobile telephone. →Configuring a mobile telephone for use as a modem →Connecting to the Internet Important z In order to connect to the Internet, you must have already signed up with a provider and obtained a connection ID and password.
Quick Start Guide - Introduction 第 10 頁,共 160 頁 2. Right-click on the Bluetooth icon in the task tray, and then click on [Add New Connection] Note { Alternatively, click [Start]→[All Programs]→[Bluetooth]→[Bluetooth Settings], and then click on [New Connection] from the active [Bluetooth Settings] window. The [Add New Connection Wizard (Welcome to the Add New Connection Wizard)] window will appear. 3.
Quick Start Guide - Introduction 第 11 頁,共 160 頁 4. Select the device name of the mobile telephone from [Device List], and then click on the [Next] button The [Add New Connection Wizard (Searching for Services)] window will appear. file://C:\Documents and Settings\anitachou\Local Settings\Temp\~hh3F24.
Quick Start Guide - Introduction 第 12 頁,共 160 頁 Once a service has been detected successfully, connection to the device and COM port creation will be performed automatically, after which the [Add New Connection Wizard (Modem Settings)] window will appear. 5.
Quick Start Guide - Introduction 第 13 頁,共 160 頁 Note { Please refer to the modem or mobile phone instruction manual for further details on the initialization commands. 7. Enter the connection name (optional), telephone number (of your provider's access point), user name and password (as issued by your provider), and then click on the [Finish] button. Important { The sample entries shown in the window are provided solely for purpose of explanation.
Quick Start Guide - Introduction 第 14 頁,共 160 頁 1. Start your browser, e -mail application or other application Important { Please enter the e-mail settings separately if you are going to use e-mail (the setup method will vary with the application). 2. Enter the URL of the Web page you wish to display and then press the [Enter] key, or use the e-mail tool to send/receive items or perform other activities. The [Dial-up Connection] window will appear. 3.
Quick Start Guide - Introduction 第 15 頁,共 160 頁 Please click on the [Disconnect] button when you want to disconnect from the Internet. Alternatively, please right-click on the icon, and then click on [Disconnect]. Note z You can start an application to make an automatic connection to the Internet, but you can also make a manual connection using the connection destination icon. The procedure is described below. 1.
Quick Start Guide - Introduction 第 16 頁,共 160 頁 If the connection has been established successfully, the connection icon and task tray will appear as shown below. You will be able to browse Web pages using your browser and send and receive e-mail. Important { Please enter the e-mail settings separately if you are going to use e-mail (the setup method will vary with the application). 2. End the connection Right-click on the icon, and then click [Disconnect] to end a connection.
Quick Start Guide - Introduction Connecting to a LAN using an access point (LAP) 第 17 頁,共 160 頁 [LAP] This section describes how to connect to a network (for example, a company LAN or a personal home network) using a LAP profile-compatible access point. Please refer to "Using an access point (PAN) to connect to a LAN if you are using a PAN profilecompatible access point.
Quick Start Guide - Introduction 第 18 頁,共 160 頁 Note { Alternatively, click [Start]→[All Programs]→[Bluetooth]→[Bluetooth Settings], and then click on [New Connection] from the active [Bluetooth Settings] window. The [Add New Connection Wizard (Welcome to the Add New Connection Wizard)] window will appear. 3. Confirm that [Express Mode] has been selected, and then click on the [Next] button The [Add New Connection Wizard (Searching for Bluetooth devices)] window will appear.
Quick Start Guide - Introduction 第 19 頁,共 160 頁 Once the program has finished searching for the devices, the [Add New Connection Wizard (Device Selection)] window will appear. 4. Select the device name of the access point from [Device List], and then click on the [Next] button The [Add New Connection Wizard (Searching for Services)] window will appear. You will be asked for the Bluetooth passkey in the window that appears. 5.
Quick Start Guide - Introduction 第 20 頁,共 160 頁 Service detection and COM port creation will be performed automatically. The [Add New Connection Wizard (Create Connection Destination)] window will appear. 6. Enter the connection name, user name and password, then click on the [Next] button Note { The user name and password are entered here to allow you to connect to the access point. The [Add New Connection Wizard (Confirm Dial-up Settings)] window will appear. 7.
Quick Start Guide - Introduction 第 21 頁,共 160 頁 The [Internet Options] window will appear. 8. Configure the connection method, and then click on the [OK] button Set the connection destination used for the LAN connection set up in (6) above as the default connection destination, and then select "Always dial my default connection." 9. Click on the [Next] button The [Add New Connection Wizard (Connection Name Settings)] window will appear. 10.
Quick Start Guide - Introduction 第 22 頁,共 160 頁 10. Enter the type and name of the icon displayed after registration, and then click on the [Next] button Please click on the [Next] button if you are satisfied with the settings. The [Add New Connection Wizard (Completing the Add New Connection Wizard)] window will appear. 11. Click on the [Finish] button The access point icon will be registered in the [Bluetooth Settings] window. This will complete the access point set-up process.
Quick Start Guide - Introduction 第 23 頁,共 160 頁 The [Dial-up Connection] window will appear. 2. Confirm that "Direct connection" has been selected under [Connection Destination], and then click on the [Connect] button A connection will be initiated. Note { { { This is an example of what happens when you use "Direct connection" as a connection name under "Connect to access point." If a name different from the connection name is used, that name will appear under [Connection Destination].
Quick Start Guide - Introduction w 第 24 頁,共 160 頁 be ab e to e c a ge data w t ot e co pute s o t e etwo . Note { Please follow the procedure below if you need to set up a proxy server to connect to the Internet (the following procedure is not necessary if the PC you are going to use has already been set up as a proxy server). 1 Select [Internet Options...] from the [Tools] menu in Internet Explorer The [Internet Options] window will appear.
Quick Start Guide - Introduction 第 25 頁,共 160 頁 3. End the connection Right-click either on the connection icon under the [Bluetooth Settings] window or on the icon in the task tray, and then click on [Disconnect]. Click on the "Yes" button in the disconnection confirmation dialog box that appears. Connecting to a LAN using an access point (PAN) [PAN] This section describes how to connect to a network (for example, a company LAN or a personal home network) using a PAN profile-compatible access point.
Quick Start Guide - Introduction 第 26 頁,共 160 頁 1. Turn on the access point, and confirm that a connection has been established with the network 2. Right-click the Bluetooth icon in the task tray, and then click on [Add New Connection] Note { Alternatively, click [Start]→[All Programs]→[Bluetooth]→[Bluetooth Settings], and then click on [New Connection] from the active [Bluetooth Settings] window. The [Add New Connection Wizard (Welcome to the Add New Connection Wizard)] window will appear. 3.
Quick Start Guide - Introduction 第 27 頁,共 160 頁 Once the program has finished searching for the devices, the [Add New Connection Wizard (Device Selection)] window will appear. 4. Select the device name of the access point from [Device List], and then click on the [Next] button The [Add New Connection Wizard (Searching for Services)] window will appear. file://C:\Documents and Settings\anitachou\Local Settings\Temp\~hh3F24.
Quick Start Guide - Introduction 第 28 頁,共 160 頁 You will be asked for the Bluetooth passkey in the window that appears. 5. Enter the passkey under [Bluetooth Passkey (PIN code)], and then click on the [OK] button Service detection and COM port creation will be performed automatically. The [Add New Connection Wizard (Connection Name Settings)] window will appear. 6.
Quick Start Guide - Introduction 第 29 頁,共 160 頁 This will complete the access point set-up process. →"Connecting to a LAN (PAN)" Connecting to a LAN (PAN) Procedure 1. Right-click on the connection icon in the [Bluetooth Settings] window, and then click on [Connect] You will be asked for the Bluetooth passkey in the window that appears. 2. Enter the passkey under [Bluetooth Passkey (PIN code)], and then click on the [OK] button A connection will be initiated file://C:\Documents and Settings\anitachou
Quick Start Guide - Introduction 第 30 頁,共 160 頁 A connection will be initiated. Once you have connected to the network, Internet Explorer will start automatically, and you will be able to exchange data with other computers on the network. Note { Please follow the procedure below if you need to set up a proxy server to connect to the Internet (the following procedure is not necessary if the PC you are going to use has already been set up as a proxy server). 1 Select [Internet Options...
Quick Start Guide - Introduction 第 31 頁,共 160 頁 3. End the connection Right-click either on the connection icon under the [Bluetooth Settings] window or on the icon in the task tray, and then click on [Disconnect]. Click on the "Yes" button in the disconnection confirmation dialog box that appears. Building a personal area network [PAN] You can use the PAN profile to build a network of Bluetooth -enabled devices.
Quick Start Guide - Introduction 第 32 頁,共 160 頁 Note z The maximum total number of devices that can be used to constitute a single personal area network is seven: one server and six clients. A network comprising as many as seven devices could theoretically be built, but an operating environment that involves the use of other Bluetooth devices, leaving aside other complications, might require the network to comprise fewer components..
Quick Start Guide - Introduction 第 33 頁,共 160 頁 Important z Please refer to Windows Help for further information on TCP/IP, DHCP and configurations for sharing. Operating as a server The following icon will appear in the tasktray when the PAN server function has been activated. Should the icon not appear, please follow the procedure below to activate the PAN server function. 1. Right-click the Bluetooth icon in the task tray and make sure the Option [Use PAN Group Ad-hoc Network] is enabled.
Quick Start Guide - Introduction 第 34 頁,共 160 頁 1. Right-click on the Bluetooth icon in the task tray, and click on [Add New Connection] Note { Alternatively, click on [Start] →[All Programs]→[Bluetooth]→[Bluetooth Settings], and then on [New Connection] from the [Bluetooth Settings] window. 2. Confirm that [Express Mode] has been selected, and then click on the [Next] button 3.
Quick Start Guide - Introduction 第 35 頁,共 160 頁 Once the program has finished searching for the devices, the [Add New Connection Wizard (Device Selection)] window will appear. 4. Select the name of the device designated as the server from [Device List], and then click on the [Next] button The [Add New Connection Wizard (Searching for Services)] window will appear. The [Add New Connection Wizard (Confirm Connection Name)] window will appear. file://C:\Documents and Settings\anitachou\Local Settings\Temp
Quick Start Guide - Introduction 第 36 頁,共 160 頁 5. Click on the [Next] button The registered icon will appear in the [Bluetooth Settings] window. ■Connecting to a server Procedure 1. Right-click on the icon in the [Bluetooth Settings] window, and then click on [Connect] Once you have connected, the icon will change to indicate that the device is connected. file://C:\Documents and Settings\anitachou\Local Settings\Temp\~hh3F24.
Quick Start Guide - Introduction 第 37 頁,共 160 頁 ■Ending a connection to a server Procedure 1. Right-click on the icon in the [Bluetooth Settings] window, and then click on [Disconnect] A message confirming whether you wish to disconnect will appear. Click on the [Yes] button. Once you have disconnected, the icon will change to indicate that the device is not connected. Using a modem station for fax transmissions file://C:\Documents and Settings\anitachou\Local Settings\Temp\~hh3F24.
Quick Start Guide - Introduction 第 38 頁,共 160 頁 This section describes how to send a fax using a Bluetooth wireless modem station. →Setting up the modem station →Installing a modem →Setting fax information →Sending a fax →Receiving a fax Important z z z z Please refer to the modem station instruction manual for information on how to connect the station to a telephone line. Please ensure that any drivers used to connect the PC to the modem have been installed.
Quick Start Guide - Introduction 第 39 頁,共 160 頁 Note { Alternatively, click [Start] →[All Programs]→[Bluetooth]→[Bluetooth Settings], and then click on [New Connection] from the active [Bluetooth Settings] window. The [Add New Connection Wizard (Welcome to the Add New Connection Wizard)] window will appear. 3. Select [Custom Mode], and then click on the [Next] button The [Add New Connection Wizard (Searching for Bluetooth devices)] window will appear.
Quick Start Guide - Introduction 第 40 頁,共 160 頁 The [Add New Connection Wizard (Searching for Services)] window will appear. 5. If you are connecting to the wireless modem station for the first time, enter the passkey for the device from the [Bluetooth Passkey (PIN Code)] window, and then click on the [OK] button Once the program has finished searching for the services the [Add New Connection file://C:\Documents and Settings\anitachou\Local Settings\Temp\~hh3F24.
Quick Start Guide - Introduction 第 41 頁,共 160 頁 Once the program has finished searching for the services, the [Add New Connection Wizard (Select Service)] window will appear. 6. Select "Fax" under [Select Service], and then click on the [Next] button The [Add New Connection Wizard (Connecting to Remote Device)] screen will appear. The COM port and modem registration process will then be automatically performed.
Quick Start Guide - Introduction 第 42 頁,共 160 頁 The [Add New Connection Wizard (Completing the Add New Connection Wizard)] screen will appear. 8. Click on the [Finish] button The settings will be registered, and the icon will appear on the [Bluetooth Settings] screen. Setting FAX information Configure send/receive settings and register fax information. Procedure 1.
Quick Start Guide - Introduction 第 43 頁,共 160 頁 A window showing installed programs will appear, and a Fax icon will have been created in the [Printers and Faxes] screen. 4. Click on "Send a fax" under "Printer Tasks" on the left side of the window If you have not yet configured a fax device, the [Fax Configuration Wizard] window will appear. In the window you can enter settings pertaining to the sender (yourself). Note file://C:\Documents and Settings\anitachou\Local Settings\Temp\~hh3F24.
Quick Start Guide - Introduction 第 44 頁,共 160 頁 { If the fax configuration information has already been registered, the [Send Fax Wizard] window, which can be viewed under " Sending a fax" below, will appear instead of the [Fax Configuration Wizard] window. 5. Enter the sender information, and click on the [Next] button Note { The sender information that you configure here will be automatically appended as header information when you send a fax.
Quick Start Guide - Introduction 第 45 頁,共 160 頁 Note { If [Enable Receive] is selected, the device will be on standby for receiving faxes even if it is not sending or receiving anything, and therefore will be in continuous connection to the wireless modem (when COM Auto Connect is on). Please decide whether to select this option based on the desired objective and/or frequency of transmission. The [Fax Configuration Wizard (Transmitting Subscriber Identification (TSID))] window will appear. 7.
Quick Start Guide - Introduction 第 46 頁,共 160 頁 The fax information will be have been registered, and the [Fax Console] window will appear. This will complete the fax set -up process. Related topics: " Sending a fax" and "Receiving a fax " Sending a fax This section describes how to send a fax from the Fax Console. Important z The Fax service must be enabled for sending in order for you to send a fax.
Quick Start Guide - Introduction 第 47 頁,共 160 頁 The [Send Fax Wizard (Recipient Information)] window will appear. 4. Enter the name and fax number of the destination party, and then click on the [Next] button The [Send Fax Wizard (Preparing the Cover Page)] window will appear. 5. Specify the cover page template, subject line, and note (body text), and then click on the [Next] button file://C:\Documents and Settings\anitachou\Local Settings\Temp\~hh3F24.
Quick Start Guide - Introduction 第 48 頁,共 160 頁 The [Send Fax Wizard (Schedule)] window will appear. 6. If you wish to send the fax immediately, select "Now", and then click on the [Next] button The [Send Fax Wizard (Completing the Send Fax Wizard)] window will appear. 7. Confirm the destination information and transmission details, and then click on the [Finish] button file://C:\Documents and Settings\anitachou\Local Settings\Temp\~hh3F24.
Quick Start Guide - Introduction 第 49 頁,共 160 頁 The software will automatically dial the number and send the fax. Once the fax has been sent, Fax Monitor will revert to standby mode. Related topic: " Receiving a fax" Receiving a fax This section describes what to do when a fax arrives after you have established a connection to a modem station. Important z z The Fax service must be enabled for receiving in order for you to receive a fax.
Quick Start Guide - Introduction 第 50 頁,共 160 頁 Once the fax has been received, the Fax Monitor will revert to standby mode. Note { If you have enabled manual fax reception, the message below will appear when a fax arrives. Click on the message with your mouse to receive the fax. 2. Double-click on the [Fax] icon in the Control Panel The [Fax Console] window will appear. 3. In the [Fax Console] window, double -click on the fax that has arrived An image of the received fax will be displayed.
Quick Start Guide - Introduction 第 51 頁,共 160 頁 Related topic: " Sending a fax" Using a mobile telephone for fax transmissions [FAX] This section describes how to send a fax using a mobile telephone as a modem. →Setting up the mobile telephone →Installing a modem →Setting fax information →Sending a fax →Receiving a fax Important z z z Please ensure that any drivers used to connect the PC to the mobile telephone have been installed.
Quick Start Guide - Introduction 第 52 頁,共 160 頁 Set up and register the mobile telephone as a fax service. Procedure 1. Turn on the mobile telephone, and set it to be connectable via Bluetooth Note { Please refer to the instruction manual for information on how to operate the telephone. 2.
Quick Start Guide - Introduction 第 53 頁,共 160 頁 The [Add New Connection Wizard (Searching for Bluetooth devices)] window will appear. Once the program has finished searching for the devices, the [Add New Connection Wizard (Select Device)] window will appear. 4. Select the device name of the mobile telephone from [Device List], and then click on the [Next] button The [Add New Connection Wizard (Searching for Services)] window will appear. file://C:\Documents and Settings\anitachou\Local Settings\Temp\~h
Quick Start Guide - Introduction 第 54 頁,共 160 頁 5. If you are connecting to the mobile telephone for the first time, enter the passkey for the device from the [Bluetooth Passkey (PIN Code)] window, and then click on the [OK] button. Once the program has finished searching for the services, the [Add New Connection Wizard (Select Service)] window will appear. 6.
Quick Start Guide - Introduction 第 55 頁,共 160 頁 The COM port and modem registration process will then be automatically performed. Once the COM port and modem (standard 33600 bps type) registration is complete, the [Add New Connection Wizard (Setting Connection Name)] screen will appear. 7. Configure the type and name of the icon to appear after registration, and click on the [Next] button. Please click only on the [Next] button once you are satisfied with the configuration.
Quick Start Guide - Introduction 第 56 頁,共 160 頁 Setting fax information Configure send/receive settings and register fax information. Procedure 1. Select [Start]→[Control Panel], and then double -click on the [Printers and Other Hardware] icon Note { If the control panel is displayed in "Classic view", and you use Windows 2000, please start from Step (2). 2. Double-click on the [Printers and Faxes] icon The [Printers & Faxes] window will appear. 3.
Quick Start Guide - Introduction 第 57 頁,共 160 頁 If you have not yet configured a fax device, the [Fax Configuration Wizard] window will appear. In the window you can enter settings pertaining to the sender (yourself). Note { If the fax configuration information has already been registered, the [Send Fax Wizard] window, which can be viewed under " Sending a fax" below, will appear instead of the [Fax Configuration Wizard] window. 5.
Quick Start Guide - Introduction 第 58 頁,共 160 頁 { The sender information that you configure here will be automatically appended as header information when you send a fax. The [Fax Configuration Wizard (Select Device for Sending or Receiving Faxes)] window will appear. 6.
Quick Start Guide - Introduction 第 59 頁,共 160 頁 The [Fax Configuration Wizard (Completing the Fax Configuration Wizard)] window will appear. 8. Click on the [Finish] button The fax information will be have been registered, and the [Fax Console] window will appear. This will complete the fax set -up process. Related topics: " Sending a fax" and "Receiving a fax " Sending a fax This section describes how to send a fax from the Fax Console.
Quick Start Guide - Introduction 第 60 頁,共 160 頁 1. Double-click on the [Fax] icon in the Control Panel The [Fax Console] window will appear. 2. In the [Fax Console] window, click [File] →[Send fax] The [Send Fax Wizard (Starting the Send Fax Wizard)] window will appear. 3. Click on the [Next] button The [Send Fax Wizard (Recipient Information)] window will appear. 4. Enter the name and fax number of the destination party, and then click on the [Next] button file://C:\Documents and Settings\anitachou\Lo
Quick Start Guide - Introduction 第 61 頁,共 160 頁 The [Send Fax Wizard (Preparing the Cover Page)] window will appear. 5. Specify the cover page template, subject line, and note (body text), and then click on the [Next] button The [Send Fax Wizard (Schedule)] window will appear. 6. If you wish to send the fax immediately, select "Now", and then click on the [Next] button file://C:\Documents and Settings\anitachou\Local Settings\Temp\~hh3F24.
Quick Start Guide - Introduction 第 62 頁,共 160 頁 The [Send Fax Wizard (Completing the Send Fax Wizard)] window will appear. 7. Confirm the destination information and transmission details, and then click on the [Finish] button The software will automatically dial the number and send the fax. Once the fax has been sent, Fax Monitor will revert to standby mode. file://C:\Documents and Settings\anitachou\Local Settings\Temp\~hh3F24.
Quick Start Guide - Introduction 第 63 頁,共 160 頁 Related topic: " Receiving a fax " Receiving a fax This section describes what to do when a fax arrives after you have established a connection to a modem station. Important z z The Fax service must be enabled for receiving in order for you to receive a fax. Please refer to " Using a mobile telephone " under "Troubleshooting" for information on how to change the send and receive settings once the fax service has been configured.