
User's Manual


Import Profiles into the Profile List
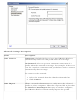
To import profiles manually:
1. Click Import on the Profiles page.
2. Select the profile files to import.
3. Click Import.
4. You are notified that the profile has been successfully imported.
5. Click OK.
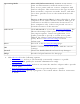
An administrator can set profiles to be imported automatically into the Profile list. Intel
PROSet/Wireless monitors the import folder on your hard disk for new profile files. Only
profiles that have been enabled through Enable Auto-Import in the
Advanced Settings
are automatically imported. If a profile of the same name already exists in the Profile list,
you are notified to either reject the imported profile or accept it. If accepted, the existing
profile is replaced.
All imported user-based profiles are placed at the bottom of the Profile List, and the
profile file is immediately deleted from your hard disk after it is imported, whether the
import was successful or not.
Password Protected Profiles
Import and export password protected user-based profiles automatically to remote
systems. If a profile is password protected, before it can be edited, the assigned
password must be entered. Refer to
Password Protection for more information.
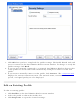
Export Profiles from the Profiles List
1. Select individual or multiple profiles from the list.
To select multiple profiles:
❍ Use your mouse to highlight a profile.
❍ Press Ctrl.
❍ Click each profile that you want selected.
2. Select Export to export one or more profiles from the Profile list.
3. Select the destination folder. Click Browse to search your hard disk for the
destination directory. The C:\ drive is the default directory.
4. Click OK to export the selected profile. You are notified: Successfully exported
selected profiles to the destination folder: C:\.
Back to Top
Back to Contents
Trademarks and Disclaimers