
User Manual


Chapter 6: Messaging Features
6-11
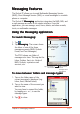
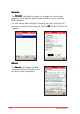
6. Type the account name on
the field, then tap
NextNext
NextNext
Next when
finished.
7. Enter the incoming, outgoing
mail, and domain in the fields.
NOTENOTE
NOTENOTE
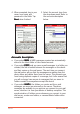
N O T E If you are unsure on the server information, check with your
system administrator, e-mail and/or telephony provider.
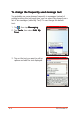
8. Tap the
OptionsOptions
OptionsOptions
Options button to adjust the advanced account
settings. Otherwise, tap
FinishFinish
FinishFinish
Finish.
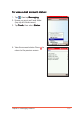
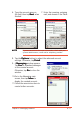
9. A
MessagingMessaging
MessagingMessaging
Messaging window appears.
Tap
YesYes
YesYes
Ye s to download messages
to the created account.
Otherwise, tap
NoNo
NoNo
N o to close the
window.
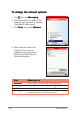
10.Go to the Messaging main
screen, then tap
InboxInbox
InboxInbox
Inbox to
display the created account.
11.Follow the same instructions to
create further accounts.