book.book Page 1 Thursday, August 16, 2007 9:44 AM Dell™ XPS One™ Owner’s Manual ModelMTG w w w. d e l l . c o m | s u p p o r t . d e l l .
book.book Page 2 Thursday, August 16, 2007 9:44 AM Notes, Notices, and Cautions NOTE: A NOTE indicates important information that helps you make better use of your computer. NOTICE: A NOTICE indicates either potential damage to hardware or loss of data and tells you how to avoid the problem. CAUTION: A CAUTION indicates a potential for property damage, personal injury, or death. ____________________ Information in this document is subject to change without notice. © 2007 Dell Inc. All rights reserved.
book.book Page 3 Thursday, August 16, 2007 9:44 AM Contents 1 Finding Information 2 About Your Computer . . . . . . . . . . . . . . . . . . . . . . . . . . . . . . . . . 15 Front View of the Computer . . . . . . . . . . . . . . . 15 Back View of the Computer . . . . . . . . . . . . . . . 17 Power Cable Routing . . . . . . . . . . . . . . . . 20 Optional TV Input Device (For Use With Optional TV Tuner) . . . . . . . . . . . . . . . . . . . . . . 3 9 . . . 21 . . . . . . . . . . .
book.book Page 4 Thursday, August 16, 2007 9:44 AM . . . . . . . . . . . . . . . 28 Surge Protectors . . . . . . . . . . . . . . . . . . 28 Line Conditioners . . . . . . . . . . . . . . . . . . 28 . . . . . . . . . . 28 . . . . . . . . . . . . . . 29 . . . . . . . . . . . . . . . . . . 31 . . . . . . . . . . . . . . . . . . 31 . . . . . . . . . . . . . . . 32 . . . . . . . . . . . 33 . . . . . . . . . . . . . . . . . .
book.book Page 5 Thursday, August 16, 2007 9:44 AM Re-Syncing Your Optional Wireless Mouse or Keyboard with Your Computer . . . . . . . . Key Combinations 6 . . . . . 44 . . . . . . . . . . . . . . . . . . . . 46 Using the Display . . . . . . . . . . . . . . . . . . 47 Adjusting Brightness . . . . . . . . . . . . . . . . . . 47 . . . 47 . . . . . . . . . . . . . 49 . . . . . . . . . . . . . . . . . 49 . . . . . . . . . . . . . . . . . . . . . . 49 . . . . . . . . . . . . . . . . 50 .
book.book Page 6 Thursday, August 16, 2007 9:44 AM . . . . . . . . . . . . . . . . . . 61 . . . . . . . . . . . . . . . . . 62 . . . . . . . . . . . 62 . . . . . . . . . . . . . . . . 64 . . . . . . . . . . . . . . . . . . . 65 . . . . . . . . . . . 65 Printer Problems Scanner Problems Sound and Speaker Problems Touch Pad Problems 9 Dell Diagnostics When to Use the Dell Diagnostics Starting the Dell Diagnostics From Your Hard Drive . . . . . . . . . . . . . . . . . . . . . . . .
book.book Page 7 Thursday, August 16, 2007 9:44 AM 11 Reinstalling Software Drivers . . . . . . . . . . . . . . . 75 . . . . . . . . . . . . . . . . . . . . . . . . . . 75 What Is a Driver? . . . . . . . . . . . . . . . . . . 75 Identifying Drivers . . . . . . . . . . . . . . . . . 76 . . . . . . . . . . 76 Reinstalling Drivers and Utilities Troubleshooting Software and Hardware Problems in the Microsoft® Windows® Vista™ Operating Systems . . . . . . . . . . . . . . . . .
book.book Page 8 Thursday, August 16, 2007 9:44 AM 14 Appendix . . . . . . . . . . . . . . . . . . . . . . . . . 97 . . . . . . . . . . . . . . . . . . 97 . . . . . . . . . . . . . . . . . . . . . 97 FCC Notice (U.S. Only) FCC Class B Glossary . . . . . . . . . . . . . . . . . . . . . . . . . . . . . 99 Index 8 . . . . . . . . . . . . . . . . . . . . . . . . . . . . . .
book.book Page 9 Thursday, August 16, 2007 9:44 AM Finding Information NOTE: Some features or media may be optional and may not ship with your computer. Some features or media may not be available in certain countries. NOTE: Additional information may ship with your computer. What Are You Looking For? Find It Here • A diagnostic program for my computer Drivers and Utilities Media • Drivers for my computer Documentation and drivers are already installed on your computer.
book.book Page 10 Thursday, August 16, 2007 9:44 AM What Are You Looking For? Find It Here • Warranty information Dell™ Product Information Guide • Terms and Conditions (U.S. only) • Safety instructions • Regulatory information • Ergonomics information • End User License Agreement • How to set up my computer Setup Diagram NOTE: The appearance of your setup diagram may vary.
book.book Page 11 Thursday, August 16, 2007 9:44 AM What Are You Looking For? Find It Here • Service Tag and Express Service Code Service Tag and Microsoft® Windows® License • Microsoft Windows License Label These labels are located on your computer. • Use the Service Tag to identify your computer when you use support.dell.com or contact support. • Enter the Express Service Code to direct your call when contacting support.
book.book Page 12 Thursday, August 16, 2007 9:44 AM What Are You Looking For? Find It Here • Solutions — Troubleshooting hints and tips, articles from technicians, and online courses, frequently asked questions Dell Support Website — support.dell.com NOTE: Select your region or business segment to view the appropriate support site.
book.book Page 13 Thursday, August 16, 2007 9:44 AM What Are You Looking For? Find It Here • How to use your Windows™ operating system • How to work with programs and files • How to personalize my desktop Windows Help and Support 1 To access Windows Help and Support: • In Windows Vista™, click the Windows Vista Start button and click Help and Support. 2 Type a word or phrase that describes your problem, and then click the arrow icon. 3 Click the topic that describes your problem.
book.
book.book Page 15 Thursday, August 16, 2007 9:44 AM About Your Computer Front View of the Computer CAUTION: Ensure that none of the computer air vents are blocked. Blocking them would cause serious thermal problems.
book.book Page 16 Thursday, August 16, 2007 9:44 AM 1 speakers (2) To adjust the volume of the integrated speakers, press the appropriate media control buttons (see "Media Control Buttons" on page 32 for more information). 2 air vents Internal fans create airflow through the vents to prevent the computer from overheating. The computer turns the fans on when the computer gets hot. Fan noise is normal and does not indicate a problem with the fans or the computer.
book.
book.book Page 18 Thursday, August 16, 2007 9:44 AM 1 Media Card Reader Provides a fast and convenient way to view and share digital photos, music, and videos stored on a memory card. The Media Card Reader reads the following digital memory cards: • Secure Digital (SD) memory card • SDIO card • MultiMediaCard (MMC) • Memory Stick • Memory Stick PRO • xD-Picture Card • Hi Speed-SD • Hi Density-SD 2 mini IEEE 1394 connector Attach high-speed serial multimedia devices, such as digital video cameras.
book.book Page 19 Thursday, August 16, 2007 9:44 AM 8 computer sync button To re-sync your optional wireless keyboard and mouse to your computer, press the sync button on the rear of your computer, then press the sync button on the device that you wish to use. See "Re-Syncing Your Optional Wireless Mouse or Keyboard with Your Computer" on page 44.
book.book Page 20 Thursday, August 16, 2007 9:44 AM 15 security cable slot Lets you attach a commercially available antitheft device to the computer. NOTICE: Before you buy an antitheft device, ensure that it works with the security cable slot on your computer. 16 S/PDIF connector Use the S/PDIF connector to transmit digital audio without going through an analog audio conversion process. 17 IEEE 1394 connector Attach high-speed serial multimedia devices, such as digital video cameras.
book.
book.
book.book Page 23 Thursday, August 16, 2007 9:44 AM Setting Up Your Computer Installing Your Computer in an Enclosure Installing your computer in an enclosure can restrict the airflow and impact your computer’s performance, possibly causing it to overheat. Follow the guidelines below when installing your computer in an enclosure: NOTICE: The operating temperature specifications indicated in this manual reflects the maximum ambient operating temperature.
book.book Page 24 Thursday, August 16, 2007 9:44 AM Connecting to the Internet NOTE: ISPs and ISP offerings vary by country. To connect to the Internet, you need a network connection and an Internet service provider (ISP). Your ISP will offer one or more of the following Internet connection options: • DSL connections that provide high-speed Internet access through your existing telephone line or cellular telephone service.
book.book Page 25 Thursday, August 16, 2007 9:44 AM NOTE: Have your ISP information ready. If you do not have an ISP, the Connect to the Internet wizard can help you get one. 1 Save and close any open files, and exit any open programs. 2 Click the Windows Vista Start button , and click Control Panel. 3 Under Network and Internet, click Connect to the Internet. The Connect to the Internet window appears.
book.book Page 26 Thursday, August 16, 2007 9:44 AM NOTE: For more information about options available with Windows Easy Transfer, see Microsoft Knowledge Base Article #928634, titled How to use Windows Easy Transfer to migrate files and settings from one Windows-based computer to another Windows Vista-based computer. This information may not be available in certain countries. 1 Click the Windows Vista Start button , and then click Transfer files and settings→ Start Windows Easy Transfer.
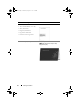
book.book Page 27 Thursday, August 16, 2007 9:44 AM Connecting a USB Printer NOTE: You can connect USB devices while the computer is turned on. 1 Complete the operating system setup if you have not already done so. 2 Attach the USB printer cable to the USB connectors on the computer and the printer. The connectors fit only one way. 1 2 3 1 USB connector on computer 3 USB printer cable 2 USB connector on printer 3 Turn on the printer.
book.book Page 28 Thursday, August 16, 2007 9:44 AM Power Protection Devices Several devices are available to protect against power fluctuations and failures: • Surge protectors • Line conditioners • Uninterruptible power supplies (UPS) Surge Protectors Surge protectors and power strips equipped with surge protection help prevent damage to your computer from voltage spikes that can occur during electrical storms or after power interruptions.
book.book Page 29 Thursday, August 16, 2007 9:44 AM the UPS manufacturer documentation for information on battery operating time and to ensure that the device is approved by Underwriters Laboratories (UL). Using the Media Card Reader Use the Media Card Reader to transfer data directly to your computer. NOTE: A memory card is not a bootable device.
book.
book.book Page 31 Thursday, August 16, 2007 9:44 AM Using Multimedia Using the Disc Drive CAUTION: Do not insert any objects into the disc drive; it could be damaged. NOTICE: Do not move the computer while playing CDs, DVDs, or other media. 1 Place the disc, label side facing forward, in the center of the disc slot. 2 Gently push the disc into the disk slot. NOTE: This step may require you to push the disc farther than you expect.
book.book Page 32 Thursday, August 16, 2007 9:44 AM Media Control Buttons NOTE: The media control buttons are capacitive buttons, and as such, may feel different from other buttons when pressed. The top four media control buttons to the right of your display may flash during startup. The media control buttons only light up when the user’s hand is detected in close proximity to the right of the display. Your keyboard may also incorporate some of these media control buttons.
book.book Page 33 Thursday, August 16, 2007 9:44 AM Turn the volume up. Turn the volume down. Mute the sound. Play or pause. Stop. Play the next track. Play the previous track. Eject. NOTE: After you press Eject, there may be a slight pause before the disc ejects. Disc and Disc-Slot Indicators Either the disc or disc-slot indicator lights up when a user’s hand is detected in its vicinity.
book.book Page 34 Thursday, August 16, 2007 9:44 AM Go to the previous track. Eject. Go to the next track. DVD and Blu-Ray Disc™ (BD) player software includes the following basic buttons: Stop. Restart the current chapter. Play. Fast forward. Pause. Fast reverse. Advance a single frame while in pause mode. Go to the next title or chapter. Continuously play the current title or chapter. Go to the previous title or chapter. Eject.
book.book Page 35 Thursday, August 16, 2007 9:44 AM The DVD drives and BD drives installed in Dell computers do not support HD-DVD media. For a list of supported media formats, see "Using Blank CD, DVD, and BD Media" on page 35. How to Copy a CD, DVD, or BD NOTE: BD media can only be copied to other BD media. DVD media can only be copied to other DVD-recordable/rewritable media. CD media can only be copied to other CD-recordable/rewritable media.
book.book Page 36 Thursday, August 16, 2007 9:44 AM CD-Writable Drives Media Type Read Write Rewritable CD-R Yes Yes No CD-RW Yes Yes Yes DVD-Writable Drives Media Type Read Write Rewritable CD-R Yes Yes No CD-RW Yes Yes Yes DVD+R Yes Yes No DVD-R Yes Yes No DVD+RW Yes Yes Yes DVD-RW Yes Yes Yes DVD+R DL Yes Yes No DVD-R DL Yes No No BD-Writable Drives NOTE: Your BD-writable drive may not read / write HD-DVD media.
book.book Page 37 Thursday, August 16, 2007 9:44 AM Media Type Read Write Rewritable BD-R Yes Yes No BD-RE Yes Yes Yes Helpful Tips • Use Microsoft® Windows® Explorer to drag and drop files to a CD-R or CD-RW only after you start Roxio Creator and open a Creator project. • Do not burn a blank CD-R or CD-RW to its maximum capacity; for example, do not copy a 650-MB file to a blank 650-MB CD. The CD-RW drive needs 1–2 MB of the blank space to finalize the recording.
book.book Page 38 Thursday, August 16, 2007 9:44 AM Adjusting the Volume NOTE: When the speakers are muted, you do not hear the CD or DVD playing. 1 Open the Volume Control window. 2 Click and drag the bar in the Volume Control column and slide it up or down to increase or decrease the volume. For more information on volume control options, click Help in the Volume Control window.
book.book Page 39 Thursday, August 16, 2007 9:44 AM 6 Click the arrows beside the Speaker Configuration setting to scroll through the options, and then select the SPDIF option. 7 Click the Back button once, and then click the Back button again to return to the main menu screen. Enabling S/PDIF in the Windows Audio Driver 1 Double-click the speaker icon in the Windows notification area. 2 Click the Options menu and then click Advanced Controls. 3 Click Advanced. 4 Click S/PDIF Interface. 5 Click Close.
book.
book.book Page 41 Thursday, August 16, 2007 9:44 AM Using the Optional Wireless Keyboard and Mouse Your Dell™ XPS™ computer supports a special wireless (non-Bluetooth) keyboard and mouse which are optimized for use with your computer. NOTE: The optional keyboard and mouse have special features which may not be available on other devices that could be used with your computer.
book.book Page 42 Thursday, August 16, 2007 9:44 AM Media Control Keys NOTE: The media control keys are capacitive buttons, and as such, may feel different from other buttons when pressed. The optional wireless keyboard has media control keys to aid you in quick control of volume and playback functions on your computer. These buttons light up when you press them. In addition to the basic media control keys shown in "Using Multimedia" on page 31, the optional keyboard also incorporates the following keys.
book.book Page 43 Thursday, August 16, 2007 9:44 AM Using the Touch Pad The touch pad detects the pressure and movement of your finger to allow you to move the cursor on the display. Use the touch pad and touch-pad buttons as you would use a mouse. 1 2 1 touch pad 2 touch-pad buttons • To move the cursor, lightly slide your finger over the touch pad.
book.book Page 44 Thursday, August 16, 2007 9:44 AM • To select and move (or drag) an object, position the cursor on the object and tap twice on the touch pad. On the second tap, leave your finger on the touch pad and move the selected object by sliding your finger over the surface.
book.book Page 45 Thursday, August 16, 2007 9:44 AM 1 2 3 4 5 1 computer sync button 2 keyboard sync button 3 keyboard power switch 4 mouse power button 5 mouse sync button 3 Press the sync button to the rear of your computer’s left speaker. 4 Press the sync button on the mouse or keyboard. The mouse or keyboard should now be paired with your computer. If you experience any problems, see "Troubleshooting" on page 51.
book.book Page 46 Thursday, August 16, 2007 9:44 AM Key Combinations and up-arrow key Increases brightness on the integrated display. and down-arrow key Decreases brightness on the integrated display. and right-arrow key Toggles the display on and off without changing the overall operating state. To adjust keyboard operation, such as the character repeat rate, open the Control Panel, click Printers and Other Hardware, and click Keyboard.
book.book Page 47 Thursday, August 16, 2007 9:44 AM Using the Display Use the display power button on the lower-right of your display to turn off the display without affecting the operating state of your computer. See "Front View of the Computer" on page 15. Adjusting Brightness You can press the following keys to adjust display brightness: • Press and the up-arrow key to increase brightness on the integrated display only (not on an external monitor).
book.book Page 48 Thursday, August 16, 2007 9:44 AM If your computer is running Windows Vista™: 1 Click the Windows Vista Start button , and click Control Panel. 2 Under Appearance and Personalization, click Adjust screen resolution. 3 In the Display Settings window, under Resolution, slide the slide bar to the left/right to decrease/increase the screen resolution. 4 Click How do I get the best display? for further instructions.
book.book Page 49 Thursday, August 16, 2007 9:44 AM Cleaning Your Computer CAUTION: Before you begin any of the procedures in this section, follow the safety instructions in the Product Information Guide. Computer and Display CAUTION: Before you clean your computer, disconnect the computer from the electrical outlet. Clean your computer with a soft cloth dampened with water. Do not use liquid or aerosol cleaners, which may contain flammable substances.
book.book Page 50 Thursday, August 16, 2007 9:44 AM 2 With a soft, lint-free cloth, gently wipe the bottom of the disc (the unlabeled side) in a straight line from the center to the outer edge of the disc. For stubborn dirt, try using water or a diluted solution of water and mild soap. You can also purchase commercial products that clean discs and provide some protection from dust, fingerprints, and scratches. Cleaning products for CDs are also safe to use on DVDs.
book.book Page 51 Thursday, August 16, 2007 9:44 AM Troubleshooting Solving Problems Follow these tips when you troubleshoot your computer: • If you added or removed a part before the problem started, review the installation procedures and ensure that the part is correctly installed. • If a peripheral device does not work, ensure that the device is properly connected. • If an error message appears on the screen, write down the exact message.
book.book Page 52 Thursday, August 16, 2007 9:44 AM The screen is blank or difficult to read E N S U R E T H A T T H E D I S P L A Y I S T U R N E D O N — See "Front View of the Computer" on page 15. TE S T T H E E L E C T R I C A L O U T L E T — Ensure that the electrical outlet is working by testing it with another device, such as a lamp.
book.book Page 53 Thursday, August 16, 2007 9:44 AM Optical drive problems NOTE: High-speed optical drive vibration is normal and may cause noise, which does not indicate a defect in the drive or the media. NOTE: Because of different regions worldwide and different disc formats, not all DVD titles work in all DVD drives. ADJUST THE WINDOWS VOLUME CONTROL — • Click the speaker icon in the lower-right corner of your screen. • Ensure that the volume is turned up by clicking the slidebar and dragging it up.
book.book Page 54 Thursday, August 16, 2007 9:44 AM C H E C K T H E M I C R O S O F T ® M A I L S E C U R I T Y S E T T I N G S — If you cannot open your e-mail attachments: 1 In Microsoft Mail, click Tools→ Options→ Security. 2 Click Do not allow attachments to be saved or opened that could potentially be a virus or Block images and other external content in HTML e-mail to remove the checkmark, as needed.
book.book Page 55 Thursday, August 16, 2007 9:44 AM IEEE 1394 Device Problems CAUTION: Before you begin any of the procedures in this section, follow the safety instructions in the Product Information Guide. NOTE: Your computer supports only IEEE 1394a standard.
book.book Page 56 Thursday, August 16, 2007 9:44 AM USB Keyboard CHECK THE KEYBOARD CABLE — • Ensure that the keyboard cable is firmly connected to the computer. • Shut down the computer, reconnect the keyboard cable as shown on the setup diagram for your computer, and then restart the computer. • Ensure that the cable is not damaged or frayed and check cable connectors for bent or broken pins. Straighten any bent pins.
book.book Page 57 Thursday, August 16, 2007 9:44 AM A program stops responding END THE PROGRAM — 1 Press simultaneously to access the Task Manager. 2 Click the Applications tab. 3 Click to select the program that is no longer responding. 4 Click End Task. A program crashes repeatedly NOTE: Most software includes installation instructions in its documentation or on a floppy disk, CD, or DVD.
book.book Page 58 Thursday, August 16, 2007 9:44 AM • Verify that the device drivers do not conflict with the program. • If necessary, uninstall and then reinstall the program.
book.book Page 59 Thursday, August 16, 2007 9:44 AM • Restart your computer. • See your mouse documentation. TO V E R I F Y T H A T T H E P R O B L E M I S W I T H T H E M O U S E , C H E C K T H E T O U C H P A D — 1 Turn off the mouse. 2 At the Windows desktop, use the touch pad to move the cursor around, select an icon, and open it. If the touch pad operates correctly, the mouse may be defective.
book.book Page 60 Thursday, August 16, 2007 9:44 AM CHECK THE MOUSE SETTINGS — Windows Vista: 1 Click Start → Control Panel→ Hardware and Sound→ Mouse. 2 Adjust the settings as needed. R E I N S T A L L T H E M O U S E D R I V E R — See (see "Drivers" on page 75). R U N T H E H A R D W A R E TR O U B L E S H O O T E R — See "Troubleshooting Software and Hardware Problems in the Microsoft® Windows® Vista™ Operating Systems" on page 78.
book.book Page 61 Thursday, August 16, 2007 9:44 AM I F T H E P O W E R L I G H T I S O F F — The computer is either turned off or is not receiving power. • Reseat the power cable in the power connector on the back of the computer and the electrical outlet. • Bypass power strips, power extension cables, and other power protection devices to verify that the computer turns on properly. • Ensure that any power strips being used are plugged into an electrical outlet and are turned on.