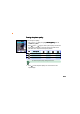
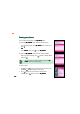
Setting the photo quality To set the photo quality: 1. Use (up) or (down) to highlight Photo Quality from the camera settings menu. (left) or (right) to select a photo quality. The selected 2. Press photo quality is displayed on top of the soft key bar. Refer to the table below for a comparison of the photo qualities. Photo quality Icon Description Nice 63.3 KB 33.3 KB 6.4 KB 4 KB Normal 62.3 KB 30.0 KB 5.7 KB 3 KB Economic 60.6 KB 28.3 KB 5.2 KB 2.
Setting the capture mode To set the capture mode: 1. Use (up) or (down) to highlight Capture Mode from the camera settings menu. (left) or (right) to select from four pre-installed 2. Press capture modes. The selected mode is displayed on top of the soft key bar. Refer to the table below for a description of the capture modes. Icon Mode Description Auto The camera automatically adjusts to the lighting condition.
Adjusting the photo brightness and contrast To adjust the brightness: 1. Use (up) or (down) to highlight Brightness from the camera settings menu. (left) or (right) to move the slider to the left 2. Press (decrease) or right (increase) until the you achieve the desired brightness. 3. Press . The screen returns to the capture display. Slider To adjust the contrast: 1. Use (up) or (down) to highlight Contrast from the camera settings menu. 2.
Setting the multi-capture interval To set the multi-capture interval: 1. Use (up) or (down) to highlight Multi-Capture Interval from the camera settings menu. (left) or (right) to select from four multi-capture 2. Press intervals. The selected interval is displayed on top of the soft key bar. Refer to the table below for a description of the the multicapture intervals.
Turning the flash on or off To turn the flash on or off: 1. Use (up) or (down) to highlight Flash Switch from the camera settings menu. (left) or (right) to turn the flash on or off. 2. Press When you select the check mark , the flash is turned on and the flash icon on the capture display shows . When you selected , the flash is turned off and the flash icon on the capture display shows . When in camera mode, you can turn the flash on or off by pressing .
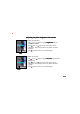
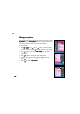
Viewing your photos You can view all saved photos in the M y A l b u m folder. To open the M y A l b u m folder from the Camera menu: Go to the Camera menu, select M y A l b u m from the menu, then press . OR In the C a m e r a menu, press to open M y A l b u m m. To open the M y A l b u m folder from the capture display: When in the capture display, press then press . (Option), select My Album, The phone remains in camera mode when you access the M y A l b u m folder from the capture display.
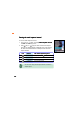
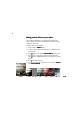
Using the photo options The photo options allow you to save, hide, delete, rename, edit, send, and slideshow the photos saved in the M y A l b u m folder. To access the photo options: 1. From M y A l b u m m, press menu. (Option) to display the photo options 2. Use (up) or (down) to select an option, then press to the table below for a description of each option. Option View Change View Set as Save as Hide Delete Delete All Rename Edit Image Four In One Send MMS Detail Slide Show Storage .
Editing your photos You can add special effects, frame design, and texts to photos saved in M y A l b u m using the Edit Image function in the photo options menu. You can also use this function to rotate or flip the images. 1 To edit a photo: 1. From M y A l b u m m, Use (up) or (down) to select the photo you want to edit, then press to display the photo in full screen. (Option), then select Edit Image from the photo 2. Press options menu. 3. Press (Option) to display the photo editing menu. 4.
Adding preview effects to your photo You can add a preview effect to your subject before capturing the photo. The phone comes with six pre-installed preview effects that you can apply to your photos. To add an effect to your photo: 1. Put the Camera in C a p t u r e mode. 2. Point the camera to your subject. Make sure your subject fits in the capture display. 3. Press (Option), then highlight Preview Effects from the menu. 4. Press (left) or (right) to select the preview effect, then press .
Adding frames to your photo You can add a frame design to your photos using any of the 20 pre-installed frames. To add a frame to your photo: 1. Put the Camera in C a p t u r e mode. 2. Point the camera to your subject. Make sure your subject fits in the capture display. 3. Press (Option), then highlight F r a m e from the menu. The photo size automatically changes to main wallpaper when you select F r a m ee. You cannot change the photo size when you add a frame to a photo. 4.
Using the external display for self-capture You can use the external display to do a self-capture. To use the self-capture feature: 1. Put the Camera in C a p t u r e mode. 2. Press press OR (Option), highlight Self Capture from the menu, then . The main display shows a camera on the background. Press the to enable self-capture. 3. Point the camera to yourself, then use the external display as the capture reference. 4. Press the capture button on the side of the phone.
Using the capture timer You can use the capture timer to capture a photo without pressing the key or button. • Determine the best location for the phone before using this feature. Try pointing the camera on your subject in different angles and locations for best results. • The multi-capture feature automatically turns-off when you select capture timer. Setting the capture timer To set the capture timer: 1. Put the Camera in C a p t u r e mode. 2. Press (Option), highlight Capture Timer from the menu.
Icon Timer Description Off The capture timer is off. 5 seconds The camera starts to capture in 5 seconds 10 seconds The camera starts to capture in 10 seconds 20 seconds The camera starts to capture in 20 seconds Capturing a photo using the capture timer 1. After selecting the capture timer, place the phone on a stable surface making sure that the camera points correctly to the subject. 2. Press . The phone automatically captures the photo after the capture timer expires.
Using multi-capture The multi-capture feature allows you to capture multiple photos in specific time intervals. Use multi-capture when capturing sequential or motion photos. To use multi-capture: 1. Set the multi-capture interval following the instructions on the “Setting the multi-capture interval” section. 2. Put the Camera in C a p t u r e mode. (Option), highlight Multi-Capture from the menu. 3. Press 4. Press (left) or button to select the number of photos you want to capture.
Viewing multi-capture photos To view the multi-captured photos: 1. Open the M y A l b u m folder. (up) or (down) to locate the sequential photos 2. Use (i.e. PIC1007011.1, PIC1007011.2, etc). The phone automatically saves an extra photo file containing a thumbnail of each photo. The phone saves this file in the M y A l b u m folder together with the other four, six, nine, or 16 source photos. 3. Select a photo, then press 4. Press to display. (Back) to return to M y A l b u m m.
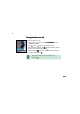
AVI Recorder The AVI Recorder allows you to capture short video files using the phone camera. The video files are saved in .AVI format and is stored in the M Myy V Vii ddee o s folder. To access the A V I R e c o r d e rr: 1. From the C a m e r a menu, use (up) or R e c o r d e rr, then press . OR to display the M e s s a g e menu. Press Recorder mode display Familiarize yourself with the capture display before using the AVI recorder.
Capturing videos DO NOT use the recorder in places where video capture is prohibited. Take note of local regulations before using the recorder. To capture a video: 1. Put the Camera in AVI Recorder mode. 2. Point the camera to your subject. Make sure your subject fits in the capture display. 3. Hold the phone firmly, then press to start the video capture. (Save) to save the video to 4. After recording is finished, press the My Video folder.
Adding preview effects to your video You can apply a preview effect to your video before capturing. The phone comes with six pre-installed preview effects that you can choose for your videos. To add an effect to your video: 1. Put the Camera in AVI Recorder mode. 2. Point the camera to your subject. Make sure your subject fits in the capture display. (Option), then highlight Preview Effects from the menu. 3. Press 4. Press press 5. Press (left) or (right) to select the preview effect, then .
Adjusting the video brightness and contrast To adjust the brightness: 1. Use (up) or (down) to highlight Brightness from the video settings menu. 2. Press (left) or (right) to move the slider to the left (decrease) or right (increase) until the you achieve the desired brightness. 3. Press . The screen returns to the video recorder display. Slider To adjust the contrast: 1. Use (up) or (down) to highlight Contrast from the video settings menu. 2.
Turning the flash on or off To turn the flash on or off: 1. Use (up) or (down) to highlight Flash Switch from the video settings menu. (left) or (right) to turn the flash on or off. 2. Press When you select the check mark , the flash is turned on and the flash icon in the video recorder display shows . When you selected , the flash is turned off and the flash icon in the video recorder display shows . When in camera mode, you can turn the flash on or off by pressing .