
How-To Guide Part 2


138138
138138
138
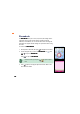
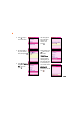
The created contact appears in the
PhonebookPhonebook
PhonebookPhonebook
Ph o n e b ook preceded by the
handset icon
.
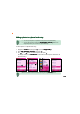
8. Key-in other contact information including the home phone number,
office phone number, other phone number, fax number, company,
title, home address, e-mail address, birthday, remarks, and gender.
Refer to the next sections when adding a photo and/or voice tag, or
when classifying the phone book entry to a group.
You are not required to fill in all the phone book entry information.
You may add other information to the phone book entry later using
the
ModifyModify
ModifyModify
M o d i f y command.
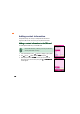
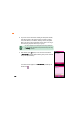
9. When finished, press (Save) to save the contact information.
A
Data saved! Data saved!
Data saved! Data saved!
Da t a s a ved ! message appears indicating that you have saved the
entry to the phone memory.