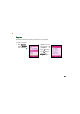
Keytone The keytone sounds off everytime you press any key on the keypad. To select a keytone: 1. Select K e y t o n e from the Ringtone menu, then press . 2. Highlight a key tone (up) or using (down), then to select. press 3. Click (Back) to return to the R i n g t o n e menu.
Composer In addition to the pre-installed ringtones, you can compose five ring tones, each with up to 200 notes, if you know how to compose with musical notes. Composing a ring tone 1 To compose a ring tone: 1. Select C o m p o s e r from the R i n g t o n e menu, then press to display the list of composed ring tones. (Option), then select 2. Highlight an ( E M P T Y ) ring tone, press C o m p o s ee. The music staff appears on screen. 3. Use the keypad button to key-in the notes.
4. When done, press (Option), select Instrument Instrument, then press to display the available instrument sounds that you can use. 5. Use (up) or (down) to highlight an instrument, then press to select. (Back) to Press return to your composition. 6. Press (Option), select T e m p oo, to then press display the available tempo you can use for the composed ring tone. 7. Use to highlight a tempo, then press (Back) to listen to your composition. A low number option means a slow tempo.
8. Press (Option), select P l a yy, then press to listen to your composition. When playing, press (Stop) to stop. 9. When finished, press (Option), select S a v ee, then press text input screen appears. . The 10. Key-in a name for the composed ringtone, then press . A S e t successfully! message appears indicating that you have successfully composed and saved the new ringtone. 11. The new ring tone is displayed in the Composer list. Press (Back) to return to the R i n g t o n e menu.
Ring mode The ring mode menu allows you to select the behavior of your phone everytime you receive an incoming call. To select a ring mode: 1. Select Ring Mode from the Ringtone menu, then press 2. Highlight a ring mode using select. 3. Click (up) or . (down), then press to (Back) to return to the R i n g t o n e menu.
Volume Adjusting the volume To adjust the incoming ring volume: 104 1. Select V o l u m e from the R i n g t o n e menu, then press . 2. Select I n c o m i n g V o l u m ee, then press to display the Incoming Volume screen. Eight (8) bars indicate the volume level. The default setting is 2. 3. Press (left) to decrease the volume or (right) to increase the volume. The default ring tone is played the moment you adjust the volume. 4.
To adjust the earpiece volume: 1. Select E a r p i e c e V o l u m e from the Volume menu, then press . 2. Follow steps 3 to 4 of the previous section to adjust the earpiece volume. The default earpiece volume is 4. To adjust the key tone volume: 1. Select K e y T o n e from the Volume menu, then press . 2. Follow steps 3 to 4 of the previous section to adjust the keytone volume.
Misc Tones Switch To set miscellaneous tone alerts: 1. Select Misc Tones Switch from the Ringtone menu, then press to display a list of phone events that a tone alert can be assigned. 2. Highlight an item using (up) or (down), then press to select. All the items are enabled by default. When selected, a check mark appears on the box preceding the item. Tone When enabled Key Tone Connect Vib.
M303 This chapter provides information on how to save, use, share, and manage contact information using the phone book.
Chapter summary Phonebook ...................................................................................... 132 Adding contact information ............................................................ 134 Adding a contact information to the SIM card ......................... 134 Adding a contact information to the phone memory .............. 136 Adding a photo to a phone book entry ................................... 139 Adding a voice recording to a phone book entry ....................
Other phone book features ............................................................. 157 Sending an SMS/MMS message ................................................
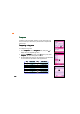
Phonebook The Phonebook allows you to store, use, share, and manage contact information such as names, phone numbers, company and home addresses, e-mail address, etc. You can also add a voice recording and personalize the ringtone and LED settings for a particular contact using this menu. To access the P h o n e b o o kk: 1. Put the phone in idle mode, then press to display the main menu. 2. Use the navigation keys to select the Phonebook icon press to open the Phonebook Phonebook.
Options Quick Find Name Search Add Delete Copy Settings Storage Allows you to easily search for a contact in your phonebook by typing the initial letters of the contact name. easily search for a contact in your phonebook by typing the contact name.
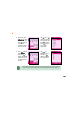
Adding contact information The phone memory can store up to 300 phone book entries and supports a SIM card that can store up to 255 phone book entries. Adding a contact information to the SIM card To add a phone book entry to the SIM card: Because SIM card memory is limited, you can only save the name and one phone number of an entry. 1. From the Phonebook, press (Option) to display a pop-up menu. (down) to select A d dd, then press . 3.
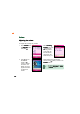
4. Press to key-in the contact name. 7. Use the keypad to key-in the phone number of the contact, then press . 5. Use the keypad to key-in the contact name, then press . 8. When finished, press (Save) to save the contact information. A Data saved! message appears indicating that you have saved the entry to the SIM memory. 6. Press (down) to highlight the P h o n e N o 1 field, then press . The created contact appears in the Phonebook preceded by the SIM icon .
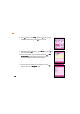
Adding a contact information to the phone memory Aside from the contact name and phone number, you can add other information to a phone book entry when you save it to the phone memory. The phone memory can store up to four phone numbers, fax number, office name, home and e-mail addresses, birthdate, notes, and many more. You can also customize the contact group, melody, and LED settings or add a photo and voice tag for voice command recognition.
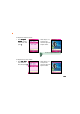
To add a phone book entry to the phone memory: 1. From the Phonebook, (Option) press to display a pop-up menu. (up) or 2. Use (down) to select A d dd, then press 5. Use the keypad to key-in the contact name, then press . . 3. When prompted, select To Handset from the pop-up menu at the bottom left corner of the screen, then press . An Add Record screen appears. 6. Press (down) to highlight the P h o n e N o 1 field, then press . 4. Press to key-in the contact name. 7.
8. Key-in other contact information including the home phone number, office phone number, other phone number, fax number, company, title, home address, e-mail address, birthday, remarks, and gender. Refer to the next sections when adding a photo and/or voice tag, or when classifying the phone book entry to a group. You are not required to fill in all the phone book entry information. You may add other information to the phone book entry later using the M o d i f y command. 9.
Adding a photo to a phone book entry • You can only add a photo to a phone book entry saved in the phone memory. • You must have the photo saved in the S u b W a l l p a p e r ( P o r t r a i t ) folder of the Image Gallery before you can attach to a phone book entry. To add a photo to a phone book entry: 1. Highlight the P i c t u r e field, then press to open the Image Gallery Gallery. 2. Select Sub Wallpaper (Portrait) (Portrait), then press . 3.
Adding a voice recording to a phone book entry • Voice recordings for phone book entries are used for voice dialing. Record the voice tag in a quiet environment to achieve accurate recordings. • Refer to Chapter 2 on how to use the Voice Dialing feature of the phone. To add a voice tag to a phone book entry: 1. Highlight the V o i c e field, then press to open the Select Voice window. 2. Select Record Voice Voice, then press . 3. After the beep, use the microphone to say the name of the phone entry.
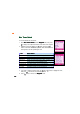
Searching phone book entries Using Quick Find To search a phone book entry using Quick Find: 2 1. From the Phonebook, press 2. Use (up) or (Option) to display a pop-up menu. (down) to select Quick Find Find, then press . 3. Use the keypad to type the first letter of the entry you are searching. The letter is displayed on top of the soft key bar. The screen dispays all phone book entries having the first letter you typed. 4.
Using Name Search To search a phone book entry using Name Search: 1. From the Phonebook, press 2. Use (up) or (Option) to display a pop-up menu. (down) to select Name Search Search, then press 3. Use the keypad to type the entry name, then press . 2 . 4. When there is a match, the screen dispays the phone book entry you searched. If no such entry was found, the Phonebook screen shows blank. 5. Press (Back) to return to the Phonebook Phonebook.
Managing phone book entries Viewing phone book entries To display the phone book entry information: 1. Select a phone book entry using (up) or (down), then press . The View Record screen appears. (up) or (down) to scroll and view additional phone book 2. Use entry information. 3. Press (Back) to return to the Phonebook Phonebook.
Displaying long entries The phone book has a scrolling feature that allows you to see a name entry even if it is longer than the screen width. To display a long phone book entry: 1. Select a phone book entry with a long name, then press record. to view the phone book entry 2. Notice that the name entry scrolls to the left until the last character is displayed. Compare Screens 1 to 3.
Modifying a phone book entry You can change or add a contact information to a phone book entry even after it has been saved to the phone memory. To modify a phone book entry: 1 1. View an entry following the instructions in the “Viewing phone book entries” section, then press (Options). 2. Select M o d i f y from the options, then press R e c o r d screen appears. . The M o d i f y 3. Use (up) or (down) to select the phone book entry information that you want to modify, then press . 4.
Deleting a phone book entry To delete a phone book entry: 146 1. From the Phonebook Phonebook, select the phone book entry you want to delete. 2. Press (Option), then select D e l e t e from the pop-up menu. 3. Select whether to delete only the selected phone book entry or all phone book entries, then press . 4. Press (Yes), when a confirmation window appears. A Deleted successfully! message appears indicating that the entry has been deleted from the phone book.
To delete a phone book entry from the V i e w R e c o r d window: 1. View an entry following the instructions in the section “ V i e w i n g phone book e n t r i e s ””, then (Options). press 3. Press (Yes) when a confirmation window appears. 2. Select D e l e t e from the menu, then press . A Deleted successfully! message appears indicating that the entry has been deleted from the phone book. The display returns to the Phonebook Phonebook.
Copying name entries Copying a SIM phone book entry to the phone memory To copy a SIM phone book entry to the phone memory: 1. From the Phonebook Phonebook, select the phone book entry you want to copy to the phone memory. 3. Select whether to 2. Press (Option), copy only the then select C o p y selected phone book from the pop-up entry or all the phone menu. book entries, then press . 4. From the pop-up menu, select T o H a n d s e tt, then press . 148 5.
Copying a phone book entry to the SIM card To copy a phone book entry to the SIM card: 2 1. Follow steps 1 to 3 of the previous section. 2. From the pop-up menu, select T o S I M M, then press . 3. A confirmation message appears to inform you that only the name and phone number of the phone book entry will be saved, and that a long phone book entry name will be cut. Press (Yes) to confirm. Otherwise, press to cancel. 4.
Copying multiple entries To copy multiple phone book entries: 1. From the Phonebook Phonebook, Press (Option), then select C o p y from the pop-up menu. 3. From the pop-up menu, select Hanset to SIM or SIM to Handset Handset, then press . 150 2. Select All Records Records, then press .
4. When prompted for confirmation, press (Yes). 5. Another confirmation screen appears. Select whether to keep or delete the original data after copying, then press . When you select K e e p O r i g i n a l D a t aa, the phone book entries remain in the phone or SIM memory after copying them. 6. A Data saved! message appears indicating that the phone book entries were copied to the specified memory. The display returns to the Phonebook Phonebook. The copied phone entries now appear in the phonebook.
Changing the phone book settings Customizing group settings You can customize the phone book group name, ring tone and LED color. To customize the group settings: 1. From the Phonebook Phonebook, press from the pop-up menu. 2. Use (up) or (Option), then select S e t t i n g s (down) to select G r o u p S e tt, then press 1 . (up) or (down) to select the group you want to modify, 3. Use (Option). then press 4. Select E d i t from the menu, then press . 5.
Restoring a phone book group settings To restore the default phone book group settings: 1. From the Phonebook Phonebook, press from the pop-up menu. 2. Use 1 (up) or (Option), then select S e t t i n g s (down) to select G r o u p S e tt, then press . 3. Use (up) or (down) to select the group you want the settings restored, then press (Option). 4. Select R e s t o r e from the menu, then press 5. When prompted, press Phonebook Phonebook. . (Yes).
Classifying a phone book entry to a group To classify an entry to a group: 1. Select the phone book entry you want to classify to a group, then press to view the phone book record. 2. Press (Option), then select M o d i f y from the pop-up menu. 3. Select the G r o u p field, then press to display the group list. When the entry is not classified, this field shows A l ll. 4. Use press (up) or . 1 (down) to select a group, then The selected group now appears in the G r o u p field. 5.
Changing the speed dial settings You can change the speed dial key assignments and other speed dial settings using the Settings menu. To change the speed dial settings: 1. From the Phonebook Phonebook, press from the pop-up menu. (Option), then select S e t t i n g s (up) or (down) to select Speed Dial Dial, then press . 3. Follow the instructions in the section Speed Dial on page 109 to assign and use the speed dial keys. 2.
3. Select an option from the menu, then press description below. . Refer to the options From SIM Displays only all phone book entries saved in the SIM memory. From Handset Displays only all phone book entries saved in the phone memory. All Displays only all phone book entries saved in the SIM memory. 4. When finished, press (Back) to return to the Phonebook Phonebook. Viewing the phone book storage To view the phone book storage: 1. From the Phonebook Phonebook, press from the pop-up menu.
Other phone book features Sending an SMS/MMS message You can send an SMS or MMS message from the phone book entry. To send an SMS message: 1. From the Phonebook Phonebook, select the entry you want to send an SMS message, then press . (Option), then select Send Se nd SMS from the pop-up menu. 2. Press The Edit SMS screen appears. 2 3. Follow the instructions in Chapter 5 “Messaging features” to compose and send the SMS message.
To send an MMS message: 1. From the Phonebook Phonebook, select the entry you want to send an MMS message, then press . (Option), then select Send S e nd MMS from the pop-up menu. 2. Press The Edit MMS screen appears. 2 3. Follow the instructions in Chapter 6 “Messaging features” to compose and send the MMS message.
M303 This chapter provides information on the MMS and SMS messaging features of your mobile phone including instructions on how to send text, graphics, and audio files to other mobile phones.
Chapter summary Messaging features ......................................................................... 162 Short Message Service (SMS) ......................................................... 163 Composing and sending an SMS message ......................... 163 Launching the SMS message editor .................................. 163 Choosing the message recipient(s) .................................. 163 Composing the SMS message ...........................................