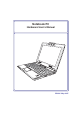
Notebook PC Hardware User’s Manual ASU S WID E SCR EEN NOTEB OO K OFF ON E3232 / May 2007
Contents Table of Contents Table of Contents 1. Introducing the Notebook PC About This User’s Manual .......................................................................................... 6 Notes For This Manual........................................................................................... 6 Preparing your Notebook PC...................................................................................... 9 2. Knowing the Parts Top Side........................................................
Contents Table of Contents (cont.) 4. Using the Notebook PC Pointing Device......................................................................................................... 36 Using the Touchpad ............................................................................................. 36 Touchpad Usage Illustrations............................................................................... 37 Caring for the Touchpad.............................................................................
Contents Table of Contents (cont.
1.
1 Introducing the Notebook PC About This User’s Manual You are reading the Notebook PC User’s Manual. This User’s Manual provides information on the various components in the Notebook PC and how to use them. The following are major sections of this User’s Manuals: 1. Introducing the Notebook PC Introduces you to the Notebook PC and this User’s Manual. 2. Knowing the Parts Gives you information on the Notebook PC’s components. 3.
1 Introducing the Notebook PC Safety Precautions The following safety precautions will increase the life of the Notebook PC. Follow all precautions and LQVWUXFWLRQV ([FHSW DV GHVFULEHG LQ WKLV PDQXDO UHIHU DOO VHUYLFLQJ WR TXDOLÀHG SHUVRQQHO 'R QRW XVH GDPDJHG SRZHU FRUGV DFFHVVRULHV RU RWKHU SHULSKHUDOV 'R QRW XVH VWURQJ VROYHQWV VXFK DV WKLQQHUV benzene, or other chemicals on or near the surface. IMPORTANT! Disconnect the AC power and remove the battery pack(s) before cleaning.
1 Introducing the Notebook PC Transportation Precautions To prepare the Notebook PC for transport, you should turn it OFF and disconnect all external peripherals to prevent damage to the connectors. The hard disk drive’s head retracts when the power is turned OFF to prevent scratching of the hard disk surface during transport. Therefore, you should not transport the Notebook PC while the power is still ON.
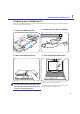
1 Introducing the Notebook PC Preparing your Notebook PC These are only quick instructions for using your Notebook PC. Read the later pages for detailed information on using your Notebook PC. 1. Install the battery pack 3 2. Connect the AC Power Adapter 1 2 3. Open the Display Panel 4. Turn ON the Notebook PC 1.
1 10 Introducing the Notebook PC
2. Knowing the Parts Basic sides of the Notebook PC NOTE: Photos and icons in this manual are used for artistic purposes only and do not show what is actually used in the product itself.
2 Knowing the Parts Top Side Refer to the diagram below to identify the components on this side of the Notebook PC. NOTE: The keyboard will be different for each territory. 1 2 3 4 5 6 7 8 9 10 6 Microphone (Built-in) 1 The built-in mono microphone can be used for video conferencing, voice narrations, or simple audio recordings.
Knowing the Parts 2 2 Camera Indicator The camera indicator shows when the built-in camera is in use. The camera may be auto-activated by supported software. 3 Multi-Position Camera (on selected models) The built-in camera allows picture taking or video recording. Can be used with video conferencing and other interactive applications. CAUTION: The camHUD FDQ EH DGMXVWHG IDFLQJ IRUZDUG RU IDFLQJ EDFNZDUG EXW FDQ RQO\ ÁLS through the bottom. Do not rotate the camera upward past 35 degrees.
2 Knowing the Parts Bottom Side Refer to the diagram below to identify the components on this side of the Notebook PC. NOTE: The bottom side may vary in appearance depending on model. NOTE: The battery pack size will vary depending on model. 1 2 3 6 4 5 WARNING! The bottom of the Notebook PC can get very hot. Be careful when handling the Notebook PC while it is in operation or recently been in operation. High temperatures are normal during charging or operation.
Knowing the Parts 1 2 Battery Pack The battery pack is automatically charged when the Notebook PC is connected to an AC power source and maintains power to the Notebook PC when AC power is not connected. This allows use when moving temporarily between locations. Battery time varies by usage DQG E\ WKH VSHFLÀFDWLRQV IRU WKLV 1RWHERRN 3& 7KH EDWWHU\ SDFN FDQQRW EH GLVDVVHPEOHG and must be purchased as a single unit.
2 Knowing the Parts Left Side Refer to the diagram below to identify the components on this side of the Notebook PC. 1 2 3 4 5 6 Display (Monitor) Output 1 7KH SLQ ' VXE PRQLWRU SRUW VXSSRUWV D VWDQGDUG 9*$ FRPSDWLEOH GHYLFH VXFK DV D PRQLWRU or projector to allow viewing on a larger external display. 2 HDMI HDMI Port +'0, +LJK 'HÀQLWLRQ 0XOWLPHGLD ,QWHUIDFH LV DQ XQFRPSUHVVHG DOO GLJLWDO DXGLR YLGHR LQWHUIDFH EHWZHHQ DQ\ DXGLR YLGHR VRXUFH VXFK DV D VHW WRS ER[ '9' SOD\HU and A/V r
Knowing the Parts 6 2 Flash Memory Slot Normally a PCMCIA or USB memory card reader must be purchased separately in order to use memory cards from devices such as digital cameras, MP3 players, mobile SKRQHV DQG 3'$V 7KLV 1RWHERRN 3& KDV D EXLOW LQ PHPRU\ FDUG UHDGHU WKDW FDQ UHDG PDQ\ ÁDVK PHPRU\ FDUGV DV VSHFLÀHG ODWHU LQ WKLV PDQXDO 7KH EXLOW LQ PHPRU\ FDUG UHDGHU LV not only convenient, but also faster than most other forms of memory card readers because it utilizes the high-bandwidth PCI bus.
2 Knowing the Parts Right Side Refer to the diagram below to identify the components on this side of the Notebook PC. 1 2 3 4 5 6 7 8 Optical Drive 1 The Notebook PC comes in various models with different optical drives. The Notebook 3&·V RSWLFDO GULYH PD\ VXSSRUW FRPSDFW GLVFV &' DQG RU GLJLWDO YLGHR GLVFV '9' DQG PD\ KDYH UHFRUGDEOH 5 RU UH ZULWDEOH 5: FDSDELOLWLHV 6HH WKH PDUNHWLQJ VSHFLÀFDtions for details on each model.
Knowing the Parts 7 2 Modem Port The RJ-11 modem port with two pins is smaller than the RJ-45 LAN port and supports a standard telephone cable. The internal modem supports up to 56K V.90 transfers. The built-in connector allows convenient use without additional adapters. IMPORTANT! The built-in modem does not support the voltage used in digital phone systems. Do not connect the modem port to a digital phone system or else damage will occur to the Notebook PC.
2 Knowing the Parts Rear Side Refer to the diagram below to identify the components on this side of the Notebook PC. 1 1 2.0 2 3 USB Port (2.0/1.1) The USB (Universal Serial Bus) port is compatible with USB 2.0 or USB 1.1 devices such as keyboards, pointing devices, cameras, hard disk drives, printers, and scanners connected in a series up to 12Mbits/sec (USB 1.1) and 480Mbits/sec (USB 2.0).