
User's Manual
DDNS acount request procedures
1. Type www.DynDNS.org to the address box of your Web browser and press Enter.
Read the policy and select "I have read...".
2. Enter your user name, e-mail address, password, then click Create Account.
3. A message prompts out asking you to check your mailbox for the activation letter. Open your mailbox and
read the mail.
4. You can find the letter in your E-mail box. Click the hyperlink.
5. The link directs you to a login page. Click login.
6. Enter the username and password then click Login.
7. After logging in, you can see this welcome message.
8. Select Services tab.
9. Click Add Dynamic DNS Host .
10. Enter the host name then click Add Host.
11. You can see this message when your hostname is successfully created.
DSL-N13 DDNS settings
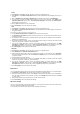
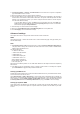
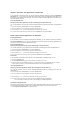
1. Click Advanced Setup -> DNS -> Dynamic DNS to enter the configuration page. Press Add to configure
Dynamic DNS.
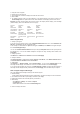
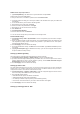
2. Choose your DDNS provider and fill in the hostname. The supported DDNS provider are DynDNS.org and
TZO. DynDNS.org settings require username and password of your DDNS account. TZO requires
registered Email address and Key.
3. Press Save/Apply to save and activate the settings.
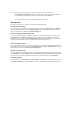
4. To verify whether DDNS is working, click Start menu and select Run....Type cmd and click OK to open the
CLI console.
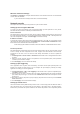
5. Type ping account.dyndns.org (your DDNS domain name). If you can see the reply like what is shown in
the picture, DDNS is working correctly.
Setting up default gateway
This section allows to manually setup default gateway of Internet connection.
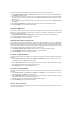
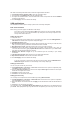
1. Click Advanced Setup -> Routing -> Default Gateway to open the configuration page.
2. By default, automatic assigned default gateway is enabled, that is, the router accepts the first received
gateway assignment from ISP. If your ISP specifies a gateway, uncheck Enable Automatic Assigned
Default Gateway and enter the gateway address.
3. Press Save/Apply to save and activate the settings.
Setting up static route
For simple networks that have only one router, you do not need to set up static route. For more complicated
network such as an enterprise network where several routers and different subnets exist, you need to
configure static routes so as to direct the network traffic correctly.
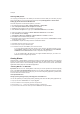
1. Click Advanced Setup -> Routing -> Static Route to open the configuration page and view the current
static route settings. Press Add to create a new static route.
2. The configurable settings include:
• Destination Network: input the IP address of destination;
• Subnet Mask: input the subnet mask of destination;
• Use Gateway IP Address: input the gateway network address (optional);
• User Interface: select the interface of your router to which the static route applies.
3. Press Save/Apply to save and activate the settings.
Setting up routing protocol - RIP