
User's Manual
1. Using the same encryption.
2. Working on the same channel.
3. The IP addresses of all wireless bridges are within the same subnet.
4. WDS enabled.
5. For bridging wireless routers, the MAC Addresses of the uplink wireless router must be saved to the
Remote Bridge List. For uplink wireless router, MAC addresses of all bridging router must be saved.
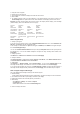
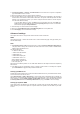
Example: DSL-N13 (wireless bridge with Internet access), WL-500gP (wireless bridge), and WL-500gD
(wireless bridge). Refer to the illustration on the next page.
DSL-N13 WL-500gD WL-500gP
SSID ASUS ASUS ASUS
DHCP server Enabled Disabled Disabled
LAN IP address
192.168.1.1 192.168.1.2 192.168.1.3
Authentication Open Open Open
Encryption WEP-128bit WEP-128bit WEP-128bit
Remote bridge
00:01:00:01:01:02
00:01:00:01:01:03
00:01:00:01:01:01
00:01:00:01:01:01
MAC address 00:01:00:01:01:01
00:01:00:01:01:02
00:01:00:01:01:03
Channel 11 11 11
WDS setup (DSL-N13)
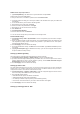
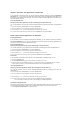
1. Setting up encryption
If you want to use encryption function, select a Network Authentication mode; if not, select Disabled. Click
Wireless -> Security to open the configuration page.
In this example, set authentication to Open and encryption to Enabled, select 128bit for Encryption Strength,
then click Set Encryption Keys.
You can check Enable ASUS PassPhrase and input a string in Passphrase field to let the system generate
the Network Keys. You can also disable Passphrase and input four keys manually. When finished, click
Save/Apply.
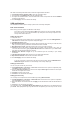
2. Setting up channel
Click Wireless -> Advanced. Set Channel to 11 and click Save/Apply.
3. Setting IP address
Click Advanced Setup -> LAN. Set DSL-N13 IP address to 192.168.1.1, select Enable DHCP Server and
set Start IP address to 192.168.1.4. Click Save/ Reboot.
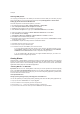
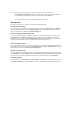
4. Setting WDS
Click Wireless -> Wireless Bridge. Select Wireless Bridge. You can select Enabled (Scan) to find
WL-500gD and WL-500gP. If the stations are on the list, check the checkbox and click Save/Apply.
If you cannot find WL-500gD by scanning, set Bridge Restrict to Enable and input the MAC address of
WL-500gD and WL-500gP manually. When finished, click Save/Apply. DSL-N13 WDS setup is complete!
WDS setup (WL-500gD and WL-500gP)
Set up WL-500gD and WL-500gP according to the table on Page 26.
1. Wireless Setting
Set WL-500gD, WL-500gP wireless channel, authentication, encryption and keys the same as DSL-N13.
2. Set IP address to 192.168.1.2 (WL-500gD), 192.168.1.3 (WL-500gP)
3. Disable DHCP Server and set default gateway to 192.168.1.1,
4. WDS Setting
• Open Wireless -> Bridge , set AP Mode to Hybrid.
• Set Channel to 11.
• Add the MAC address of DSL-N13 to Remote Bridge List.
5. Save the settings and reboot.