
User Manual


YOUR PERSONAL INFORMATION ORGANISER
CALENDAR
178
10
CHAPTER
appointments are bold; past
appointments are dimmed.
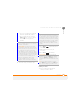
Go to Date: Shows your daily schedule
in day-planner format. This view
displays a horizontal time strip at the top
to show at a glance when you have
appointments.
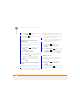
Creating an appointment
1 Press Home , and then press
Start (left softkey).
2 Navigate to the Upcoming Events
content list and press New (left
softkey).
3 Use the 5-way navigator to move
among fields and enter information.
You must use the number keys to
enter date and time settings, including
AM or PM if you are using the 12-hour
time format—other keys have no
function when entering date and time
settings.
4 Press Done (left softkey).
DID
YOU
KNOW
?
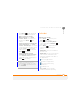
If your schedule contains a
conflict—two appointments that overlap—you
can see the conflict in Today View, Date View,
and Week View.
TIP
To switch views, press the left softkey.
Don’t confuse the view name displayed above
the left softkey with the current view. The
name above the left softkey is the name of
the next view you see when you press the
key.
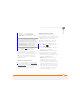
TIP
To “pencil in” an appointment, open the
appointment, select Status, and then select
Te n t a t i v e .
TIP
You can display your appointments on
your Today screen (see Selecting
your Home
screen layout).