
user manual

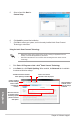


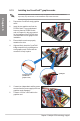
Table Of Contents
- Safety information
- About this guide
- P8H77-V specifications summary
- Chapter 1: Product introduction
- Chapter 2: Hardware information
- 2.1 Before you proceed
- 2.2 Motherboard overview
- 2.3 Building your computer system
- 2.3.1 Additional tools and components to build a PC system
- 2.3.2 CPU installation
- 2.3.3 CPU heatsink and fan assembly installation
- 2.3.4 DIMM installation
- 2.3.5 Motherboard installation
- 2.3.6 ATX Power connection
- 2.3.7 SATA device connection
- 2.3.8 Front I/O Connector
- 2.3.9 Expension Card installation
- 2.3.10 Rear panel connection
- 2.3.11 Audio I/O connections
- 2.4 Starting up for the first time
- 2.5 Turning off the computer
- Chapter 3: BIOS setup
- Chapter 4: Software support
- Chapter 5: Multiple GPU technology support
- Appendices
- http://csr.asus.com/english/Takeback.htm
ASUS P8H77-V
4-37
Chapter 4
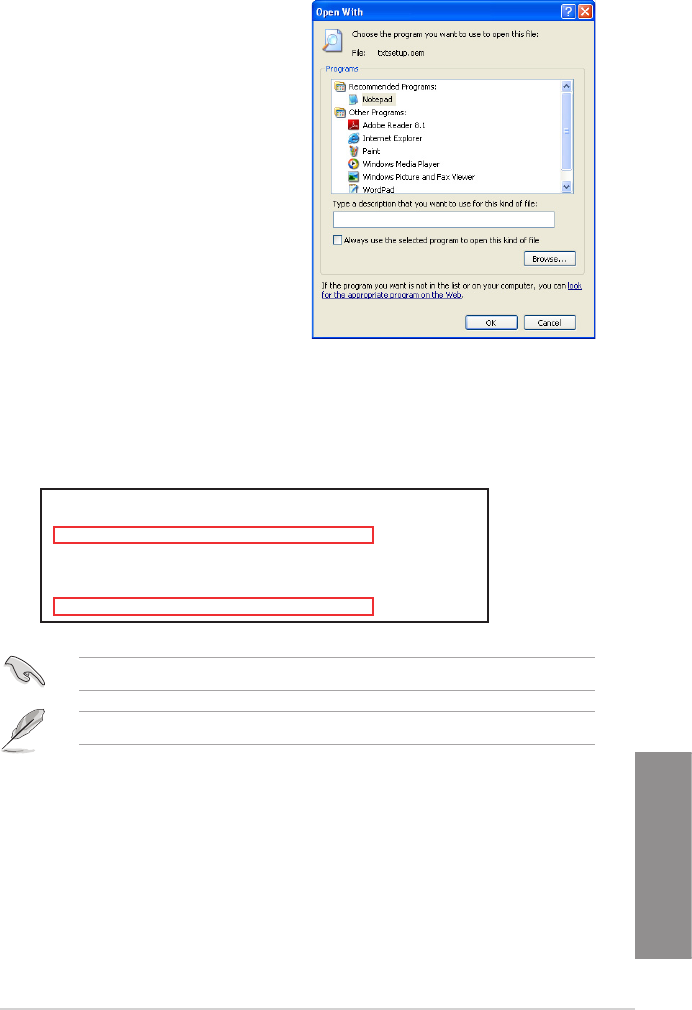
8. Find the [HardwareIds.scsi.iaAHCI_DesktopWorkstationServer] and
[HardwareIds.scsi.iaStor_DesktopWorkstationServer] sections in the txtsetup.oem
le.
9. Type the following line to the bottom of the two sections:
id = “USB\VID_xxxx&PID_xxxx”, “usbstor”
10. Save and exit the le.
Add the same line to both sections.
The VID and PID vary with different vendors.
7. Use Notepad to open the le.
[HardwareIds.scsi.iaAHCI_DesktopWorkstationServer]
id= “PCI\VEN_8086&DEV_1C02&CC_0106”,”iaStor”
id= “USB\VID_03EE&PID_6901”, “usbstor”
[HardwareIds.scsi.iaStor_DesktopWorkstationServer]
id= “PCI\VEN_8086&DEV_2822&CC_0104”,”iaStor”
id= “USB\VID_03EE&PID_6901”, “usbstor”