
user manual


Table Of Contents
- Safety information
- About this guide
- P8H77-V specifications summary
- Chapter 1: Product introduction
- Chapter 2: Hardware information
- 2.1 Before you proceed
- 2.2 Motherboard overview
- 2.3 Building your computer system
- 2.3.1 Additional tools and components to build a PC system
- 2.3.2 CPU installation
- 2.3.3 CPU heatsink and fan assembly installation
- 2.3.4 DIMM installation
- 2.3.5 Motherboard installation
- 2.3.6 ATX Power connection
- 2.3.7 SATA device connection
- 2.3.8 Front I/O Connector
- 2.3.9 Expension Card installation
- 2.3.10 Rear panel connection
- 2.3.11 Audio I/O connections
- 2.4 Starting up for the first time
- 2.5 Turning off the computer
- Chapter 3: BIOS setup
- Chapter 4: Software support
- Chapter 5: Multiple GPU technology support
- Appendices
- http://csr.asus.com/english/Takeback.htm
ASUS P8H77-V
4-31
Chapter 4
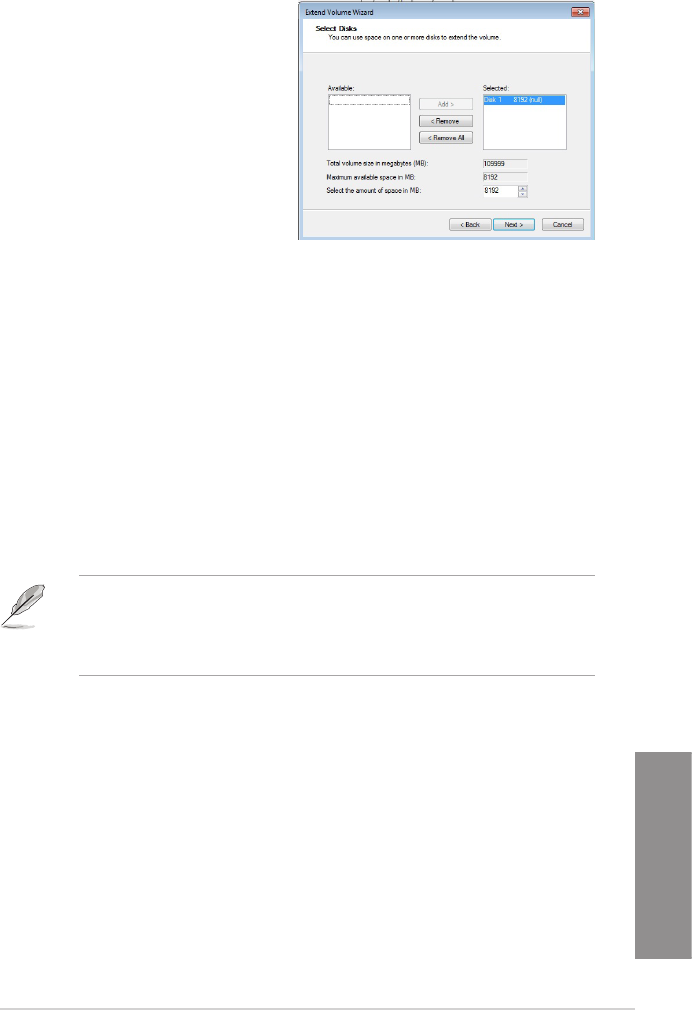
10. Click Next after selecting the default
selected disk.
11. Extend volume setup is completed. Click Finish to recover the Intel
®
Rapid Start
Technology partition.
12. Reboot the system after deleting the partition.
13. Go to Start > Control Panel > Programs > Programs and Features > to remove the
Intel
®
Rapid Start Manager for the complete deletion of Intel
®
Rapid Start Technology.
Intel
®
Smart Connect Technology
The Intel
®
Smart Connect Technology is a feature that provides the latest content updates
and energy efciency to your computer’s platform.
Once installed and activated, the Intel
®
Smart Connect Technology periodically wakes up the
system from sleeping mode, performs user state gathering, and initiates re-entry to sleeping
mode to wake-up after a set time interval.
• Intel
®
Smart Connect Technology supports Windows
®
Live Mail, Microsoft Outlook,
and Seesmic applications.
• It is necessary to enable the items of the PCH Conguration in the BIOS before
applying the Intel
®
Smart Connect Technology. Go to Advanced Mode > Advanced
> PCH Conguration, and enable the Intel
®
Smart Connect Technology.
Installing the Intel
®
Smart Connect Technology
Place the support DVD to the optical drive.
Go to Utilities, and click Intel
®
Smart Connect Technology.
As the setup wizard appears, click Next to begin the setup.
Tick I accept the terms in the License Agreement, and click Next.
1.
2.
3.
4.