
user manual


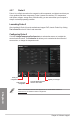
Table Of Contents
- Safety information
- About this guide
- P8H77-V specifications summary
- Chapter 1: Product introduction
- Chapter 2: Hardware information
- 2.1 Before you proceed
- 2.2 Motherboard overview
- 2.3 Building your computer system
- 2.3.1 Additional tools and components to build a PC system
- 2.3.2 CPU installation
- 2.3.3 CPU heatsink and fan assembly installation
- 2.3.4 DIMM installation
- 2.3.5 Motherboard installation
- 2.3.6 ATX Power connection
- 2.3.7 SATA device connection
- 2.3.8 Front I/O Connector
- 2.3.9 Expension Card installation
- 2.3.10 Rear panel connection
- 2.3.11 Audio I/O connections
- 2.4 Starting up for the first time
- 2.5 Turning off the computer
- Chapter 3: BIOS setup
- Chapter 4: Software support
- Chapter 5: Multiple GPU technology support
- Appendices
- http://csr.asus.com/english/Takeback.htm
ASUS P8H77-V
4-7
Chapter 4
Adjustment slider
Start-up values
Applies all changes
immediately
Click to restore all start-up settings
Target values
Undoes all changes without applying
Click to save your
overclocking settings
Using Advanced Mode
Click the Advanced Mode tab to adjust the advanced voltage settings.
Advanced mode
Applies all changes
immediately
Undoes all changes
without applying
Click to restore
all start-up
settings
Current values
Target values
Voltage
Adjustment bars
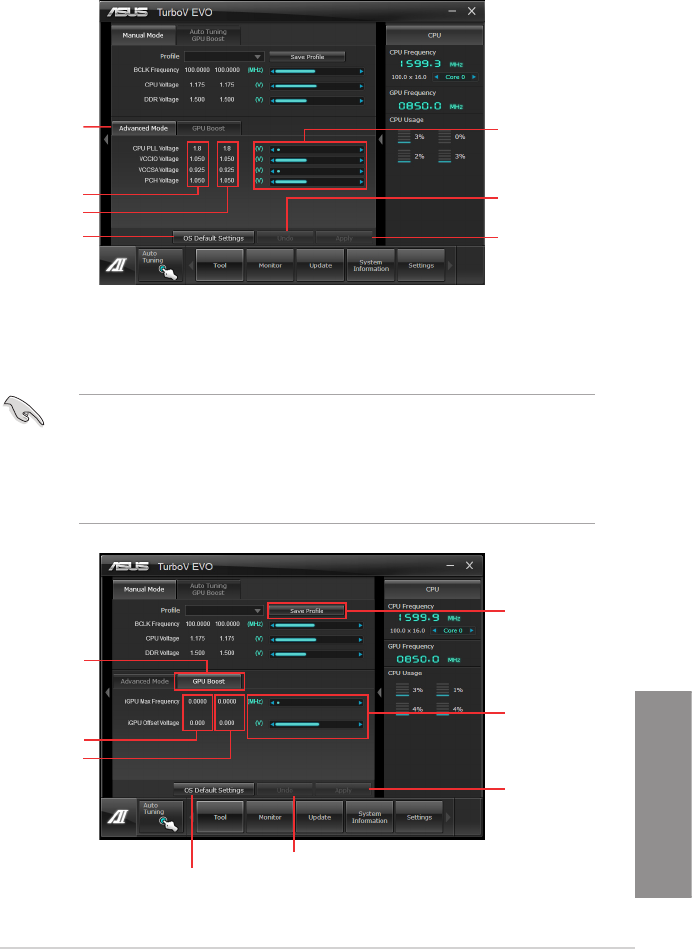
Using GPU Boost
Click the GPU Boost tab to manually adjust the GPU Boost settings.
• ASUS GPU Boost is available only when you install the VGA driver from the
motherboard support DVD.
• For system stability, all changes made in ASUS GPU Boost will not be saved to the
BIOS settings and will not be kept on the next system boot. Use the Save Prole
function to save your customized overclocking settings and manually load the prole
after Windows starts.
CPU Ratio