
user manual


Table Of Contents
- Safety information
- About this guide
- P8H77-V specifications summary
- Chapter 1: Product introduction
- Chapter 2: Hardware information
- 2.1 Before you proceed
- 2.2 Motherboard overview
- 2.3 Building your computer system
- 2.3.1 Additional tools and components to build a PC system
- 2.3.2 CPU installation
- 2.3.3 CPU heatsink and fan assembly installation
- 2.3.4 DIMM installation
- 2.3.5 Motherboard installation
- 2.3.6 ATX Power connection
- 2.3.7 SATA device connection
- 2.3.8 Front I/O Connector
- 2.3.9 Expension Card installation
- 2.3.10 Rear panel connection
- 2.3.11 Audio I/O connections
- 2.4 Starting up for the first time
- 2.5 Turning off the computer
- Chapter 3: BIOS setup
- Chapter 4: Software support
- Chapter 5: Multiple GPU technology support
- Appendices
- http://csr.asus.com/english/Takeback.htm
4-4
Chapter 4: Software support
Chapter 4
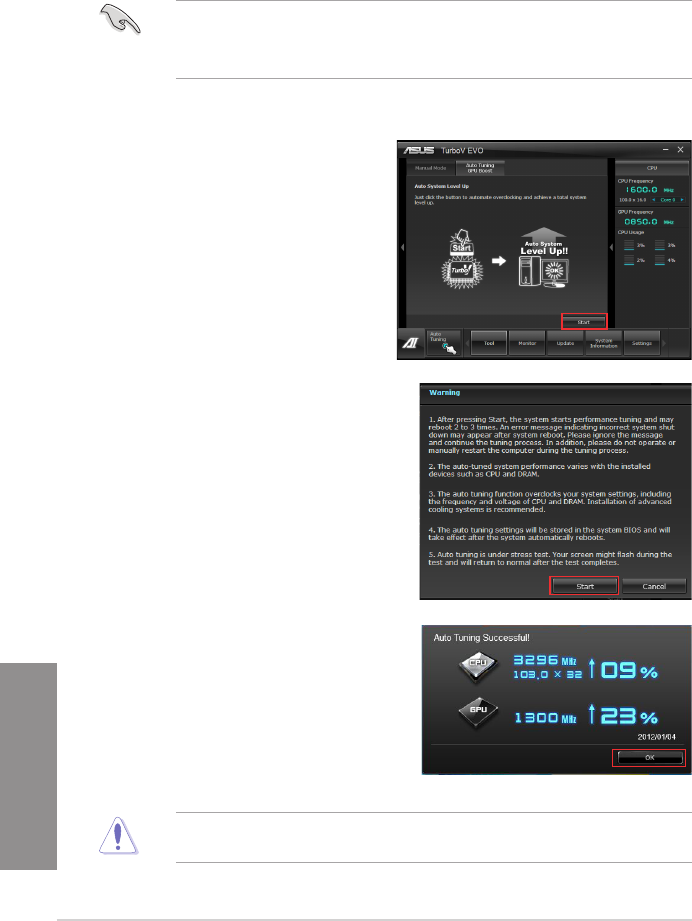
3. TurboV automatically overclocks the
CPU, saves BIOS settings and restarts
the system. After re-entering Windows, a
message appears indicating auto tuning
success. Click OK to exit.
Using Auto Tuning
1. Click Auto Tuning on the AI
Suite II main menu bar and
then click Start.
2. Read through the warning
messages and click Start to start
auto-overclocking.
4.3.2 Auto Tuning
Auto Tuning is an intelligent tool that overclocks your system to achieve a total system level
up using TurboV. Even O.C. beginners can achieve extreme yet stable overclocking results
with Auto Tuning!
• The overclocking result varies with the CPU model and the system conguration.
• To prevent overheating from damaging the motherboard, a better thermal environment
is strongly recommended.
To restore your system performance to normal, change the frequency and voltage settings
of the CPU and DRAM in your system BIOS.