
Computer Hardware User Manual


Table Of Contents
- Safety information
- Chapter 1: Product Introduction
- Chapter 2: Basic installation
- Chapter 3: BIOS setup
- Chapter 4: Software support
- 4.1 Installing an operating system
- 4.2 Support DVD information
- 4.3 Software information
- 4.3.1 AI Suite 3
- 4.3.2 Dual Intelligent Processors 4
- 4.3.3 EPU
- 4.3.4 DIGI+ Power Control
- 4.3.5 Fan Xpert 2
- 4.3.6 USB 3.0 Boost
- 4.3.7 Network iControl
- 4.3.8 USB BIOS Flashback
- 4.3.9 Ai Charger+
- 4.3.10 EZ Update
- 4.3.11 USB Charger+
- 4.3.12 System Information
- 4.3.13 ASUS SSD Caching II
- 4.3.14 Audio configurations
- 4.3.15 ASUS Dr. Power Utility
- Chapter 5: RAID support
- Chapter 6: Multiple GPU support
- Appendices
ASUS Z87-WS
2-1
Chapter 2
Basic installation
2
2.1 Building your PC system
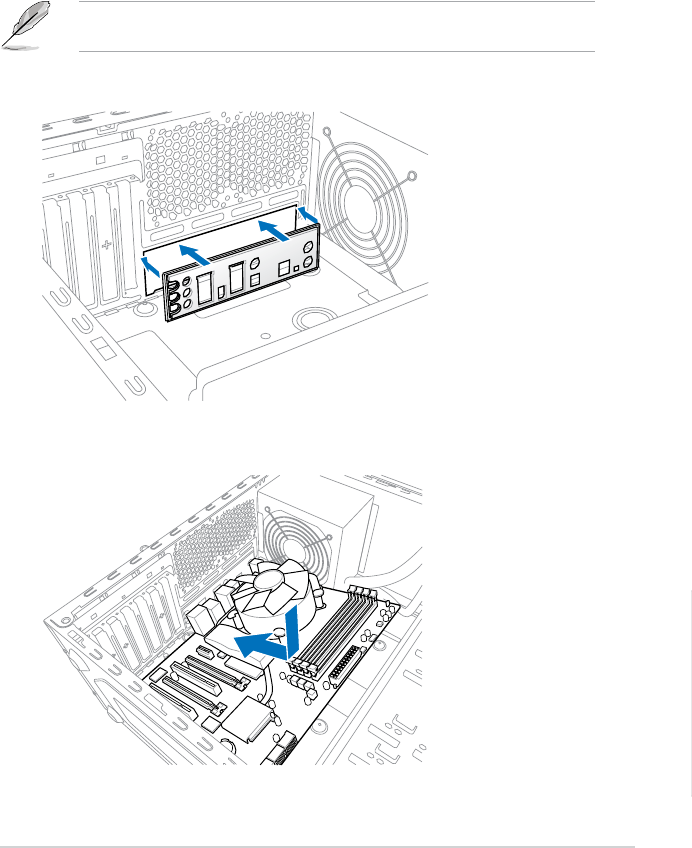
2.1.1 Motherboard installation
The diagrams in this section are for reference only. The motherboard layout may vary with
models, but the installation steps are the same for all models.
1. Install the ASUS I/O Shield to the chassis rear I/O panel.
Chapter 2: Basic installation
2. Place the motherboard into the chassis, ensuring that its rear I/O ports are aligned to
the chassis’ rear I/O panel.