
Computer Hardware User Manual


Table Of Contents
- Safety information
- Chapter 1: Product Introduction
- Chapter 2: Basic installation
- Chapter 3: BIOS setup
- Chapter 4: Software support
- 4.1 Installing an operating system
- 4.2 Support DVD information
- 4.3 Software information
- 4.3.1 AI Suite 3
- 4.3.2 Dual Intelligent Processors 4
- 4.3.3 EPU
- 4.3.4 DIGI+ Power Control
- 4.3.5 Fan Xpert 2
- 4.3.6 USB 3.0 Boost
- 4.3.7 Network iControl
- 4.3.8 USB BIOS Flashback
- 4.3.9 Ai Charger+
- 4.3.10 EZ Update
- 4.3.11 USB Charger+
- 4.3.12 System Information
- 4.3.13 ASUS SSD Caching II
- 4.3.14 Audio configurations
- 4.3.15 ASUS Dr. Power Utility
- Chapter 5: RAID support
- Chapter 6: Multiple GPU support
- Appendices
ASUS Z87-WS
1-37
Chapter 1
• For a fully congured system, we recommend that you use a power supply unit
(PSU) that complies with ATX 12 V Specication 2.0 (or later version) and provides a
minimum power of 350 W.
• DO NOT forget to connect the 4-pin/8-pin EATX12 V power plug. Otherwise, the
system will not boot.
• We recommend you use an EATX12V power connector to increase power efciency
when you overclock the CPU.
• We recommend that you use a PSU with a higher power output when conguring a
system with more power-consuming devices. The system may become unstable or
may not boot up if the power is inadequate.
• If you want to use two or more high-end PCI Express x16 cards, use a PSU with
1000W power or above to ensure the system stability.
• We recommend you connect an EATX 12V_1 cable to increase power efciency when
you plug in high-end PCI Express x16 cards.
• If you are uncertain about the minimum power supply requirement for your system,
refer to the Recommended Power Supply Wattage Calculator at
http://support.asus.com/PowerSupplyCalculator/PSCalculator.aspx?SLanguage=en-
us
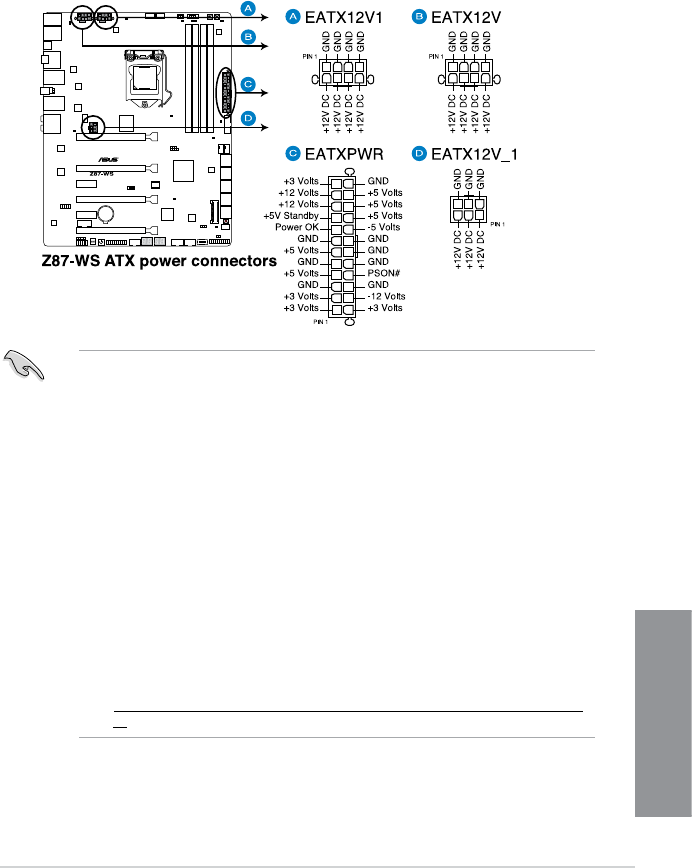
9. EATX power connectors
(24-pin EATXPWR; 8-pin EATX12V1, 8-pin EATX12V; 6-pin EATX12V_1)
These connectors are for ATX power supply plugs. The power supply plugs are
designed to t these connectors in only one orientation. Find the proper orientation and
push down rmly until the connectors completely t.