
Computer Hardware User Manual


Table Of Contents
- Safety information
- Chapter 1: Product Introduction
- Chapter 2: Basic installation
- Chapter 3: BIOS setup
- Chapter 4: Software support
- 4.1 Installing an operating system
- 4.2 Support DVD information
- 4.3 Software information
- 4.3.1 AI Suite 3
- 4.3.2 Dual Intelligent Processors 4
- 4.3.3 EPU
- 4.3.4 DIGI+ Power Control
- 4.3.5 Fan Xpert 2
- 4.3.6 USB 3.0 Boost
- 4.3.7 Network iControl
- 4.3.8 USB BIOS Flashback
- 4.3.9 Ai Charger+
- 4.3.10 EZ Update
- 4.3.11 USB Charger+
- 4.3.12 System Information
- 4.3.13 ASUS SSD Caching II
- 4.3.14 Audio configurations
- 4.3.15 ASUS Dr. Power Utility
- Chapter 5: RAID support
- Chapter 6: Multiple GPU support
- Appendices
ASUS Z87-WS
6-11
Chapter 5
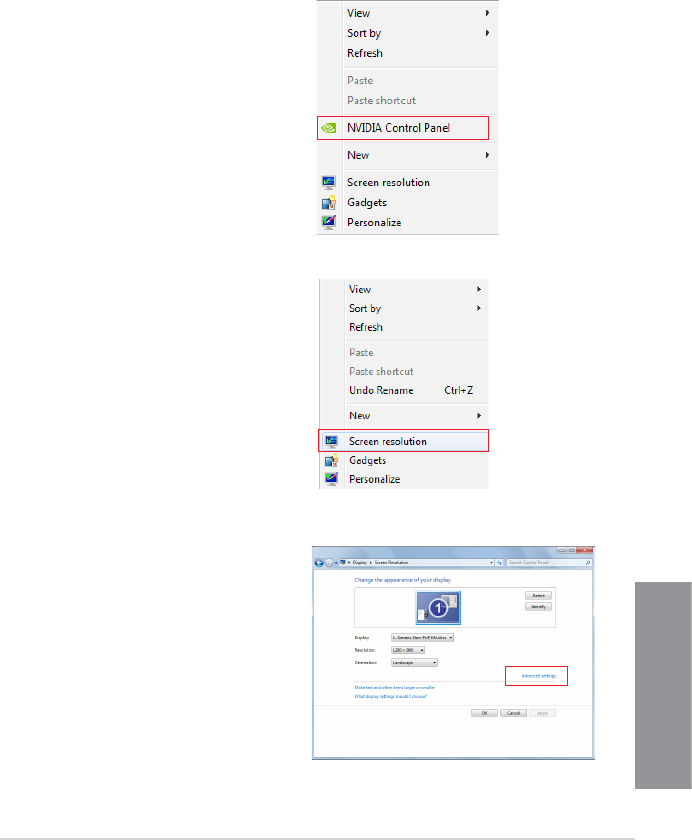
B1. If you cannot see the NVIDIA Control
Panel item in step (A), select Screen
Resolution.
B2. From the Screen Resolution window,
click Advanced settings.
6.2.5 Enabling the NVIDIA® SLI™ technology
After installing your graphics cards and the device drivers, enable the SLI feature on the
NVIDIA
®
Control Panel from the Windows
®
7 desktop.
Launching the NVIDIA Control Panel
You can launch the NVIDIA Control Panel using the following two methods.
A. Right click on an empty space on the
Windows
®
desktop and select NVIDIA
Control Panel.
The NVIDIA Control Panel window
appears (See Step B3).