
Troubleshooting guide


SECTION 2
INSTALLING THE PRINTER
6
Install Inkjet Cartridges
AstroJet 2650P can be configured with six Inkjet Cartridges.
AstroJet 2800P can be configured with eight Inkjet Cartridges.
To install Inkjet Cartridges:
1. Remove Inkjet Cartridge from packaging, taking care not to touch
copper contacts, metal plate, or gold printhead. Remove protective
tape from Printhead.
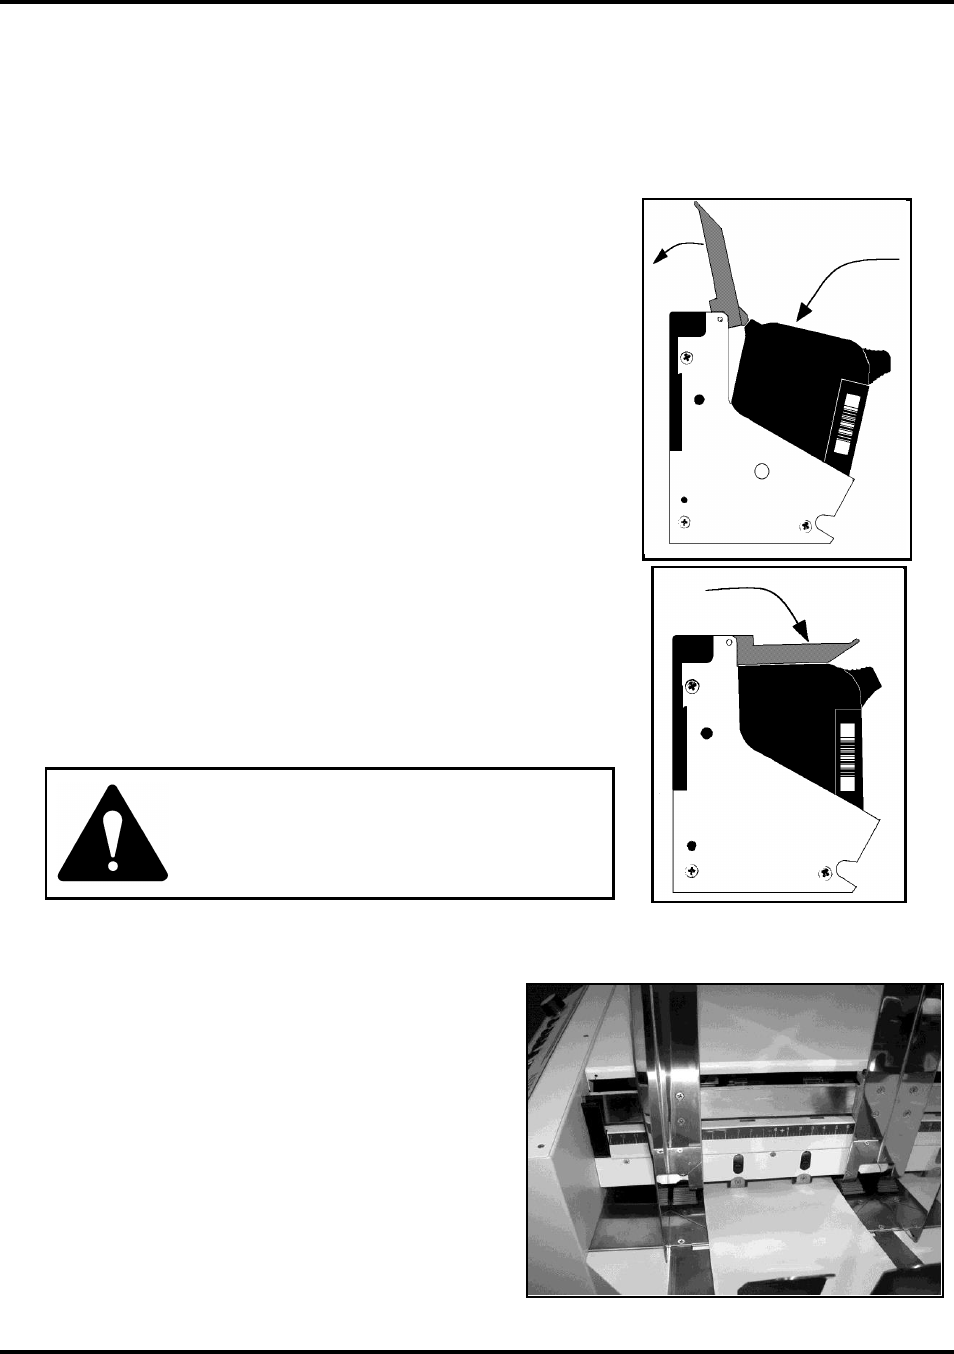
2. Open Latch Lever mounted on Inkjet Cartridge Holder.
3. With Cartridge’s Printhead pointing down, slide Cartridge into
Holder. Push down and toward contacts in Holder.
4. Make sure Cartridge is seated in Holder, then close Latch Lever to
secure Cartridge. DO NOT force Latch Lever into place.
(See diagram.)
5. Repeat Steps 1-4 for remaining Inkjet Cartridges.
NOTE: For optimum image quality during the run, refer to
“Cleaning the Printhead”.
Ink in the cartridge may be harmful if
swallowed. Keep new and used cartridges
out of reach of children. Discard empty
cartridges immediately.
Setting up Feed
1. Release Separator Locking Levers (located on operator’s
side of Feeder), then raise Separators to “up and locked”
position. Move Side Guides to outermost open position.
Place one piece of media in center of Feed Table.
2. Four Separators on Feeder. Use two Center Separators
for narrow media and all four Separators for wide media.
Place media under the Separators and lower Separators so
that they rest on media.
3. Rotate Locking Lever up to lock Separators in place.