
Mini White Best Practices

IX. Route the wiring harness of the pump to the terminal block inside the indoor AC unit (see wiring
instructions below).
X. If not already installed, install the cylindrical lter and attach the clear reservoir to the pump base.
XI. Once the knock out panel is removed and the three items above are installed and secure and it’s safe
to do so, restore power to the indoor unit.
XII. Slowly pour water into the high wall unit’s drip tray and observe the ow of water into the pump
reservoir checking for leaks until the pump activates. Continue slowly pouring water into the reservoir
until water is owing from your discharge termination point for about 30 seconds.
XIII. Re-connect the OEM drain tube to the pump reservoir inlet.
XIV. Re-install the AC unit’s cover and the pump cover.
WARNING: Do not use discharge tubing greater than ¼". All tubing connections should be carefully
secured with zip ties.
2. Wiring
a. Aspen Pump wiring harnesses have 4 wires; 2 power and 2 safety
b. For a standard 230-V split system with a 4 block terminal, we recommend the following. This scenario
assumes lines 1 & 2 from the outdoor unit are power wires and that line 1 is BLACK and line 2 is RED.
Shut off the power and following safe electrical handling procedures prior to wiring the pump.
I. Using a wire nut, tie together the BLACK power wire & the GRAY safety wire from the pumps wiring
harness along with the BLACK power wire coming from the outdoor unit. The black wire from the
outdoor unit may already be installed on terminal 1 of the indoor unit, if it is, remove it so it can be tied
into the wire nut as described in this section. The wire nut should have 3 wires in it.
II. Locate the included inline fuse loop, cut and strip the wires. Using a wire nut, attach one end of the
inline fuse to the RED power wire from the pumps wiring harness. Now insert the other end of the RED
fuse wire into terminal 2 of the indoor unit along with the RED power wire coming from the outdoor
unit.
III. Insert the PURPLE safety wire from the pump’s wiring harness into terminal 1 of the indoor unit all by
itself.
3. Siphoning What is it and how does it affect the pump?
a. Siphoning occurs when the discharge tubing terminates below the pump and reservoir. In this
scenario, when the pump stops running, gravity takes over and pulls all the water out of the pump.
The next time the pump begins to run, it is dry and must self-prime. When the pump “self-primes”
‒ it is functioning “dry,” without water. Proper operation of the pump requires that the pump be
lubricated and cooled by water and may sustain damage anytime it runs without water.
b. Where to install the anti-siphon device:
I. All Aspen pumps include the anti-siphon device, it is pre-installed at the factory on our Silent+
models and located inside the box on all other models (which means that the installer must install the
antisiphon device on those models).
II. The anti-siphon device is an in-line device that can be installed in any orientation; it will have tubing
on either side of it when correctly installed. The anti-siphon device must be installed on the discharge
side of the pump, ABOVE THE PUMP and ideally should be installed 18” from the pump or prior to the
drain tube dropping below the level of the pump. (*this distance may vary to suit your installation) and
will have additional ¼" tubing leading to the desired discharge location.
III. The correct use of the anti-siphon device allows the discharge tubing to terminate at any location
within discharge distance specication of the pump without causing any potential siphoning effect to
reach the pump.
4. Maintenance Yes, pumps require some maintenance just like AC systems.
a. Annual inspections are recommended and consist of the following:
I. Inspect all electrical, communication and tubing connections to ensure they are tight.
II. Carefully disassemble the reservoir and inspect the mesh lter and inside the reservoir for debris and
or organic growth. If necessary, remove and clean the reservoir with warm water and mild soap, rinse
thoroughly before re-installing. The oat inside the reservoir must be re-installed with magnet on the
top side!
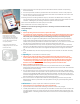
RectorSeal has an excellent
pump selector on our website
and includes the appropriate PDF
wiring diagrams for many specic
AC units. http://www.rectorseal.
com/pump-selector/
Aspen pumps are available in
voltage specic 115 V or 230 V and
Univolt (100-250 V)
2/3