A Aspect Metal” Peel & Stick Tile Installation Guide PROPER SURFACE PREPARATION IS ESSENTIAL FOR A SUCCESSFUL PROJECT Allure to follow recommended surface fp:epnraflan Instructions may void the warranty. ACE LIC s not responsible or liable for any labor costs or damaged product incurred as a result of improper installation. All product defaces are covered under aur S-year limited warranty. Read this installation manual in its entirety before you start.
Method 2: If you do not intend to prepare, sand and prime the surface, an additional adhesive should be used. We recommend a high-quality polyurethane construction adhesive be applied to the back of each tile in these cases. Be sure to remove the release film on the back of each tile before applying additional adhesive. Apply no more than about five pea-sized dots of adhesive to the back of a full tile (see right). Keep the adhesive a half-inch from the edges. Firmly press the tiles into place.
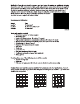
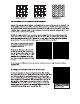
Basket Weave 1 Basket Weave 2 Herringbone See Circumspection for herringbone layout instructions. Layout: One popular layout method is to begin from the center of the area to be covered. This method allows balance around the perimeter of the work area. Find the center point between the horizontal and vertical measurements and mark on the wall or work area with a pencil. Snap a vertical and a horizontal chalk line as a reference.
2) Cutting tiles: The most important thing to remember here is to cut only the tiles, not yourself — be careful. Be sure to protect your eyes from damage by using protective eye wear or safety goggles. Measure and mark the tile with a marker on the protective film where the cut must be made (Picture C). If cutting tiles is necessary, using a chop saw is the recommended cutting method.