
User's Manual


Table Of Contents
- Front page
- Contents
- Your dishwasher
- Safety instructions
- Before washing for the first time
- Loading the dishwasher
- Using the dishwasher
- Add detergent
- The main power switch
- Select a program
- Select a program mode
- Select an Option
- Starting the dishwasher
- Time remaining
- Status light™
- Stopping or changing a program
- If you want to load more dishes
- If the dishwasher is turned off due to a power failure
- Once the program has finished
- How to get the best drying results
- Unloading the dishwasher
- Program chart
- Settings
- Care and cleaning
- Troubleshooting
- Technical information
- Installation
- ASKO Service
- Information for test institute
- Your notes
- Quick guide
If the dishwasher is built-in the surrounding cabinetry must be resistant
to any condensation from the dishwasher.
B. Freestanding
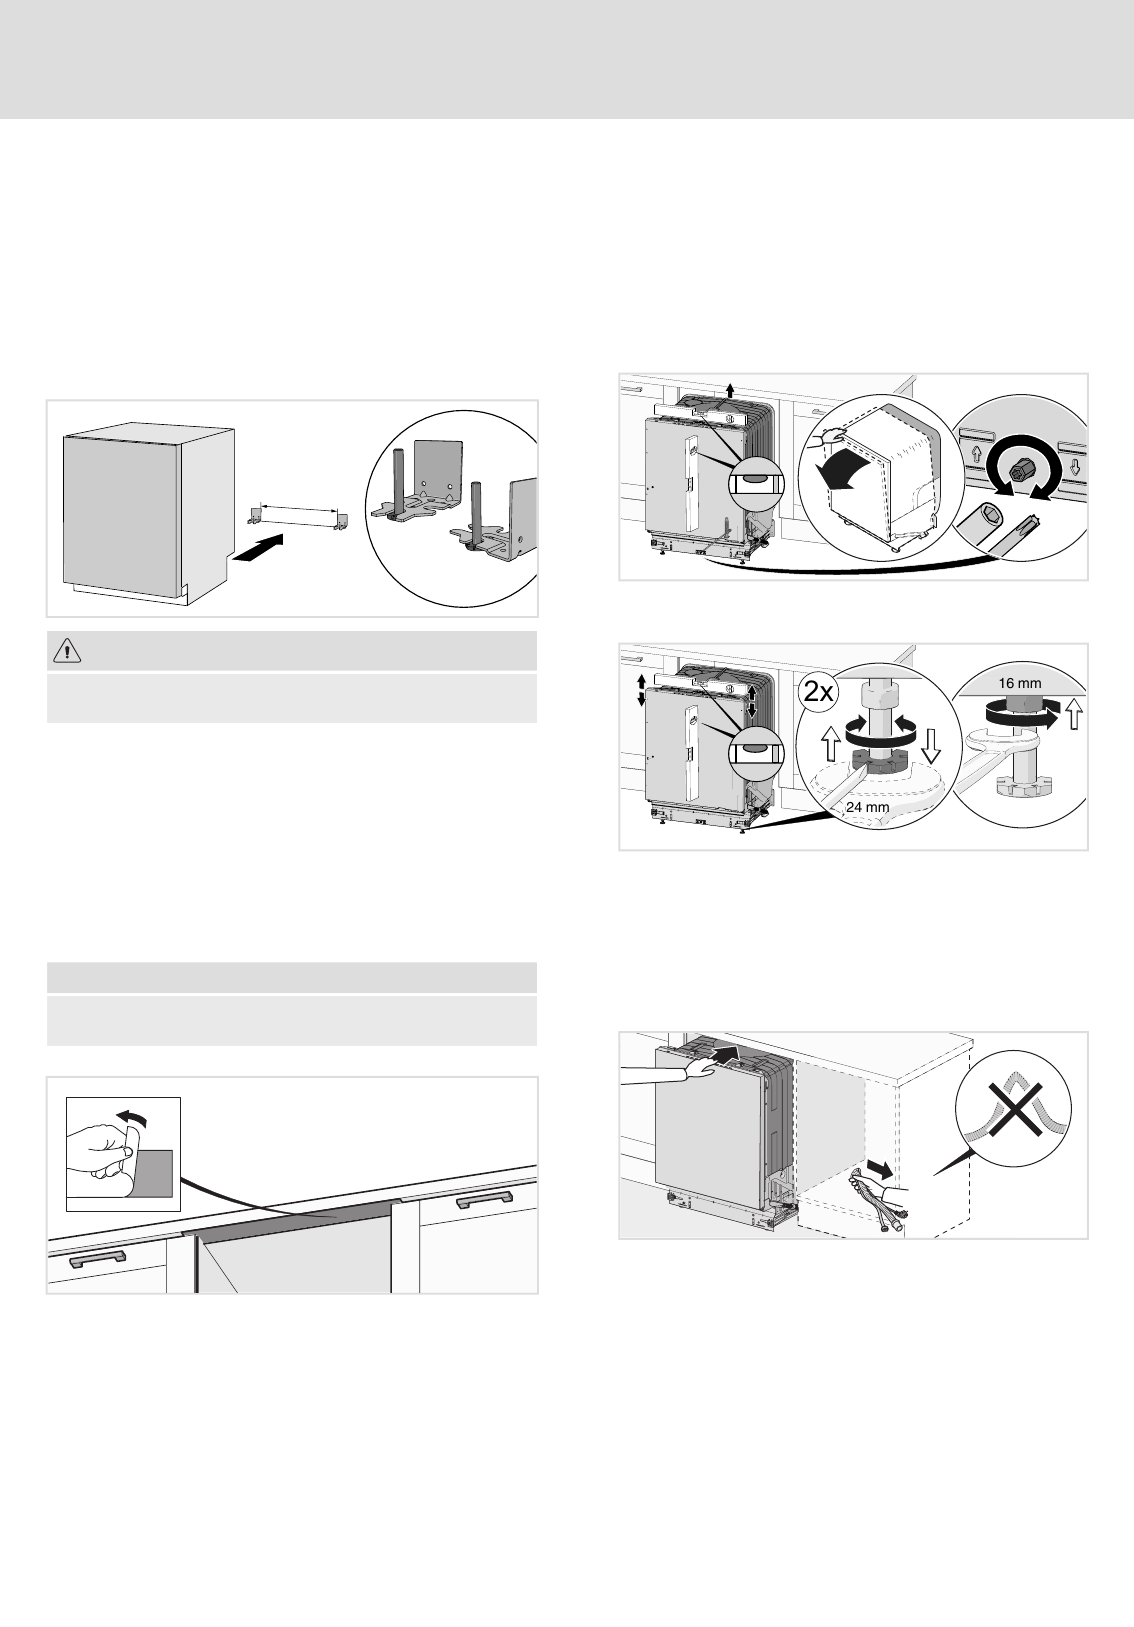
A freestanding dishwasher must be fitted with anti-tip brackets. This
comprises two brackets, which are screwed into place as illustrated.
The dishwasher is then pushed in so that the brackets engage the rear
feet. Now the dishwasher will not topple if pressure is put on the open
door. If the dishwasher is installed completely on its own, side panels
and a worktop must both be fitted. Accessories can be purchased
where you bought the dishwasher.
413
WARNING!
A completely freestanding dishwasher must be fitted with anti-tip
brackets.
C. Partially built-in
If the dishwasher is located so that one of its sides is visible, a side
panel must be fitted. Accessories can be purchased where you bought
the dishwasher.
Affix the protective film
Attach the protective film (packed in the document bag) to the
underside of the worktop. The protective film is to protect the worktop
from moisture.
NOTE!
The surface to which the protective film is affixed must be clean and
dry.
Adjust the height and slide the
dishwasher into place
1. Start by measuring the height from the floor to the bottom edge of
the worktop.
2. Measure the height from the floor to the top edge of the dishwasher.
3. Lean the dishwasher forwards a little and adjust the rear foot with
the screw at the front of the dishwasher. Turn clockwise to lower or
anticlockwise to raise.
4.
Max 0.6 Nm
5. Adjust the front feet by turning them clockwise to raise and
anticlockwise to lower the dishwasher.
2x
24 mm
16 mm
6. Check that there is an air gap of at least 3 mm between the
underside of the worktop and the top edge of the dishwasher.
7. Slide the dishwasher into place.
• Pull through the drainage and supply hoses when the machine
is slid into place.
• Check that the hoses have no kinks or sharp bends, and check
that there is nothing that can damage the hoses.
8. Make any final adjustments to the feet (the dishwasher may lean
no more than 5 mm) and tighten the lock nuts on the front feet.
21