Downloaded From projector-manual.
Contents Contents........................................................................... 1 About this manual... .......................................................................................... 2 Operation During Projection .......................................... 3 Image Operations During Projection ................................................................. 3 Adjusting Image Brightness .........................................................................................
Replacing the Lamp ........................................................................................ 26 To check the current lamp use time ........................................................................... 26 When to replace the lamp .......................................................................................... 27 Replacing the Lamp ................................................................................................... 27 To replace the lamp ..........................
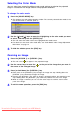
Operation During Projection This section explains the various types of operations you can perform while the projector is projecting an image. Image Operations During Projection You can perform the following operations while projecting an image.
Selecting the Color Mode You can select from among five different color mode settings to optimize the projected image in accordance with image contents and projection conditions. To change the color mode 1 Press the [COLOR MODE] key. 2 Use the [T] and [S] keys to move the highlighting to the color mode you want to select, and then press the [ENTER] key. z This displays the color mode selection window. The currently selected color mode is the one whose button is selected (filled in).
Momentarily Cutting Off the Input Source Image 1 Press the [BLANK] key. 2 To resume projection of the image from the input source, press the [BLANK] key (or [ESC] key). z This temporarily cuts off the image from the input source and projects a black screen in its place. Note You can specify projection of a black screen or blue screen, or a logo. For details, see “Blank Screen” under “Screen Settings Main Menu” on page 18. Freezing an Image Pressing the [FREEZE] key freezes the projected image.
Displaying a Pointer in the Projected Image You can select from among eight different pointer styles, including various arrow styles, for display in the projected image. Pointers can be used during a presentation to indicate or highlight a specific part of the image. Arrow 1 Oval 1 Spot 2 Note Depending on the pointer style you are using, the pointer may not display properly when you are using keystone correction.
Changing the aspect ratio of the projected image Press the [ASPECT] key to toggle the aspect ratio of the displayed image between 4:3 and 16:9. Note z The aspect ratio setting affects the projected image only when the input source is VIDEO or component. z When the input source is a component signal with an aspect ratio of 16:9, the aspect ratio switches automatically to 16:9. When this happens, pressing the [ASPECT] key will not change the aspect ratio.
Using the [FUNC] Key Pressing the [FUNC] key displays the menu shown below. You can use this menu to perform the operations described below. z Adjust image brightness Highlight “Brightness” and then press the [ENTER] key. • This performs the same operation as pressing the [BRIGHT] key ( key) described on page 3. z Turn the Eco Mode on or off Highlight “Eco Mode” and then press the [ENTER] key. • This performs the same operation as pressing the [ECO] key (U key) described on page 7.
Configuring Advanced Projector Settings Your projector has a setup menu that you can use to configure advanced settings. Basic Setup Menu Operations Displaying the Setup Menu Pressing the [MENU] key displays the menu shown below in the center of the projection screen. Main menu The main menu includes seven main menu items. The currently selected main menu item is the one that is highlighted. Sub-menu The sub-menu shows each individual setting under each main menu item, and its current setting.
Basic Setup Menu Example The procedure below shows how to configure the following three settings: • Image Adjustment J Contrast • Image Adjustment J Color Mode • Option Settings 1 J Eco Mode Note z Certain settings on the setup menu cannot be changed while there is no input signal to the projector. Because of this, you should configure setup menu settings after selecting an input source and starting projection. z This example covers basic steps only.
To configure the “Option Settings 1 J Eco Mode” setting 5 6 7 8 Press the [ESC] key. Press the [T] key three times to select “Option Settings 1”. Press the [ENTER] key. Press the [T] key three times to select “Eco Mode”. 9 Use the [W] and [X] keys to select “On” or “Off”. 10 After you are finished, press the [MENU] key to exit the setup menu. Downloaded From projector-manual.
Restoring Projector Settings to Their Initial Factory Defaults You can use the procedures in this section to restore all of the settings on a particular main menu or all of the settings on the setup menu to their initial factory defaults. To restore all settings on a particular main menu to their initial factory defaults 1 2 Press the [MENU] key to display the setup menu. Use the [T] and [S] keys to select the main menu whose settings you want to restore to their initial factory defaults.
To restore all settings on the setup menu to their initial factory defaults 1 2 Press the [MENU] key to display the setup menu. Use the [T] key to select “Restore All Defaults”, and then press the [ENTER] key. z This displays a confirmation message asking if you want to initialize all settings. 3 4 Use the [S] key to select “Yes”. To restore all settings on the setup menu to their initial defaults, press the [ENTER] key.
Image Adjustment Main Menu Setting Name Input Setting Unit Description Brightness RCVU Source Specific Use this sub-menu to adjust the brightness of the projected image. A larger value produces a brighter image. Contrast RCVU Source Specific Use this sub-menu to adjust the contrast of the projected image. A larger value produces a stronger contrast. Sharpness RCV Source Specific Use this sub-menu to adjust the sharpness of the outlines in the projected image.
Setting Name Input Setting Unit Description Vertical Position RCV Signal Specific Use this sub-menu to adjust the vertical position of the input source image within the projection area. Horizontal Position RCV Signal Specific Use this sub-menu to adjust the horizontal position of the input source image within the projection area.
About the “Signal Specific” Setting Unit For the items that have “Signal Specific” in the “Setting Unit” column of the above table, the setting is saved for the specific type of signal (XGA/60Hz, SXGA/60Hz, etc.) that is being input when the setting is performed, and not for a specific input source. Screen Settings Main Menu Setting Name Input Setting Unit Description Keystone Correction RCVUN Single Use this sub-menu to correct vertical keystoning of the projected image.
Setting Name Input Setting Unit Description Projection Mode RCVUN Single Use this sub-menu to specify whether projection will be from the front of the screen or the back of the screen. *: Select this option when projecting from the front of the screen. : Select this option when projecting from the back of the screen. : Select this option to flip the back-projected image vertically. : Select this option to flip the image vertically.
Setting Name Input Setting Unit Description Blank Screen RCVUN Single Use this sub-menu to specify what should be projected after the [BLANK] key is pressed. Blue: Select this option to project a blue screen. Black*: Select this option to project a black screen. Logo: Select this option to project the projector’s built-in logo screen.
Input Settings Main Menu Setting Name Input Setting Unit Description RGB Input RCUVN Single Use this sub-menu to specify manually the type of signal being input from the projector’s RGB input terminal. Auto*: Automatically detects the signal being input from the RGB input terminal and configures the appropriate input protocol. RGB: Select this option when a computer is connected to the RGB input terminal.
Option Settings 1 Main Menu Setting Name Input Setting Unit Description Menu Position RCVUN Single Use this sub-menu to specify the display position of the setup menu as either the center or the left side of the screen. *: Select this option to display the setup menu in the center of the screen. : Select this option to display the setup menu on the upper left corner of the screen. Auto Keystone Correction RCVUN Single Use this sub-menu to turn auto keystone correction on or off.
Setting Name Direct Power On Input RCVUN Setting Unit Single Description Use this sub-menu to turn Direct Power On on or off. See “Direct Power On” in the “User’s Guide” for more information. On: Select this option to turn on Direct Power On. Off*: Select this option to turn off Direct Power On. Important! While Direct Power On is enabled, the projector will turn off automatically if no key operation is performed and no signal input is received within about 10 minutes after it is turned on.
Option Settings 2 Main Menu Setting Unit Setting Name Input Description Zoom Memory RCVUN Single Use this sub-menu to turn zoom memory on or off. Zoom memory lets you save the zoom setting when the projector is turned off, so it can be restored automatically the next time the projector is turned on. On*: Select this option when you want to restore the zoom setting that was in effect when the projector was last turned off, whenever it is turned on.
Operational Info Main Menu Setting Name Input Setting Unit Description Lamp Time RCVUN Single This sub-menu item shows the cumulative number of hours the current lamp has been used to date. Use this value as a reference when deciding whether or not the current lamp needs to be replaced. For details about replacing the lamp, see “Replacing the Lamp”. Reset Lamp Time RCVUN Single Use this submenu item to reset the lamp time to 0 hours after replacing the lamp.
Restore All Defaults Main Menu Setting Name Input Setting Unit Description Restore All Defaults RCVUN Single This sub-menu returns all sub-menu items on all main menus to their initial default settings. This operation can be performed regardless of the currently selected input source and regardless of whether or not a signal is currently being input. For details about this procedure, see “To restore all settings on the setup menu to their initial factory defaults” on page 13.
User Maintenance Cleaning the Projector Periodically clean the projector exterior, lens, intake vents, and exhaust vents on a regular basis. Important! z Always make sure that the projector has cooled sufficiently before cleaning it. If the projector is turned on, perform the following steps before cleaning it. 1 2 3 Turn off the projector. Check to make sure that the POWER/STANDBY indicator has changed to amber.
Important! z Continued use of the projector after dust has accumulated around the intake vents can cause overheating of internal components and lead to malfunction. z Certain operating conditions also can cause dirt and dust to accumulate around the projector's exhaust vents on the front. If this happens, use the same procedure as that described above to clean the exhaust vents. Replacing the Lamp Caution Continued use of a lamp that has passed its lamp life increases the risk of the lamp rupturing.
When to replace the lamp The LAMP indicator starts to flash red and the message shown below appears whenever the lamp time exceeds 2000 hours. It is time to replace the lamp. Use the procedure in the User’s Guide to replace the lamp as soon as possible. When this message appears, replace the lamp as soon as possible using the procedure under “Replacing the Lamp” on page 27. Note that the above message will disappear about 10 seconds after you turn on the projector, even if you do not replace the lamp.
To replace the lamp Important! When replacing the lamp, use the special screwdriver that comes with the YL-33 replacement lamp. The projector does not come with a screwdriver. 1 2 Turn off the projector and unplug its AC power cord. 3 Turn over the projector and place it on top of a desk or on some other stable surface. 4 Loosen the lamp cover screw, and then remove the lamp cover. Wait for about 60 minutes to allow the projector’s current lamp to cool down completely.
6 Use the lamp cartridge handle to pull the lamp cartridge from the projector. 7 Insert the new lamp cartridge as far as it will go, as shown in the illustration. z After inserting the lamp cartridge, lay its handle down in the position shown in the illustration under step 5 on this page. Make sure the grooves of the lamp cartridge align with the grooves of the lamp housing. Caution Take care to avoid touching the lamp (glass) and the mirrors inside the projector.
To reset the lamp time 1 2 3 4 5 6 7 8 9 Turn on the projector. Press the [MENU] key to display the setup menu. Press the [T] key to select “Operational Info”, and then press the [ENTER] key. Press the [ENTER] key. This causes the message “Reset Lamp Time?” to appear. Press the [S] key to select “Yes”, and then press the [ENTER] key. This resets the lamp time to 0 hours. Press the [MENU] key to exit the setup menu. This causes the setup menu to disappear from the projected image.
Appendix Remote Controller Signal Range When performing an operation on the remote controller, point it at the remote control signal receiver on the back or front of the projector. The following illustration shows the range of the remote controller signal. ±30 degrees max. 5 meters (16.4 feet) max. ±30 degrees max. 5 meters (16.4 feet) max. Front Back 5 degrees to 30 degrees ±30 degrees max. 5 meters (16.4 feet) max. 5 meters (16.4 feet) max.
Connecting to a Component Video Output Device Some video devices are equipped with a component video output terminal. You can use an optionally available VESA to component video adapter (SP-VESA-ADPT-R) and a component video cable to connect the RGB input terminal of the projector to the component video output terminal of a video device. Important! Always turn off the projector and the video device before connecting them. z Component video output terminals come in 3-terminal sets: Y·Cb·Cr or Y·Pb·Pr.
Full-screen Display of an RGB Image The projector outputs images using XGA (1024 pixels × 768 pixels) video resolution. When the input signal from the computer connected to the projector is not an XGA signal, “Resize Image To Fit” automatically enlarges or reduces the image so it matches the projector’s video resolution and fills the entire screen. The following shows how different input signals from a computer are adjusted during projection.
Reattaching the Lens Cover Use the following procedure to replace the lens cover if it should accidentally become detached from the projector. 1 Insert the nub () of the left tab of the lens cover into the depression () of the tab under the lens. z When performing the above step, make sure that the lens cover is open to 90 degrees in relation to the front of the Data Projector.