
User's Manual


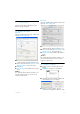
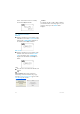


Table Of Contents
- 1 Important
- 2 Your VOIP251 Cordless Telephone
- 3 Getting Started
- 3.1 Requirements
- 3.2 Connecting your charger
- 3.3 Charging your handset
- 3.4 Positioning the base station
- 3.5 Checking the signal strength
- 3.6 Checking the battery level
- 3.7 Installing software
- 3.8 Setting up for the first time
- 3.9 Checking Skype connection status
- 3.10 Auto power off
- 3.11 What is standby mode?
- 3.12 Switching your handset on/off
- 4 Contact List
- 5 Call
- 6 Call Log
- 7 Conference Calls
- 8 Intercom
- 9 Call Transfer
- 10 Skype Tools
- 11 Setting Options
- 12 Advanced Settings
- 13 Emergency Management
- 14 Extra Features
- 15 Phone Settings
- 16 Text and Numbers
- 17 Appendix
- 18 Troubleshooting
- 21 Index

23
Call Transfer
9 Call Transfer
You can transfer Skype call(s) between your
handset and your computer.
9.1 Enabling call transfer
Windows
Open the “VOIP251 Phone Settings” window and
select the
Audio Settings
tab.
Under PC Skype Audio Settings, check the
“Authorize Skype call from computer” box.
Select a device from the
Earpiece Device
and
Microphone Device
drop down menus.
Click
Apply
.
Transfer Call
is now available in the tray icon
menu.
Note
The “Authorize Skype call from computer” box
must be checked in order for you to use the
computer’s audio device.
Mac OS X
Open the “VOIP251 Phone Settings” window and
select the
Audio Settings
tab.
Under Mac Skype Audio Settings, check the
“Authorize Skype call from computer” box.
Select a device from the
Earpiece Device
and
Microphone Device
drop down menus.
Transfer Call
is now available in the VOIP251
menu.
Note
The “Authorize Skype call from computer” box
must be checked in order for you to use the
computer’s audio device.
9.2 Transfer to computer
During a call, press and hold
4 on your
handset.
TRANSFER
is displayed on the handset.
A dialogue box with a transfer confirmation
request displays on your computer.
Click
OK
on your computer. You can
continue the call using your computer’s audio
1
2
3
4
1
2
3
1
2
3
4