SHBBook Page 1 Wednesday, March 3, 1999 8:03 PM NetStacker II Dual Speed Stackable Hub User’s Manual
SHBBook Page 2 Wednesday, March 3, 1999 8:03 PM Copyright Notice Trademarks Asanté Technologies and FriendlyNET are trademarks of Asanté Technologies, Inc. Ethernet is a registered trademark of the Xerox Corporation. A ll brand names and products are trademarks or registered trademarks of their respective holders. FCC Information This device complies with part 15 of the FCC Rules.
SHBBook Page i Wednesday, March 3, 1999 8:03 PM Table of Contents About This Manual ................................................. iii Chapter Contents .............................................. iii Document Conventions ..................................... iv Important Safety Instructions ............................ iv Introduction .......................................................... 1-1 Package Contents ......................................... 1-1 The NetStacker II Hubs ..................
SHBBook Page ii Wednesday, March 3, 1999 8:03 PM LED Indicators ..................................................... 3-1 Power LED ..................................................... 3-2 Collision Indicator LEDs ................................. 3-2 Hub ID Number LEDs ..................................... 3-3 Port Link Activity Indicator LEDs .................... 3-3 10Mbps Link Activity LEDs ....................... 3-3 100Mbps Link Activity LEDs ..................... 3-3 Troubleshooting ..............
SHBBook Page iii Wednesday, March 3, 1999 8:03 PM About This Manual This manual describes the NetStacker II dual speed stackable hubs. The manual focuses on the following two models: ❑ 12-port 10/100Mbps managed stackable hub ❑ 24-port 10/100Mbps managed stackable hub Unless otherwise noted, all information provided in this manual is applicable to both units.
SHBBook Page iv Wednesday, March 3, 1999 8:03 PM Document Conventions This manual uses the term “NetStacker II” to refer to the 12 port and 24 port dual speed hubs, and “hub” to refer to all other Ethernet hubs. This manual uses the following conventions to convey instructions and information: ◆ Note: Noteworthy information, which contains helpful suggestions or references to other sections in the manual, is in this format.
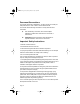
SHBBook Page v Wednesday, March 3, 1999 8:03 PM About This Manual 11. If an extension cord is used with this product, make sure that the total ampere ratings on the products connected to the extension cord do not exceed the extension cord ampere rating. Also make sure that the total of all products plugged into the wall outlet does not exceed 15 amperes. 12.
SHBBook Page vi Wednesday, March 3, 1999 8:03 PM Page vi
SHBBook Page 1 Wednesday, March 3, 1999 8:03 PM 1 Introduction This chapter introduces the Asanté NetStacker II 12 port and 24 port dual speed stackable hubs and provides an overview of basic hub technology.
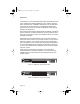
SHBBook Page 2 Wednesday, March 3, 1999 8:03 PM Introduction The NetStacker II 12 port unmanaged hub provides 12 twisted pair ports. The 24 port managed hub provides 24 twisted pair ports. In addition, both hubs offer an expansion slot for a 100Base-FX interface so the user can slide a fiberoptic module into the rear panel. A slot for a 100Base-FX interface is also provided on the front panel, for use when the management module has been installed in the rear panel slot.
SHBBook Page 3 Wednesday, March 3, 1999 8:03 PM Performance Features Each hub features full plug-and-play installation. LED indicators include power status, port link activity status, collision detection, and hub identification, for easy monitoring of hub operation. Performance Features The NetStacker II dual speed stackable hubs offer the following features: ❑ Full compliance with the IEEE802.3 and IEEE802.
SHBBook Page 4 Wednesday, March 3, 1999 8:03 PM Introduction Page 1-4
SHBBook Page 1 Wednesday, March 3, 1999 8:03 PM 2 Installation This chapter describes the components and explains how to install, mount, and apply power to your NetStacker II dual speed hub. It contains the following sections: ❑ Components ❑ Cabling and Voltage Requirements ❑ Placement and Mounting ❑ Connecting Network Devices ❑ Powering on the Hub Components This section describes the front and back panel layouts of the NetStacker II dual speed hubs.
SHBBook Page 2 Wednesday, March 3, 1999 8:03 PM Installation The front panel of the 24 port hub displays: ❑ Twenty-four dual speed (UTP) Ethernet ports ❑ One uplink switch button ❑ LED indicators. These features are shown in Figure 2-2.
SHBBook Page 3 Wednesday, March 3, 1999 8:03 PM Components Hub ID 1 2 3 4 5 6 7 NetStacker II 8 Hub ID Number COL 100M Power 100Mbps 10M 100 Mbps 10Mbps 1 2 3 4 5 6 7 9 8 10 11 12 10 Mbps Power Collision Figure 2-3 LED Indicators on 12 port hub Rear Panels of the 12 Port and 24 Port Hubs The rear panels of the 12 port and 24 port hubs both display: ❑ Management Module Slot; can also be used for optional 100Base FX slide-in module that allows connection to fiber optic network
SHBBook Page 4 Wednesday, March 3, 1999 8:03 PM Installation Cabling and Voltage Requirements This section describes the cabling and voltage requirements for the NetStacker II 12 port and 24 port hubs. ◆ Note: You may connect network cable segments to the hub or disconnect them while the power is on. Plugging in or removing cables while your hub is running will not interrupt the traffic or disrupt the operation of the hub.
SHBBook Page 5 Wednesday, March 3, 1999 8:03 PM Placement and Mounting Placement and Mounting This section describes how to mount the NetStacker II on a desktop or shelf. Hub Location The location chosen for the NetStacker II hub should be less than 100 meters from servers, workstations, and other devices. ▲ Important: Category 5 cables are environment-sensitive. Make sure that the cable route is not too close to electromagnetic noise sources such as power lines or fluorescent lights.
SHBBook Page 6 Wednesday, March 3, 1999 8:03 PM Installation 3 Place the device into the 19-inch rack and attach it firmly. Ensure that the ventilation holes do not get blocked.
SHBBook Page 7 Wednesday, March 3, 1999 8:03 PM Connecting Network Devices 1 2 3 4 5 7 6 NetStacker II 8 Hub ID Number COL 100M Power 100Mbps 10M 10Mbps 1 2 3 4 5 7 6 8 9 10 11 12 1 2 3 4 5 6 Figure 2-7 Connecting cable to a NIC ◆ Note: The maximum length of a cable between a hub and a device is 100 meters, including all patch cables and cross-connect wires.
SHBBook Page 8 Wednesday, March 3, 1999 8:03 PM Installation 2 Make sure that the length of the straight through cable between the NetStacker II and a 100Mbps repeater does not exceed 5 meters, including all patch cables and cross connect wires. The cable between the NetStacker II and any switch or any 10Mbps repeater cannot exceed 100 meters. ◆ Note: If you need to connect more than 2 hubs via 100Mbps connections, you must have a switch separating the additional hubs.
SHBBook Page 9 Wednesday, March 3, 1999 8:03 PM Connecting Network Devices Straight through cable Button pressed in Stackable Dual-Speed Hub 1 2 3 4 5 6 7 Hub ID Number Uplink Uplink 100Mbps Normal Power 10M 10Mbps 1 2 3 4 5 6 7 8 9 10 NS2012 NetStacker II 8 COL 100M 11 MII Module Slot 12 1 2 3 4 5 6 7 8 FRIENDLYNET 9 10 11 12 FH208P 8-port Dual-speed Ethernet Hub COL 1 2 3 4 5 6 7 8 100Mbps 100Mbps 10Mbps LINK/ACT UPLINK Power NORMAL Figure 2-9
SHBBook Page 10 Wednesday, March 3, 1999 8:03 PM Installation Stacking Hubs Up to eight NetStacker II hubs may be connected within a stack. Furthermore, a management module can be installed easily in any of the stacked hubs, so that all of them can be managed. The management module communicates with a manager console by means of SNMP agent software, installed in the managed hub. This reduces considerably the expense of equipping each hub for management.
SHBBook Page 11 Wednesday, March 3, 1999 8:03 PM Connecting Network Devices Adding Fiber Optic Connectivity via MII To add connectivity for 100Base-FX transmission media, insert the optional MII fiber-optic module in the MII Module Slot in the back panel of the hub, as shown in Figure 2-11. If you have not installed a management module, this slot will be available for the fiber-optic connection module.
SHBBook Page 12 Wednesday, March 3, 1999 8:03 PM Installation Powering on the Hub The NetStacker II hub may be turned on with (or without) LAN segment cables connected. To power on the hub: 1 Connect one end of the power cord (supplied) into the AC power connector on the back panel of the hub. ◆ Note: NetStacker II hubs are equipped with an internal power supply. Power sensing is automatic for all international utility power. 2 3 Connect the power cord to a local power source outlet.
SHBBook Page 1 Wednesday, March 3, 1999 8:03 PM 3 LED Indicators This chapter explains how to interpret the front panel LED indicators on NetStacker II dual speed hubs. There are no LEDs on the rear panel. The LEDs are used to facilitate monitoring and troubleshooting. These LEDs are: ❑ Power ❑ Collision Indicators ❑ Hub ID Number ❑ Port Link Activity indicators The front panel LEDs of the 12 port and 24 port hubs are shown in Figure 3-1 and Figure 3-2.
SHBBook Page 2 Wednesday, March 3, 1999 8:03 PM LED Indicators Hub ID 1 2 3 4 5 6 7 NetStacker II 8 Hub ID Number 100 Mbps 100Mbps 13 14 15 16 17 18 19 20 21 22 23 10Mbps 10 Mbps 100Mbps 100 Mbps 24 COL 100M Power 10M 10Mbps 1 2 3 4 5 6 7 8 9 10 11 12 10 Mbps Power Collision Figure 3-2 24 port hub LEDs Power LED The Power LED is green and should always be lit when the NetStacker II is in use.
SHBBook Page 3 Wednesday, March 3, 1999 8:03 PM Hub ID Number LEDs Hub ID Number LEDs The Hub ID LEDs are a numbered row of eight green LEDs. If your NetStacker II hub is configured with other NetStacker II hubs in a stack, each hub will get an auto-configured ID number, and the LED for that number will be lit on each hub. If your hub is not part of a stack, the LED for ID number 1 will be lit.
SHBBook Page 4 Wednesday, March 3, 1999 8:03 PM LED Indicators Page 3-4
SHBBook Page 1 Wednesday, March 3, 1999 8:03 PM A Troubleshooting Table A-1 describes how to troubleshoot problems with your network and/or the Switch by monitoring the Switch’s LEDs. Table A-1 Problem Indication Troubleshooting Action No Power Power LED OFF Check the power cord. Make sure the power outlet is functional. Make sure the power cord is properly connected to the outlet and is securely connected to the hub.
SHBBook Page 2 Wednesday, March 3, 1999 8:03 PM Page A-2
SHBBook Page 1 Wednesday, March 3, 1999 8:03 PM B Specifications NetStacker II Hub Specifications Standard IEEE 802.3 Ethernet standard IEEE 802.
SHBBook Page 2 Wednesday, March 3, 1999 8:03 PM Page B-2
SHBBook Page 1 Wednesday, March 3, 1999 8:03 PM C Technical Support Contacting Technical Support To contact Asanté Technical Support: Telephone (800) 622-7464 Fax (801) 566-3787 Fax-Back (800) 741-8607 E-mail support@asante.com World Wide Web Site http://www.asante.com Technical Support Hours 6:00 a.m. to 5:00 p.m. Pacific Standard Time USA, Monday - Friday.
SHBBook Page 2 Wednesday, March 3, 1999 8:03 PM
SHBBook Page 1 Wednesday, March 3, 1999 8:03 PM
SHBBook Page 2 Wednesday, March 3, 1999 8:03 PM ASANTÉ TECHNOLOGIES, INC., 821 FOX LANE, SAN JOSE, CA 95131 PHONE: 800.622.7464 • FAX: 801.566.3787 • e-mail address: sales@asante.com • World Wide Web site: http://www.asante.com ©1999 Asanté Technologies Inc. Asanté is a trademark of Asanté Technologies, Inc. All brand names and products are trademarks or registered trademarks of their respective holders.