Book Page i Thursday, September 18, 1997 4:28 PM IntraSpection™ Personality Module IntraStack™ 6000 Series Ethernet Switch User’s Manual Asanté Technologies, Inc. 821 Fox Lane San Jose, CA 95131 1.800.662.9686 www.asante.com September 1997 Part Number 06-00380-00 Rev.
Book Page ii Thursday, September 18, 1997 4:28 PM Copyright Notice Copyright 1997 by Asanté Technologies, Inc . All rights reserved. No part of this manual, or any associated artwork, software, product design or design concept, may be copied, reproduced or stored, in whole or in part, in any form or by any means mechanical, electronic, optical, photocopying, recording or otherwise, including translation to another language or format, without the express written consent of Asanté Technologies, Inc.
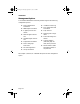
Book Page iii Thursday, September 18, 1997 4:28 PM Table of Contents About This Manual ..................................................... vii Chapter Contents ................................................................. vii Document Conventions ...................................................... viii Audience ............................................................................. viii Introduction................................................................
Book Page iv Thursday, September 18, 1997 4:28 PM Management ...............................................................4-1 Performing Basic Management Functions .......................... 4-1 Configuration Tasks Overview ........................................... 4-1 Management Tasks Overview ............................................. 4-1 Setting Community Strings ........................................... 4-3 Configuring IP Information ..........................................
Book Page v Thursday, September 18, 1997 4:28 PM Menus ......................................................................... 5-1 Configuration ...................................................................... 5-4 Identify .......................................................................... 5-4 Agent............................................................................. 5-5 IP Agent......................................................................... 5-7 swAgentSW ..................
Book Page vi Thursday, September 18, 1997 4:28 PM Page vi
Book Page vii Thursday, September 18, 1997 4:28 PM About This Manual This manual introduces the IntraSpection Personality Module for the following device: ❏ The Asanté IntraStack 6000 Series Ethernet switch This manual defines a Personality Module and explains how to install and use the IntraStack 6000 Series Personality Module.
Book Page viii Thursday, September 18, 1997 4:28 PM About This Manual Document Conventions This manual uses the following conventions to convey instructions and information: ❏ Commands and key words are in boldface font. ∆ Note: Noteworthy information, which contains helpful suggestions or references to other sections in the manual, is in this format. ▲ Important: Significant information that calls attention to important features or instructions is in this format.
Book Page 1 Thursday, September 18, 1997 4:28 PM 1 Introduction IntraSpection Personality Modules A Personality Module is a “plug-in” to the IntraSpection system that allows for expanded management of an SNMP (Simple Network Management Protocol) device by specifically addressing the device’s proprietary information (the “Private MIB”). Management capabilities are accessed via the Personality Module’s IntraSpection Device Page. See Figure 1-1.
Book Page 2 Thursday, September 18, 1997 4:28 PM Introduction Management Options The IntraStack 6000 Series Personality Module supports the following management options: ❏ Device identification information ❏ SNMP agent information ❏ IP agent protocol information ❏ ❏ ❏ ❏ ❏ Software agent information ❏ Port auto-negotiation ❏ Group information Trap receivers Spanning tree configuration Filter forwarding information ❏ Counter statistics (table and graph formats) at the port-level ❏ Packet statistic
Book Page 3 Thursday, September 18, 1997 4:28 PM IntraSpection Personality Modules Minimum System Requirements Server ❏ IntraSpection version 1.01 or greater ❏ PC with 80486 or faster microprocessor ❏ 48MB RAM ❏ 100MB free disk space ❏ Windows NT™ 3.51 or higher or Windows NT 4.0 (recommended) ❏ Web server that supports Common Gateway Interface (CGI) 1.1 (such as Netscape FastTrack Server™, Microsoft IIS, NCSA HTTP, etc.
Book Page 4 Thursday, September 18, 1997 4:28 PM
Book Page 1 Thursday, September 18, 1997 4:28 PM 2 Installation Installing a Personality Module This chapter explains how to install the IntraStack 6000 Series Personality Module. ▲ Important: The Personality Module is installed on the computer where the IntraSpection Application Server is installed. Before installing the Personality Module, make sure that IntraSpection (websuite.exe) is not running on the computer. 1 2 3 4 5 6 Insert the Personality Module CD into the computer.
Book Page 2 Thursday, September 18, 1997 4:28 PM Installation 7 Click Yes to accept the agreement and continue with the installation. To decline the agreement and exit the installation, click No. The “IntraSpection Personality Module Read Me” window appears. Review the information carefully. 8 Click Next to continue. The decompressed Personality Module files are installed onto your computer. The “Decompression of the Source is Now Complete” dialog box appears.
Book Page 3 Thursday, September 18, 1997 4:28 PM Installing a Personality Module 13 Click OK. The “IntraSpection Module Installation” window appears. ▲ Important: This window should be pointing to the directory that contains the IntraSpection (websuite.exe) program. If it is not, click Browse and locate that directory. 14 Click OK. ∆ Note: A “Select Database” window may appear. If it does, select vendor.mdb, then click OK.
Book Page 4 Thursday, September 18, 1997 4:28 PM
Book Page 1 Thursday, September 18, 1997 4:28 PM 3 Accessing the Device This chapter explains how to access the IntraStack 6000 Series Personality Module’s Device Page. The Device Page provides access to the Personality Module’s management options. Accessing the Device Page To access the Device Page for an IntraStack, you must first create a map of the network in IntraSpection. 1 2 Make sure the Personality Module is installed and the IntraSpection Application Server is running.
Book Page 2 Thursday, September 18, 1997 4:28 PM Accessing the Device ❏ Type the lowest (beginning) IP address on your network in the Low IP Address field. ❏ Type the highest (last) IP address on your network in the Hi IP Address field. ❏ Select New in the Discovery Mode field to create a new map, or select Append to attach this map to the map that is stored in your system’s buffer (if any). 5 Click Apply. IntraSpection builds a map of your network.
Book Page 3 Thursday, September 18, 1997 4:28 PM Device Page Components Device Page Components A Personality Module’s Device Page consists of several components; including, device information, a front panel image, and management menu items. See Figure 3-2. Device Information Front Panel Image Personality Module Information (management menu items) Figure 3-2 Device Page components Device Information The following information is displayed at the top of the Device Page: ❏ Device description (i.e.
Book Page 4 Thursday, September 18, 1997 4:28 PM Accessing the Device Front Panel Image The front panel image contains the following components (as illustrated in Figure 3-3): ❏ Device — the entire IntraStack 6000 Series switching system (includes the IntraStack 6014DSB and any installed expansion units). ❏ Group — each unit (module) within the device (such as the IntraStack 6014DSB). ❏ Port — each port (including MII ports) on each group.
Book Page 5 Thursday, September 18, 1997 4:28 PM Selecting the Device for Management Selecting the Device for Management The IntraStack can be managed at different levels; that is, at the device, group, or port level. For example, if a group (such as the IntraStack 6014DSB base unit) is selected and you select the Graph menu, statistics for that group are displayed. If a port is selected and you select Graph, statistics for that port are displayed.
Book Page 6 Thursday, September 18, 1997 4:28 PM Accessing the Device Menu Components The menus on the IntraStack 6000 Series Device Page provide access to the different management options supported by the Personality Module. Tables Some menus contain tables with information that is configurable directly on-screen from your Web browser while others contain information that is read-only. The following tables describe how to recognize configurable and read-only information.
Book Page 1 Thursday, September 18, 1997 4:28 PM 4 Management Performing Basic Management Functions This chapter explains how to perform some basic management functions with the IntraStack 6000 Series Personality Module. ▲ Important: The tasks outlined in this chapter require access to the IntraStack’s Device Page. See Chapter 3,“Accessing the Device,” for instructions.
Book Page 2 Thursday, September 18, 1997 4:28 PM Management Management Task Page Resetting the IntraStack page 4-15 Managing trap receivers page 4-16 Viewing the port address table page 4-18 Performing a software upgrade page 4-20 Downloading a configuration file page 4-23 Configuring Telnet idle time-out page 4-25 Configuring the Spanning Tree Protocol page 4-26 Viewing counter statistics (table and graph formats page 4-30 Viewing packet statistics (table and graph) formats page 4-33
Book Page 3 Thursday, September 18, 1997 4:28 PM Setting Community Strings Setting Community Strings Community strings define access rights for reading and writing SNMP data objects for a device. The community strings (read and write) for an IntraStack are manually set in the IntraStack 6014DSB via the unit’s console port. In order to access an IntraStack with IntraSpection, the community strings must be set in IntraSpection to match those set in the IntraStack 6014DSB.
Book Page 4 Thursday, September 18, 1997 4:28 PM Management Figure 4-2 3 IntraSpection Map Manager Page Click the Edit Device button. The Map Configuration table appears, similar to Figure 4-3. Figure 4-3 4 5 6 7 Map Configuration table Enter the IntraStack 6014DSB’s IP address in the IP Address field. Enter the IntraStack 6014DSB’s read community string in the Read Community String field. Enter the IntraStack 6014DSB ‘s write community string in the Write Community String field. Click Apply.
Book Page 5 Thursday, September 18, 1997 4:28 PM Configuring IP Information Configuring IP Information To configure and/or manage an IntraStack over the network, the IntraStack 6014DSB needs to be properly configured with IP information (such as the device’s IP address, subnet mask, and default gateway address). This information is initially set-up in the IntraStack 6014DSB via the unit’s console port; however, some information can be modified using IntraSpection.
Book Page 6 Thursday, September 18, 1997 4:28 PM Management Configuring Out-of-Band Information You can configure an IntraStack’s out-of-band parameters (i.e., the dialstring and baud rate) via the Agent menu. To configure an IntraStack’s out-of-band information: 1 Do not select any item on the Device Page’s front-panel image. (This selects the entire device.) 2 Click Agent. The Agent Information table appears, similar to Figure 4-5.
Book Page 7 Thursday, September 18, 1997 4:28 PM Configuring Bootstrap Parameters Configuring Bootstrap Parameters You can determine the method (local or remote) that the IntraStack uses to load its software at startup or during a reset via the Agent menu. To configure the IntraStack’s bootstrap parameters: 1 2 Do not select any item on the Device Page’s front-panel image. (This selects the entire device.) Click Agent. The Agent Information table appears, similar to Figure 4-5 on page 4-6.
Book Page 8 Thursday, September 18, 1997 4:28 PM Management Configuring Device Identification Information To help with identification, you can add certain details about the IntraStack; such as, the device’s name, location, and contact information. To configure device identification information: 1 Do not select any item on the Device Page’s front-panel image. (This selects the entire device.) 2 Click Identify. The Device Identification table appears, similar to Figure 4-6.
Book Page 9 Thursday, September 18, 1997 4:28 PM Updating the Device Page Updating the Device Page The files for the IntraStack 6000 Series Personality Module are stored within the IntraSpection Application Server’s database. Occasionally, these files should be updated from the Device Page to ensure that you are viewing the IntraStack’s latest information. To update the Personalty Module’s Device Page: 1 Click Validate. The Device Page is updated with the latest information for the Personalty Module.
Book Page 10 Thursday, September 18, 1997 4:28 PM Management Viewing Port Parameters You can view information about each port within an IntraStack switching system via the PortInfo menu. The PortInfo (Port Information) menu displays the type of each port as well as the port’s auto-negotiation status, link status, speed, and duplex mode. To view port parameters: 1 Click PortInfo. You do not have to select any particular port on the frontpanel image.
Book Page 11 Thursday, September 18, 1997 4:28 PM Configuring Port Parameters Configuring Port Parameters You can configure each port within an IntraStack for the following: ❏ ❏ ❏ Auto-negotiation Broadcast filtering Store-and-forwarding ▲ Important: You cannot configure a port’s duplex mode via the Personality Module.
Book Page 12 Thursday, September 18, 1997 4:28 PM Management 2 Click once on the row of the port you want to configure. The ports are identified by their group number (GrpIndex) and port number (PortIndex). ∆ Note: For a description of each field, see “Auto Negotiate” on page 5-15. 3 Click Modify. The “Modify Dialog” box appears. 4 5 Open the Admin State drop-down menu and select enable. Click Apply. The port is configured for auto-negotiation.
Book Page 13 Thursday, September 18, 1997 4:28 PM Configuring Port Parameters Configuring Store-and-Forwarding Store-and-forwarding is a port’s ability to store incoming packets before forwarding them. To configure a port’s store-and-forwarding ability: 1 Click PortCtrl. You do not have to select any port on the front-panel image. The Port Control table appears. 2 3 Click once on the row of the port you want to configure. Click Modify. The “Modify Dialog” box appears.
Book Page 14 Thursday, September 18, 1997 4:28 PM Management Enabling or Disabling a Port The enabling or disabling of a port is a manual operation that can be used to isolate network devices possibly causing problems on the network. It can also be used to prevent unauthorized use of a port or station. To enable or disable a port: 1 Click PortCtrl. You do not need to select any particular item on the frontpanel image. The Port Control table appears, similar to Figure 4-9.
Book Page 15 Thursday, September 18, 1997 4:28 PM Resetting the IntraStack Resetting the IntraStack You can reset the entire IntraStack device or a selected group via the Reset menu. To perform a reset: 1 To reset the device, do not select anything on the frontpanel image. To reset a group, click once the group. 2 Click Reset. The Reset table appears for the agent or a selected group, similar to Figure 4-10 or Figure 4-11.
Book Page 16 Thursday, September 18, 1997 4:28 PM Management Managing Trap Receivers Trap receivers are the network management stations designated to receive traps from the IntraStack when they occur. ▲ Important: A maximum of four trap receivers is allowed. This section describes how to add and delete a trap receiver. To add a trap receiver entry: 1 Do not select any item on the Device Page’s front-panel image. (This selects the entire device.) 2 Click TrapRecv.
Book Page 17 Thursday, September 18, 1997 4:28 PM Managing Trap Receivers 6 7 Type the community string for the management station in the Community String field. Click Apply. The entry for the management station is added and appears in the table. If it does not appear, click Refresh. Deleting a Trap Receiver Entry To delete a trap receiver entry: 1 2 Click once on the row containing the entry to be deleted. Click Modify. The “Modify Dialog” box appears.
Book Page 18 Thursday, September 18, 1997 4:28 PM Management Viewing the Port Address Table The IP Address Monitoring Table is a table of node addresses that the IntraStack automatically builds by listening to and learning the information that is broadcast when a new node logs on. The IntraStack checks the source and destination addresses as packets pass through it and records the source address information in the table.
Book Page 19 Thursday, September 18, 1997 4:28 PM Viewing the Port Address Table You can change the sorting order in which information is displayed by click once on one of the following buttons: ❏ Grp, Port, IP — sorts by group number, port number, then IP address. ❏ Grp, Port, Physical — sorts by group number, port number, then physical address. ❏ Phys, Grp, Port — sorts by physical address, group number, then port number.
Book Page 20 Thursday, September 18, 1997 4:28 PM Management Performing a Software Upgrade An IntraStack’s software image file can be upgraded via IntraSpection. To upgrade an IntraStack’s software image file requires two steps: ❏ ❏ Set up the IntraStack 6014DSB’s boot information. Configure the image file information. Set up the Boot Information To set up the IntraStack 6014DSB’s boot information: 1 Click Agent. The Agent Information table appears.
Book Page 21 Thursday, September 18, 1997 4:28 PM Performing a Software Upgrade Figure 4-14 Switch Agent Software Group table ∆ Note: For a description of each field, see “swAgentSW” on page 5-9. 2 3 4 5 6 7 Open the Up/Download Action drop-down menu and select Download. Open the Download File drop-down menu and select Image-File. Type the server’s IP address where the software file resides in the Image Server field. Type the name and network path of the image file in the Image File Name field.
Book Page 22 Thursday, September 18, 1997 4:28 PM Management ❏ Active Image Bank — the bank that is used during the system boot-up (also referred to as “Boot Bank” ❏ Download Bank — the bank that receives the new version of runtime code when it is downloaded (also referred to as “Destination Bank”). 8 Click Apply. The IntraStack downloads the image file to the image bank specified. Click Refresh to view updated information.
Book Page 23 Thursday, September 18, 1997 4:28 PM Downloading a Configuration File Downloading a Configuration File The IntraStack’s configuration file can be downloaded to the device via IntraSpection. To download a configuration file: 1 Make sure the IntraStack is configured with valid boot information. See “Set up the Boot Information” on page 4-20 for instructions. 2 Click swAgentSW. The Switch Agent Software Group table appears.
Book Page 24 Thursday, September 18, 1997 4:28 PM Management 9 Click Apply. The IntraStack downloads the configuration file to the image bank specified. Click Refresh to view updated information.
Book Page 25 Thursday, September 18, 1997 4:28 PM Configuring Telnet Idle Time-Out Configuring Telnet Idle Time-Out You can configure the amount of time an idle Telnet connection to the IntraStack remains active via the swAgentSW menu. If a Telnet connection to the IntraStack remains idle for the number of specified time-out minutes, the remote Telnet connection to the IntraStack is automatically disabled.
Book Page 26 Thursday, September 18, 1997 4:28 PM Management Configuring the Spanning Tree Protocol The IntraStack is shipped with Spanning Tree enabled on all ports. You can disable or enable Spanning Tree on the IntraStack or on an individual port. You can also configure the Spanning Tree parameters on the IntraStack. ▲ Important: Do not enable, disable, or configure the Spanning Tree Parameters unless you have knowledge and experience with the IEEE 802.1d specification.
Book Page 27 Thursday, September 18, 1997 4:28 PM Configuring the Spanning Tree Protocol Figure 4-16 2 3 Port Control table Select the port you want to disable or enable Spanning Tree on by clicking once on its row. Click Modify. The “Modify Dialog” box appears. 4 5 Open the STP drop-down menu and select Disable (to disable Spanning Tree on the port) or Enable (to enable Spanning Tree on the port). Click Apply. Spanning Tree is disabled (or enabled) on the selected port.
Book Page 28 Thursday, September 18, 1997 4:28 PM Management Configuring Spanning Tree Parameters To configure the Spanning Tree Parameters on the IntraStack: ▲ Important: Do not change any of the Spanning Tree parameters unless you have knowledge and experience with the IEEE 802.1d specification. 1 Do not select any item on the front-panel image. (This selects the entire device.) 2 Click Spanning. The Spanning Tree Device table appears, similar to Figure 4-17.
Book Page 29 Thursday, September 18, 1997 4:28 PM Configuring the Spanning Tree Protocol 5 6 Type the new information. Click Apply. The Spanning Tree parameters on the IntraStack are configured. Click Refresh to view updated information.
Book Page 30 Thursday, September 18, 1997 4:28 PM Management Viewing Statistics There are two groups of statistics with the IntraStack 6000 Series Personality Module: ❏ Counter Statistics (such as broadcast packets, fragments, and collisions) ❏ Packet Statistics Both groups of statistics can be viewed in two different formats: table or graph. ▲ Important: Statistics are available at the port-level only. This section describes how to view counter and packet statistics in both table and graph formats.
Book Page 31 Thursday, September 18, 1997 4:28 PM Viewing Statistics 3 Open the Sampling Interval drop-down menu and select the number of seconds to poll for statistics. Statistics are automatically gathered at the selected interval in the following columns: ❏ Curr — (current) the number of occurrences each second. ❏ Peak — the largest number of occurrences since opening or resetting the screen. ❏ Avg — (average) the average number of occurrences since opening or resetting the screen.
Book Page 32 Thursday, September 18, 1997 4:28 PM Management Count-PerSecond Display Scroll Bar Drop-Down Menus: Seconds Statistics Figure 4-19 3 Counter Statistics (graph format) Open the Statistics drop-down menu and select the object to be monitored. For a description of each object, see “Objects” on page 527. 4 5 Open the Seconds drop-down menu and select the number of seconds for which statistics are to be gathered.
Book Page 33 Thursday, September 18, 1997 4:28 PM Viewing Statistics Viewing Packet Statistics (Table Format) To view packet statistics in a table format: 1 Select a port for which statistics are to be gathered by clicking on it once. ▲ Important: Statistics can be viewed at the portlevel only. 2 Click PktTable. Packet statistics appear for the selected port, similar to Figure 4-20. Figure 4-20 Packet Statistics (table format) For a description of each object, see “Objects” on page 5-30.
Book Page 34 Thursday, September 18, 1997 4:28 PM Management Viewing Packet Statistics (Graph Format) To view packet statistics in a graph format: 1 Select a port for which statistics are to be gathered by clicking on it once on the front-panel image. ▲ Important: Statistics can be viewed at the portlevel only. 2 Click PktGraph. Packet Statistics appears for the selected port, similar to Figure 4-21.
Book Page 35 Thursday, September 18, 1997 4:28 PM Viewing Statistics ❏ Peak per Second — the largest number of occurrences since opening or resetting the screen. 6 Click Reset to reset the counters to zero.
Book Page 36 Thursday, September 18, 1997 4:28 PM
Book Page 1 Thursday, September 18, 1997 4:28 PM 5 Menus This chapter describes each management menu on the IntraStack 6000 Series’s Device Page. The table below provides a brief description of each menu; the sections that follow explain each menu in detail. Table 5-1 Device Page Menu Descriptions Menu Description Configuration Title for the submenus listed below it; this menu cannot be selected. See “Configuration” on page 5-4.
Book Page 2 Thursday, September 18, 1997 4:28 PM Menus Menu Description BankImage Allows you to view the latest information on the device’s two image banks. See “BankImage” on page 5-13. Control Title for the sub-menus listed below it; this menu cannot be selected. See “Control” on page 5-14. Reset Allows you to reset the device or a selected group. See “Reset” on page 5-14.
Book Page 3 Thursday, September 18, 1997 4:28 PM Menu Description Graph Allows you to view real-time counter statistics, in a graph format, on a selected port. See “Graph” on page 5-29. PktTable Allows you to view real-time packet statistics, in a table format, on a selected port. See “PktTable” on page 5-30. PktGraph Allows you to view real-time packet statistics, in a graph format, on a selected port. See “PktGraph” on page 5-31.
Book Page 4 Thursday, September 18, 1997 4:28 PM Menus Configuration This menu is not a management option; it is a title for the configuration sub-menus listed below it. This menu CANNOT be selected. Identify This menu provides read-only and configurable identification information for the device. Table 5-2 describes each field in the Identify menu. ∆ Note: For instructions on using this menu, see “Configuring Device Identification Information” on page 4-8.
Book Page 5 Thursday, September 18, 1997 4:28 PM Agent Agent This menu displays read-only and configurable SNMP agent information for the device; including; the image load method and protocol and the out-of-band dial string and baud rate. Table 5-3 describes each field in the Agent menu. ∆ Note: For instructions on using this menu, see “Configuring Out-of-Band Information” on page 4-6 and “Configuring Bootstrap Parameters” on page 4-7.
Book Page 6 Thursday, September 18, 1997 4:28 PM Menus Field Baud Rate Description Configurable field; determines the baud rate setting for the out-of-band port. ❏ ❏ ❏ ❏ ❏ b1200 — 1200 baud rate b2400 — 2400 baud rate b4800 — 4800 baud rate b9600 — 9600 baud rate b19200 — 19200 baud rate Revision Read-only field; displays the hardware reversion number of the device. Model No. Read-only field; displays the hardware model number of the device.
Book Page 7 Thursday, September 18, 1997 4:28 PM IP Agent IP Agent This menu displays read-only and configurable IP (Internet Protocol) agent information for the device; including, the device’s IP address, subnet mask, default gateway, and Telnet information. Table 5-4 describes each field in the IP Agent menu. ∆ Note: For instructions on using this menu, see “Configuring IP Information” on page 4-5.
Book Page 8 Thursday, September 18, 1997 4:28 PM Menus Field TimeOut Description Configurable field; determines the Telnet idle time-out period. Note: The default is 20 minutes.
Book Page 9 Thursday, September 18, 1997 4:28 PM swAgentSW swAgentSW This menu displays configurable and read-only software information for the device’s SNMP agent. It allows you to download a new image file or configuration file and enable or disable the Spanning Tree Protocol. Table 5-5 describes each field in the swAgentSW menu. ∆ Note: For instructions on using this menu, see “Performing a Software Upgrade” on page 4-20 and “Downloading a Configuration File” on page 4-23.
Book Page 10 Thursday, September 18, 1997 4:28 PM Menus Field Description Image Server Configurable field; determines the IP address of the image file server. This IP address is specific for the agent image file download server. Image File Name Configurable field; determines the name and network path of the image file. Image Retries Configurable field; determines the number of attempts that will be made for downloading the image file.
Book Page 11 Thursday, September 18, 1997 4:28 PM swAgentHW swAgentHW This menu displays read-only hardware information for the device’s SNMP agent. Table 5-6 describes each field in the swAgentHW menu. Table 5-6 swAgentHW Menu Field Description DRAMSize Read-only field; displays the DRAM size (in bytes) on the device’s hardware board. FlashRAMSize Read-only field; displays the FlashRAM size (in bytes) on the device’s hardware board.
Book Page 12 Thursday, September 18, 1997 4:28 PM Menus swBasic This menu displays read-only information on the device; such as, its backplane type and group capacity. Table 5-7 describes each field in the swBasic menu. Table 5-7 swBasic Menu Field Description Type Read-only field; displays the Ethernet switch type. Back Plane Type Read-only field; displays the back plane of this device. Group Capacity Read-only field; displays the number of groups that can be contained within the device.
Book Page 13 Thursday, September 18, 1997 4:28 PM BankImage BankImage This menu displays read-only information on the device’s two image banks. Table 5-8 describes each field in the BankImage menu. Table 5-8 BankImage Menu Field Description Index Read-only field; displays the number of the entry in the BankImage Table. MajorVersion Read-only field; displays the major version number of the bank image software.
Book Page 14 Thursday, September 18, 1997 4:28 PM Menus Control This menu is not an actual management option; it is a title to the submenus listed below it. This menu CANNOT be selected. Reset This menu allows you to reset the device or a selected group. Table 5-9 describes each field in the Reset table at the device level; Table 5-10 describes each field in the Reset table at the group level. ∆ Note: For instructions on using this menu, see “Resetting the IntraStack” on page 4-15.
Book Page 15 Thursday, September 18, 1997 4:28 PM AutoNegotiate AutoNegotiate This menu displays configurable and read-only auto-negotiation information on each of the device’s ports. Table 5-11 describes each field in the AutoNegotiate menu. ∆ Note: For instructions on using this menu, see “Configuring Auto Negotiation” on page 4-11. Table 5-11 AutoNegotiate Menu Field Description GrpIndex Read-only field; displays the number of the group for which information is displayed.
Book Page 16 Thursday, September 18, 1997 4:28 PM Menus Field LocalAbility Description Read-only field; displays the connecting ability of the local port in the device (what the port is capable of). The information displayed is in hexadecimal format; for example, IE:00 (where “IE” is Byte 1 and “00” is Byte 2).
Book Page 17 Thursday, September 18, 1997 4:28 PM GroupInfo GroupInfo This menu displays configurable and read-only information on each of the device’s groups. Table 5-12 describes each field in the GroupInfo menu. Table 5-12 GroupInfo Menu Field Description Index Read-only field; displays the number of the entry in the Group Basic Info Table. Physical Addr Read-only field; displays the ID of this group (it uses the MAC address of the first port in this group as the ID).
Book Page 18 Thursday, September 18, 1997 4:28 PM Menus MonitorIP This menu displays the device’s MAC address table. The MAC address table is a table of node addresses that the IntraStack receives on its ports. It uses the information in this table to decide whether a frame should be forwarded or filtered. Each entry consists of the MAC address of the device and an identifier for the port on which it was received. Table 5-13 describes each field in the MonitorIP menu.
Book Page 19 Thursday, September 18, 1997 4:28 PM PortCtrl PortCtrl This menu displays read-only and configurable port parameter information for each port within the device. It allows you to enable or disable a port as well as enable or disable the following: ❏ Broadcast filtering ❏ Store-and-forwarding ❏ The Spanning Tree protocol Table 5-14 describes each field in the PortCtrl menu.
Book Page 20 Thursday, September 18, 1997 4:28 PM Menus Field STP Page 5-20 Description Configurable field; enables or disables the Spanning Tree Protocol on the selected port. ❏ Enable — the port joins the Spanning Tree Protocol calculation; the state of the port is decided by STP and will be in blocking, listening, learning, or forwarding mode. ❏ Disable — the port is removed from the Spanning Tree Protocol calculation.
Book Page 21 Thursday, September 18, 1997 4:28 PM PortInfo PortInfo This menu displays read-only port information (such as the port’s type, auto-negotiation status, link status, speed, and duplex mode) for each port within the device. Table 5-15 describes each field in the PortInfo menu. ∆ Note: For instructions on using this menu, see “Viewing Port Parameters” on page 4-10. Table 5-15 PortInfo Menu Field Description GrpIndex Read-only field; displays the number of the group to which the port belongs.
Book Page 22 Thursday, September 18, 1997 4:28 PM Menus TrapRecv This menu allows you to determine the management stations that will receive traps from the device. Table 5-16 describes each field in the TrapRecv menu. ∆ Note: For instructions on using this menu, see “Managing Trap Receivers” on page 4-16. Table 5-16 Trap Receiver Menu Field Status Description Configurable field; determines the status of the trap receiving station’s entry. ❏ valid — the trap receiving station’s entry is active.
Book Page 23 Thursday, September 18, 1997 4:28 PM Spanning Spanning This menu allows you to view and configure the Spanning Tree Protocol. ▲ Important: Do not change any of the Spanning Tree Protocol parameters unless you are familiar with the IEEE 802.1d specification. Table 5-17 describes each field in the Spanning menu. ∆ Note: For instructions on using this menu, see “Configuring Spanning Tree Parameters” on page 4-28. For clarity, the IntraStack device is referred to as a “bridge” in this table.
Book Page 24 Thursday, September 18, 1997 4:28 PM Menus Field Maximum Age Description Read-only field; displays the maximum permissible age, in seconds, provided by the current Root Bridge for Spanning Tree configuration information to remain active on the selected bridge. When the time-span expires and the bridge has not received any BPDUs, it discards the current Spanning Tree information and initiates a new round of Spanning Tree configuration.
Book Page 25 Thursday, September 18, 1997 4:28 PM Spanning Field Bridge Maximum Age Description Configurable field; the maximum permissible age, in seconds, provided by the current root bridge for Spanning Tree configuration information to remain active on the selected bridge. When the time-span expires and the bridge has not received any BPDUs, it discards the current Spanning Tree information and initiates a new round of Spanning Tree configuration. The recommended IEEE 802.
Book Page 26 Thursday, September 18, 1997 4:28 PM Menus Filter This menu is not an actual management option; it is a title to the submenus listed below it. This menu CANNOT be selected. Forwarding This menu provides read-only forwarding and/or filtering information on the device. Table 5-18 describes each field in the Forwarding menu. Table 5-18 Forwarding Menu Field Description Index Read-only field; displays the number of the entry in the Filter Forwarding Information table.
Book Page 27 Thursday, September 18, 1997 4:28 PM Table Validate This menu updates the Personality Module’s Device Page with the latest information stored in the IntraSpection Application Server database. For instructions on using this menu, see “Updating the Device Page” on page 4-9. Statistics This menu is not an actual management option; it is a title to the submenus listed below it. This menu CANNOT be selected.
Book Page 28 Thursday, September 18, 1997 4:28 PM Menus Field Page 5-28 Description ❏ etherStatsCRCAlignErrors — the total number of packets received that had a length (excluding framing bits, but including FCS octets) of between 64 and 1518 octets, inclusive, but were not an integral number of octets in length or had a bad Frame Check Sequence (FCS).
Book Page 29 Thursday, September 18, 1997 4:28 PM Graph Graph This menu provides real-time counter statistics, in a graph format, on a selected port. Table 5-20 describes each field in the Graph menu. ∆ Note: For instructions on using this menu, see “Viewing Counter Statistics (Graph Format)” on page 4-31. Table 5-20 Graph Menu Field Description Seconds Drop-down menu; specifies the amount of time (in seconds) that the port is polled for information.
Book Page 30 Thursday, September 18, 1997 4:28 PM Menus PktTable This menu provides real-time packet statistics, in a table format, on a selected port. Table 5-21 describes each field in the PktTable menu. ∆ Note: For instructions on using this menu, see “Viewing Packet Statistics (Table Format)” on page 4-33. Table 5-21 PktTable Menu Field Description Sampling Interval Configurable field; allows you to set the amount of time (in seconds) that the port is polled for information.
Book Page 31 Thursday, September 18, 1997 4:28 PM PktGraph PktGraph This menu provides real-time packet statistics, in a graph format, on a selected port. Table 5-22 describes each field in the PktGraph menu. ∆ Note: For instructions on using this menu, see “Viewing Packet Statistics (Graph Format)” on page 4-34. Table 5-22 PktGraph Menu Field Description Seconds Drop-down menu; specifies the amount of time (in seconds) that the port is polled for information.
Book Page 32 Thursday, September 18, 1997 4:28 PM
Book Page 1 Thursday, September 18, 1997 4:28 PM A Technical Support Contacting Asanté Technical Support To contact Asanté Technical Support: Telephone (800) 622-7464 Fax (408) 432-6018 Fax-Back (800) 741-8607 (408) 954-8607 Internet Mail support@asante.com World Wide Web http://www.asante.com Bulletin Board Service (BBS) (408) 432-1416 ARA BBS (guest log in) (408) 894-0765 AppleLink mail/BBS ASANTE FTP Archive ftp.asante.com Technical Support Hours 6:00 A.M. to 5:00 P.M.
Book Page 2 Thursday, September 18, 1997 4:28 PM
Book Page i Thursday, September 18, 1997 4:28 PM Index Numerics 100Mbps port speed 5-21 10Mbps port speed 5-21 A about this manual vii add button 3-6 address boot server 5-7 configuring 4-5 gateway, default 5-7 IP agent 5-7 configuring 4-5 viewing 3-3 monitoring table sorting 4-19 viewing 4-18 physical description 5-4 forwarding 5-26 viewing 4-8 admin state, auto-negotiation 5-15 advertised ability, autonegotiation 5-16 agent IP parameters, configuring 4-5 menu 5-5 alignment errors, crc 5-28 apply button
Book Page ii Thursday, September 18, 1997 4:28 PM buttons add 3-6 apply 3-6 modify 3-6 refresh 3-6 C chapter contents vii client requirements 1-3 community strings configuring 4-3 invalid, accessing 5-7 trap receivers 5-22 unauthorized 5-7 configurable information 3-6 configuration file downloading 4-23 name of 5-9 retry count 5-9 server of 5-9 up/download 5-9 menu, description 5-4 tasks, overview 4-1 contact information configuring 4-8 description 5-4 control menu 5-14 counter statistics 5-27 auto partit
Book Page iii Thursday, September 18, 1997 4:28 PM dial string, out-of-band configuring 4-6 description 5-5 disable group 5-17 port 4-14, 5-19 Spanning Tree, port 5-20 document conventions viii download bank 5-10 DRAM size, viewing 5-11 duplex mode, port description 5-21 viewing 4-10 E EEPROM size, viewing 5-11 eeprombootinfo 5-5 enable group 5-17 port 4-14, 5-19 Spanning Tree, port 5-20 enterprise ID field 3-1 etherStats BroadcastPkts 5-27 Collisions 5-28 CRCAlignErrors 5-28 Fragments 5-28 Jabbers 5-28 M
Book Page iv Thursday, September 18, 1997 4:28 PM group capacity 5-12 defined 3-4 description 5-17 disabling 5-17 enabling 5-17 fan status 5-17 info menu 5-17 last change 5-17 module type 5-17 numbering 3-4 physical address of 5-17 ports, number of 5-17 reset 4-15, 5-17 groups numbering of 3-4 viewing image of 3-4 H half duplex, port 5-21 hardware address, description 5-4 model number 5-6 revision number 5-6 hello time bridge, description 5-25 configuring 4-28 Spanning Tree, description 5-24 help.
Book Page v Thursday, September 18, 1997 4:28 PM IP (continued) subnet mask 5-7 J jabbers 5-28 L LEDs, viewing 3-4 link status, of port description 5-21 viewing 4-10 load mode, image 5-5 local ability, auto negotiation boot configuring 4-7 description 5-5 location information configuring 4-8 description 5-4 5-16 M MAC addresses table, sorting 4-19 viewing 4-18 VLAN ID 5-18 management accessing the device 3-1 agent menu 5-5 autonegotiate menu 5-15 bank image menu 5-13 community strings, configuring 4-
Book Page vi Thursday, September 18, 1997 4:28 PM manual about vii audience viii chapter contents vii document conventions viii overview vii map network, creating 3-1 manager page 4-4 mau jabber lockups 5-28 maximum age bridge configuring 4-28 description 5-25 Spanning Tree, description 5-24 media independent interface ports.
Book Page vii Thursday, September 18, 1997 4:28 PM P port (continued) broadcast packet statistics filtering, configuring 4-12 128 to 255 octets 5-30 packet filtering 5-19 256 to 511 octets 5-30 connecting ability, viewing 5-16 512 to 1023 octets 5-30 ctrl (control) menu 5-19 64 octets 5-30 defined 3-4 65 to 127 octets 5-30 disable field 5-19 etherStatsPkts1024to1518disabling 4-14 octets 5-30 duplex mode graph format description 5-21 description 5-31 viewing 4-10 viewing 4-34 enable field 5-19 table format
Book Page viii Thursday, September 18, 1997 4:28 PM R RAM, flash, viewing 5-11 rate, baud 5-6 read community 4-3 readable octets 5-28 read-only information 3-6 receive port 5-26 received ability, autonegotiation 5-16 receivers, trap adding 4-16 address 5-22 community string 5-22 deleting 4-17 status 5-22 refresh button 3-6 remote able, auto negotiation 5-15 boot, configuring 4-7 requirements client 1-3 server 1-3 system 1-3 reset counter statistics 5-27 group 4-15, 5-17 IntraStack 4-15 left 5-10 packet sta
Book Page ix Thursday, September 18, 1997 4:28 PM Spanning Tree Protocol (continued) enabling 4-26 forward delay, description 5-24 hello time, description 5-24 hold time 5-24 maximum age, description 5-24 menu.
Book Page x Thursday, September 18, 1997 4:28 PM system requirements 1-3 T table menu 5-27 tables, in menus, resizing 3-6 technical support A-1 telnet active sessions 5-7 viewing 4-5, 4-25 idle time-out 5-8 sessions 5-7, 5-10 viewing 4-5, 4-25 time-out period configuring 4-25 description 5-10 tftp (trivial file transfer protocol) 5-5 time since topology changed 5-25 topology changes, number of 5-25 trap receivers adding 4-16 address 5-22 community string 5-22 deleting 4-17 description of 4-16 maximum 4-1